


Whether you call them over-unders, split shots, or half-in/half-out, photos that give a simultaneous view above and below the waterline are some of our favorites. They really speak to a non-diving audience and are guaranteed to get a lot of likes on social media. Combine this technique with the coolest predator in the ocean and you have a winner.
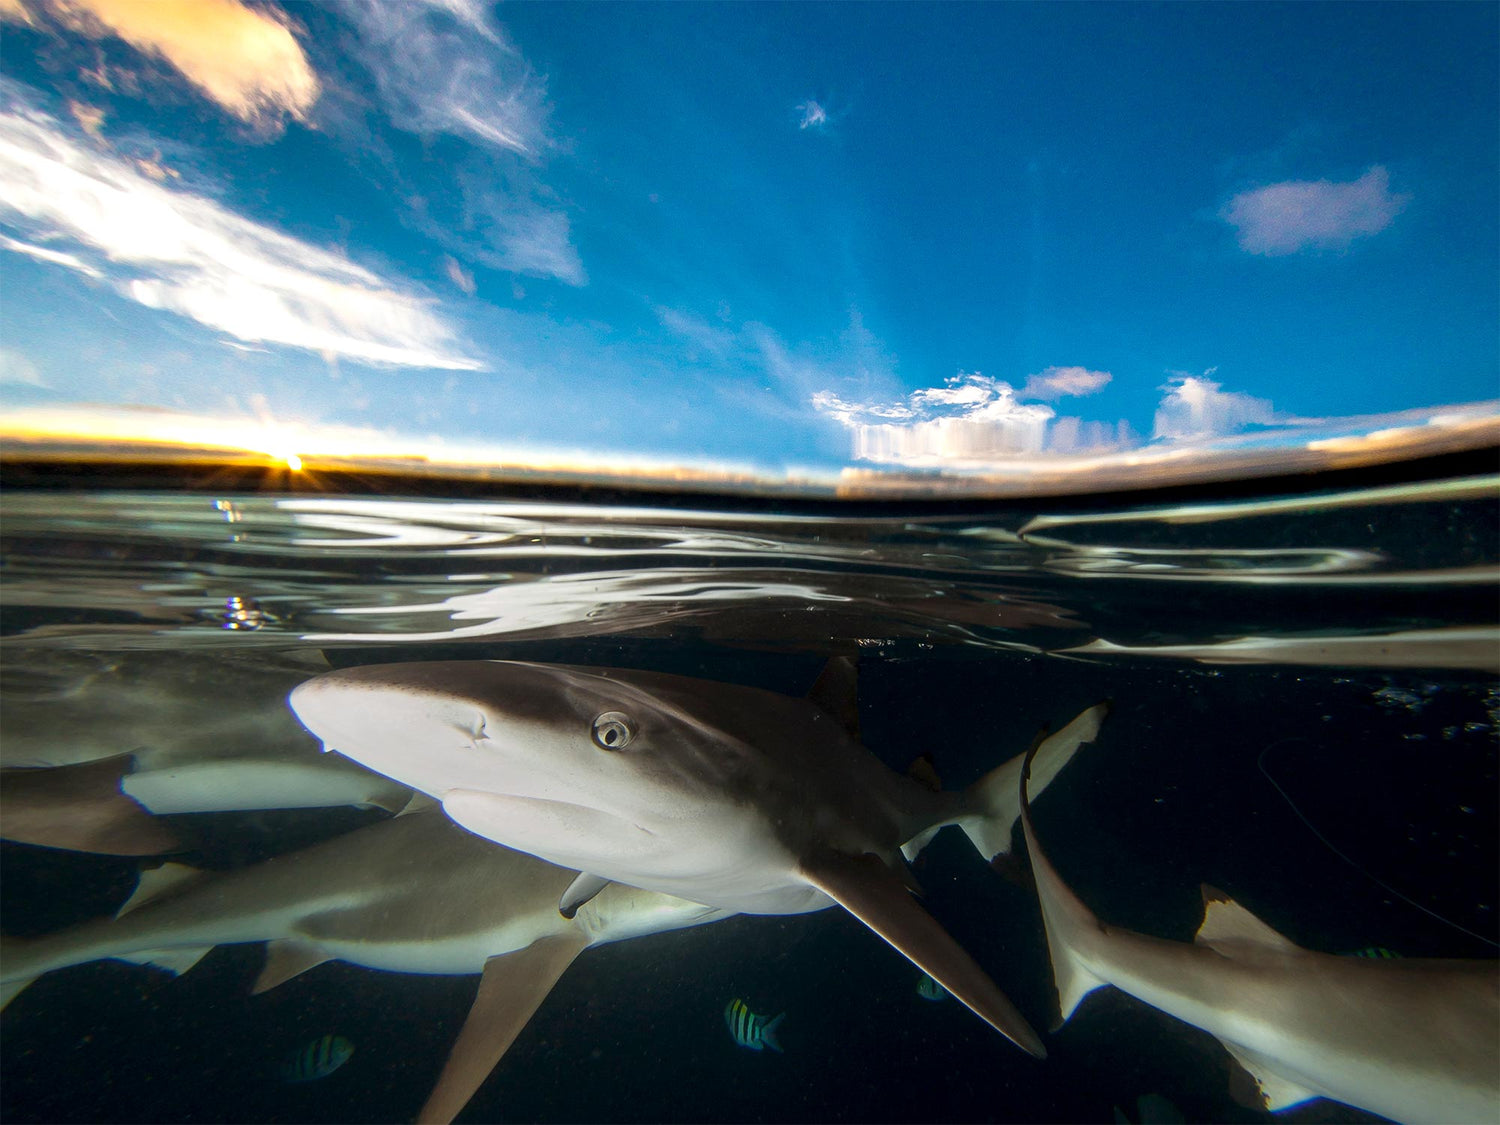
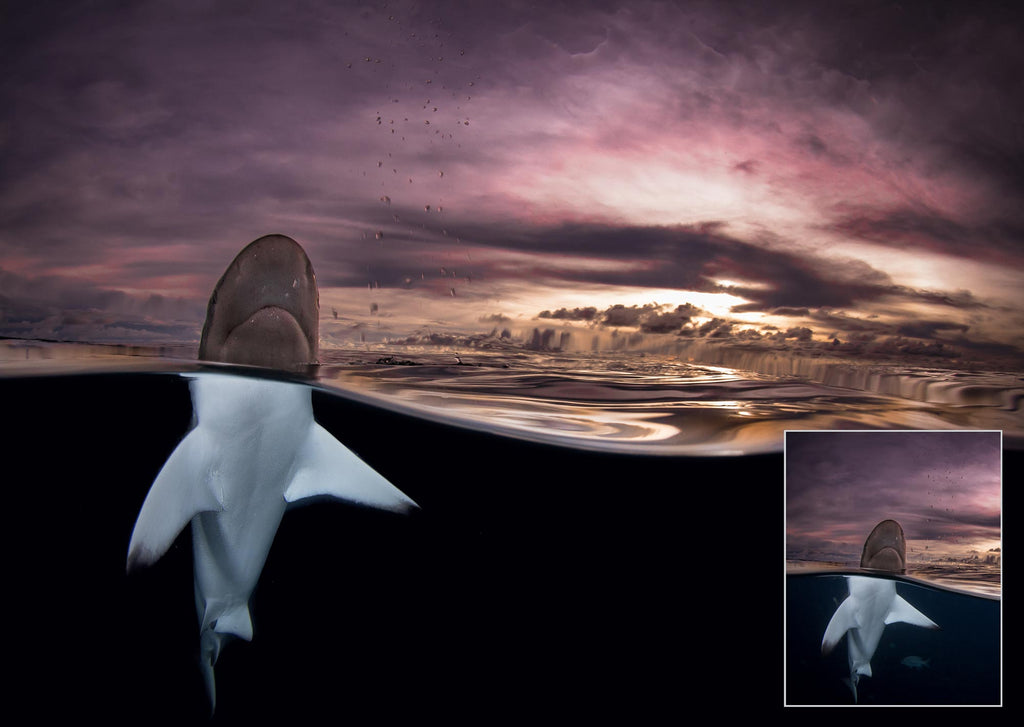
ISO 160 • f/10 • 1/200 • Canon EOS 5D Mark II with Canon 8-15mm f/4 Fisheye at 8mm • Vertigo is a classic shark dive in Yap, Micronesia. Talk to your operator about planning for a few moments at the end of the dive to shoot splits. This can be done in the water or hanging over the side of the boat. The odd "zoom" look to this image is from using the Lens Correction filter in Adobe® Lightroom. This attempts to correct the distortion created by a 180º fisheye lens. Photo © 2020 Steve Miller
Where
Almost any sea, the most common type of shark varying by location. Most of the images you see are in a context of baiting, but not all sharks need to be baited to come in (Oceanic White Tips for example). The assumption here is that the sharks are close to the camera, either because they are bold or baited.
Some baiting methods are more responsible than others. Please do your research and support a reputable operation that uses methods that are considerate of these magnificent creatures.
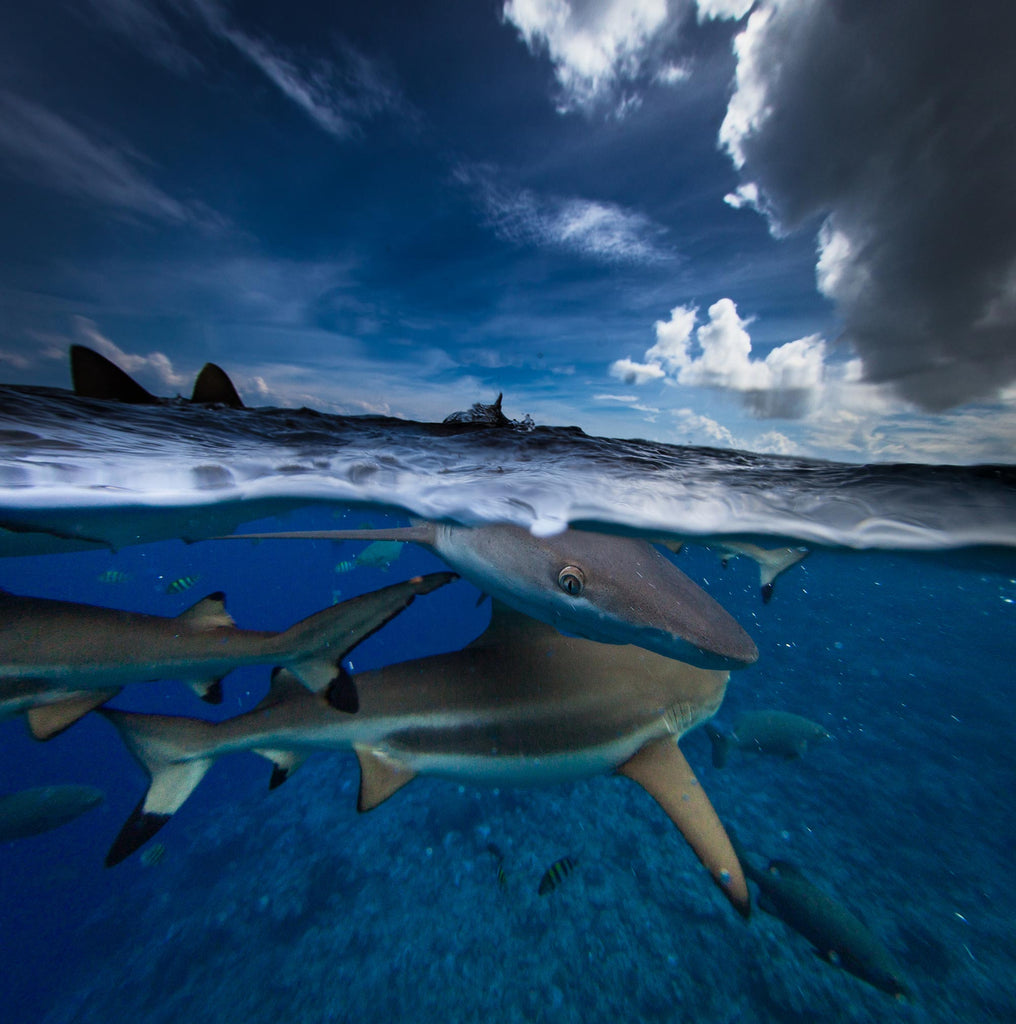
Depending on conditions and what your boat operator allows, split shots can be shot either while floating at the surface of the water or by holding your system off the side of the boat. For the safety of both you and the animals, consult with your operator and plan your shot ahead of time. Photo © 2020 Steve Miller
DSLR + Mirrorless
Mode: Manual (M) if using flash; Manual (M), Program (P), or Shutter Priority (Tv) option if shooting natural light.
ISO: 200-400; a lower ISO for bright and shallow water, and assuming some amount of sky is in your frame.
Aperture: f/11 to f/16
Shutter speed: 1/125-1/250, or faster if you camera will sync with your strobe. We are not only trying to stop the motion of the shark, but also light rays and the waterline on the dome.
Lens: Wide angle zooms are very practical here; we like the 10-17mm Fisheye and 12-24mm range, usually set at the widest point. An 8-15mm Fisheye would also be a good option. Some people prefer rectilinear lenses like a 16-35mm.
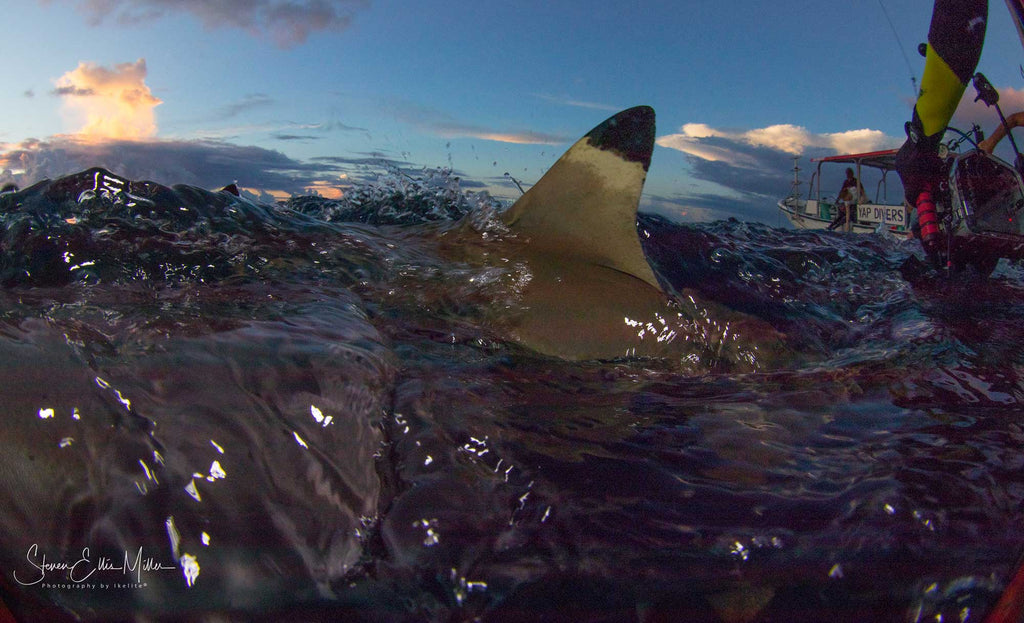
ISO 400 • f/16 • 1/160 • Canon EOS 100D Rebel SL1 with Tokina 10-17mm Fisheye at 10mm • The shark exposure is determined by the camera with your strobe in TTL exposure mode. The camera is shot in Manual (M) mode to control ambient light and correctly expose the sunset. You change camera settings with the fading light and your camera adjusts the strobe accordingly. Photo © 2020 Steve Miller
Point and Shoot
Mode: Manual (M) it is available on your camera and you're shooting with a strobe. Shutter priority (TV) or Program (P) are options as well. If you are not using strobes, try Shutter priority (Tv) and pay particular attention to not blowing out the highlights in the upper section of your frame.
ISO: 200 or lowest available; we have plenty of light here.
Aperture: f/8 to f/18 depending on the brightness of the scene. Shooting in Macro focus mode on some cameras will force your camera to use a smaller aperture in automatic modes, which is desirable.
Shutter speed: 1/250 or faster to stop motion.
Lens: Native zoomed out to maximum width (typically 24-28mm). A DC-series dome port is recommended for a wider underwater view and more control over the water line. Wide angle or fisheye conversion lenses will work but may exhibit a double water line.
ISO 400 • f/16 • 1/160 • Canon EOS 100D Rebel SL1 with Tokina 10-17mm at 10mm • You can see the way water magnifies and changes the image here- similar to how you see a drinking straw in a glass of water. This image used Adobe® Photoshop to reconnect the shark and correct for the shift. Photo © 2020 Steve Miller
Technique
Time of day and conditions will typically be determined by the dive operation. During the day try to make sure the sun is at your back.
At dusk for the famous sunset split shots you will want to have the most colorful part of the sky in your frame. This means you are probably pointing right into the setting sun. Set your camera on Manual (M) and adjust your settings to expose the sky properly. This will mean small apertures early in the shoot, opening up as the sun sinks. If you are taking turns and shooting from a boat, have your buddy read the sky and call out an aperture if you notice the light changing. You will probably be busy with what the sharks are doing.
Shooting like this at the later hours will mean that the water in the lower half of your frame is very dark, maybe black. But when a shark comes in close enough the strobes will light up the animal.
Pro tip: If your camera is struggling to lock focus quickly enough for the action, consider pre-focusing the lens very close and then turning off the auto focus. If you are using a DSLR and a bright fisheye lens, you may find the auto focus works better than you'd expect; remember the top part of your frame is bright.

ISO 100 • f/5.6 • 1/100 • Canon EOS 200D Rebel SL2 with Tokina 10-17mm Fisheye lens at 10mm • In the daytime there's a huge shift in dynamic range between the air above the surface and the water below. When shooting towards the sun in bright sunlight the sky can easily totally disappear... though that works for some compositions. Photo © 2020 Steve Miller
Strobes
Keep your strobes out to the side, but pointing in enough to light anything very close to the dome-. You will light up scattered particles as well if they are eating.
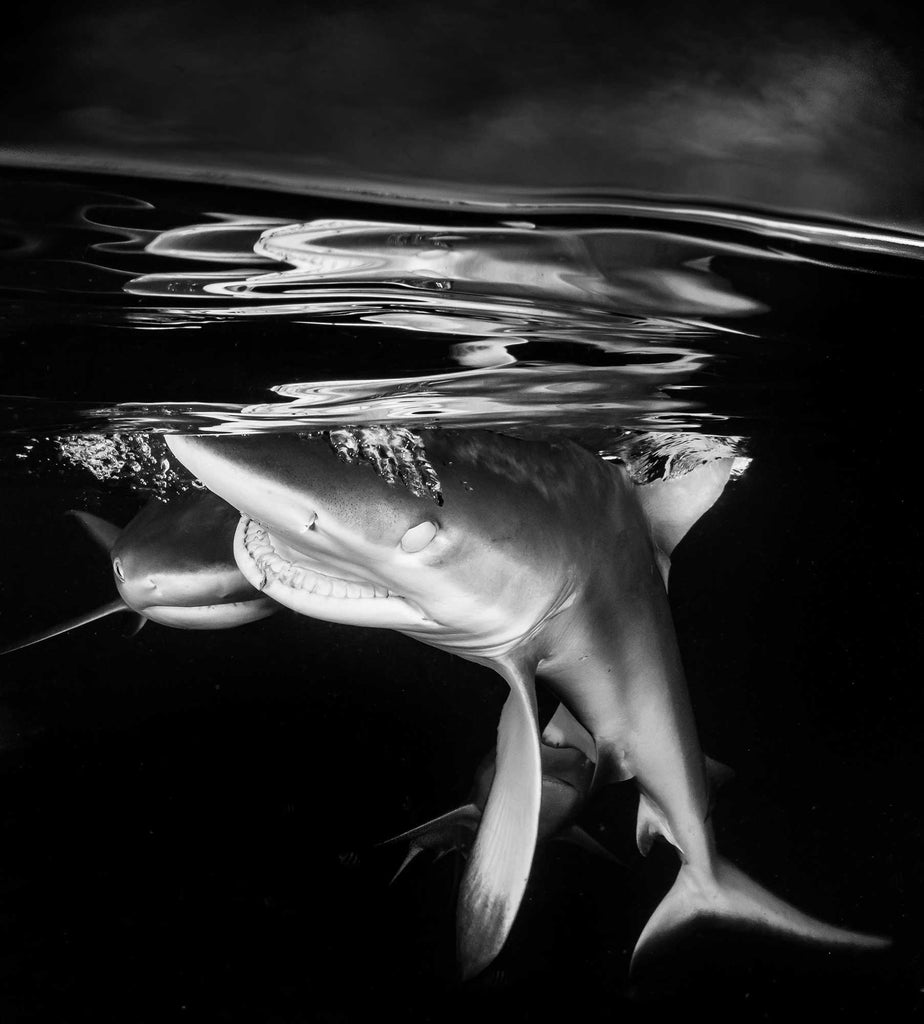
TTL strobe exposure is our best friend here. When things get crazy and you are lining up a shark 10 feet (3m) away, you may have an unexpected instant with a shark only 1 foot (0.3m) away. Unless you keep fingers on both strobe power controls and intuitively know when to adjust the power, you may over-expose. If your strobe doesn't have TTL, remember that you can use distance as well. Moving the strobe an additional foot or two away from something coming in very close can knock up to two f/stops off your strobe power.
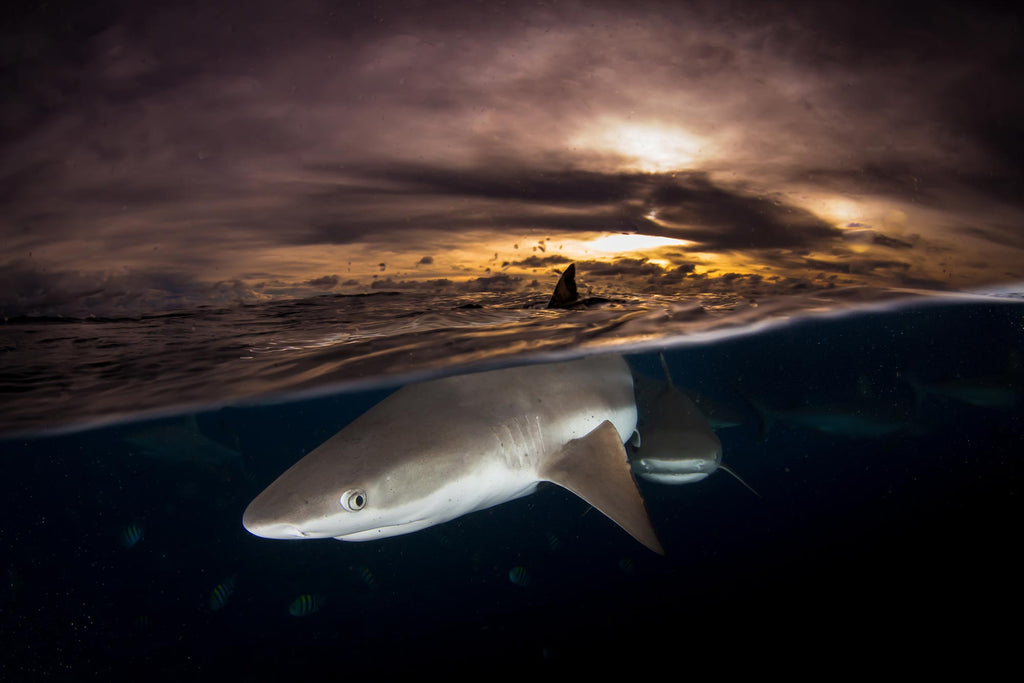
ISO 400 • f/16 • 1/160 • Canon EOS 100D Rebel SL1 with Tokina 10-17mm Fisheye at 10mm • After the sun sets, there are still some opportunities for a good capture. With no natural light, the auto focus can struggle so consider pre-focusing. Photo © 2020 Steve Miller
 Ambassador Steve Miller has been a passionate teacher of underwater photography since 1980. In addition to creating aspirational photos as an ambassador, he leads the Ikelite Photo School, conducts equipment testing, contributes content and photography, represents us at dive shows and events, provides one-on-one photo advice to customers, and participates in product research and development. Steve also works as a Guest Experience Manager for the Wakatobi Dive Resort in Indonesia. In his "free" time he busies himself tweaking his very own Backyard Underwater Photo Studio which he's built for testing equipment and techniques. Read more...
Additional Reading
When to Change Aperture Undewater
When to Change Shutter Speed Underwater
How to Shoot Split Shots (Half-In, Half-Out of the Water)
Techniques for Photographing Sharks
Great White Sharks Underwater Camera Settings and Technique
Shark Photography Underwater Camera Settings
Over-Under (Split Shots) Underwater Camera Settings
Stingray City Underwater Camera Settings and Technique
Just Below the Surface | Shooting on Snorkel in Grand Cayman