


![Canon RF 16-28mm Zoom Gear Installation // 200DL Underwater Housing [VIDEO]](http://www.ikelite.com/cdn/shop/articles/Canon_RF_16-28mm_Zoom_Gear_Assembly_copy_1.jpg?v=1760716954&width=1500)
Featuring Mike Rabideau
The Canon RF 16-28mm f/2.8 IS STM Lens is a relatively affordable and compact wide angle zoom option for your Canon full frame mirrorless system. Mike Rabideau shows you how to install the lens and zoom gear in your Ikelite 200DL Underwater Housing. This applies to any 200DL housing for a Canon RF-mount camera including (but not limited to) the Canon EOS R, R5, R5 II, R6, R6 II, and RP cameras.
Follow along with Mike in the video below or scroll down to read the video transcript.
Products Used
- 8" Dome Port Port # 75340
- DL 50mm Extension # 75050
- Zoom Gear # 5509.41
Anti-Reflection Ring
First thing we're going to do is take the housing, and we're going to remove the dust cover by unscrewing the zoom gear retainer. And then we're just going to pull out the dust cover and set it aside. We've already gone ahead and installed the Canon R5 Mark II camera in the housing for this demonstration. So we're just going to skip all of that and jump right into installing the lens.
Now we're going to do is add the anti-reflection ring. If you notice, this lens has some printing across the front of it. Sometimes that printing can reflect back on the inside of the dome port. So we have these anti-reflection rings to prevent that from happening. So we just simply remove this die cut sticker from the backing and place it onto the lens. It's just that simple. And as you can see, this anti-reflective material is covering all the printing that was on the front of the lens.

Our self-adhesive anti-reflection rings attach to the front of your lens to cover the writing and details that can cause reflections inside of a dome port.
Installing the Zoom Gear
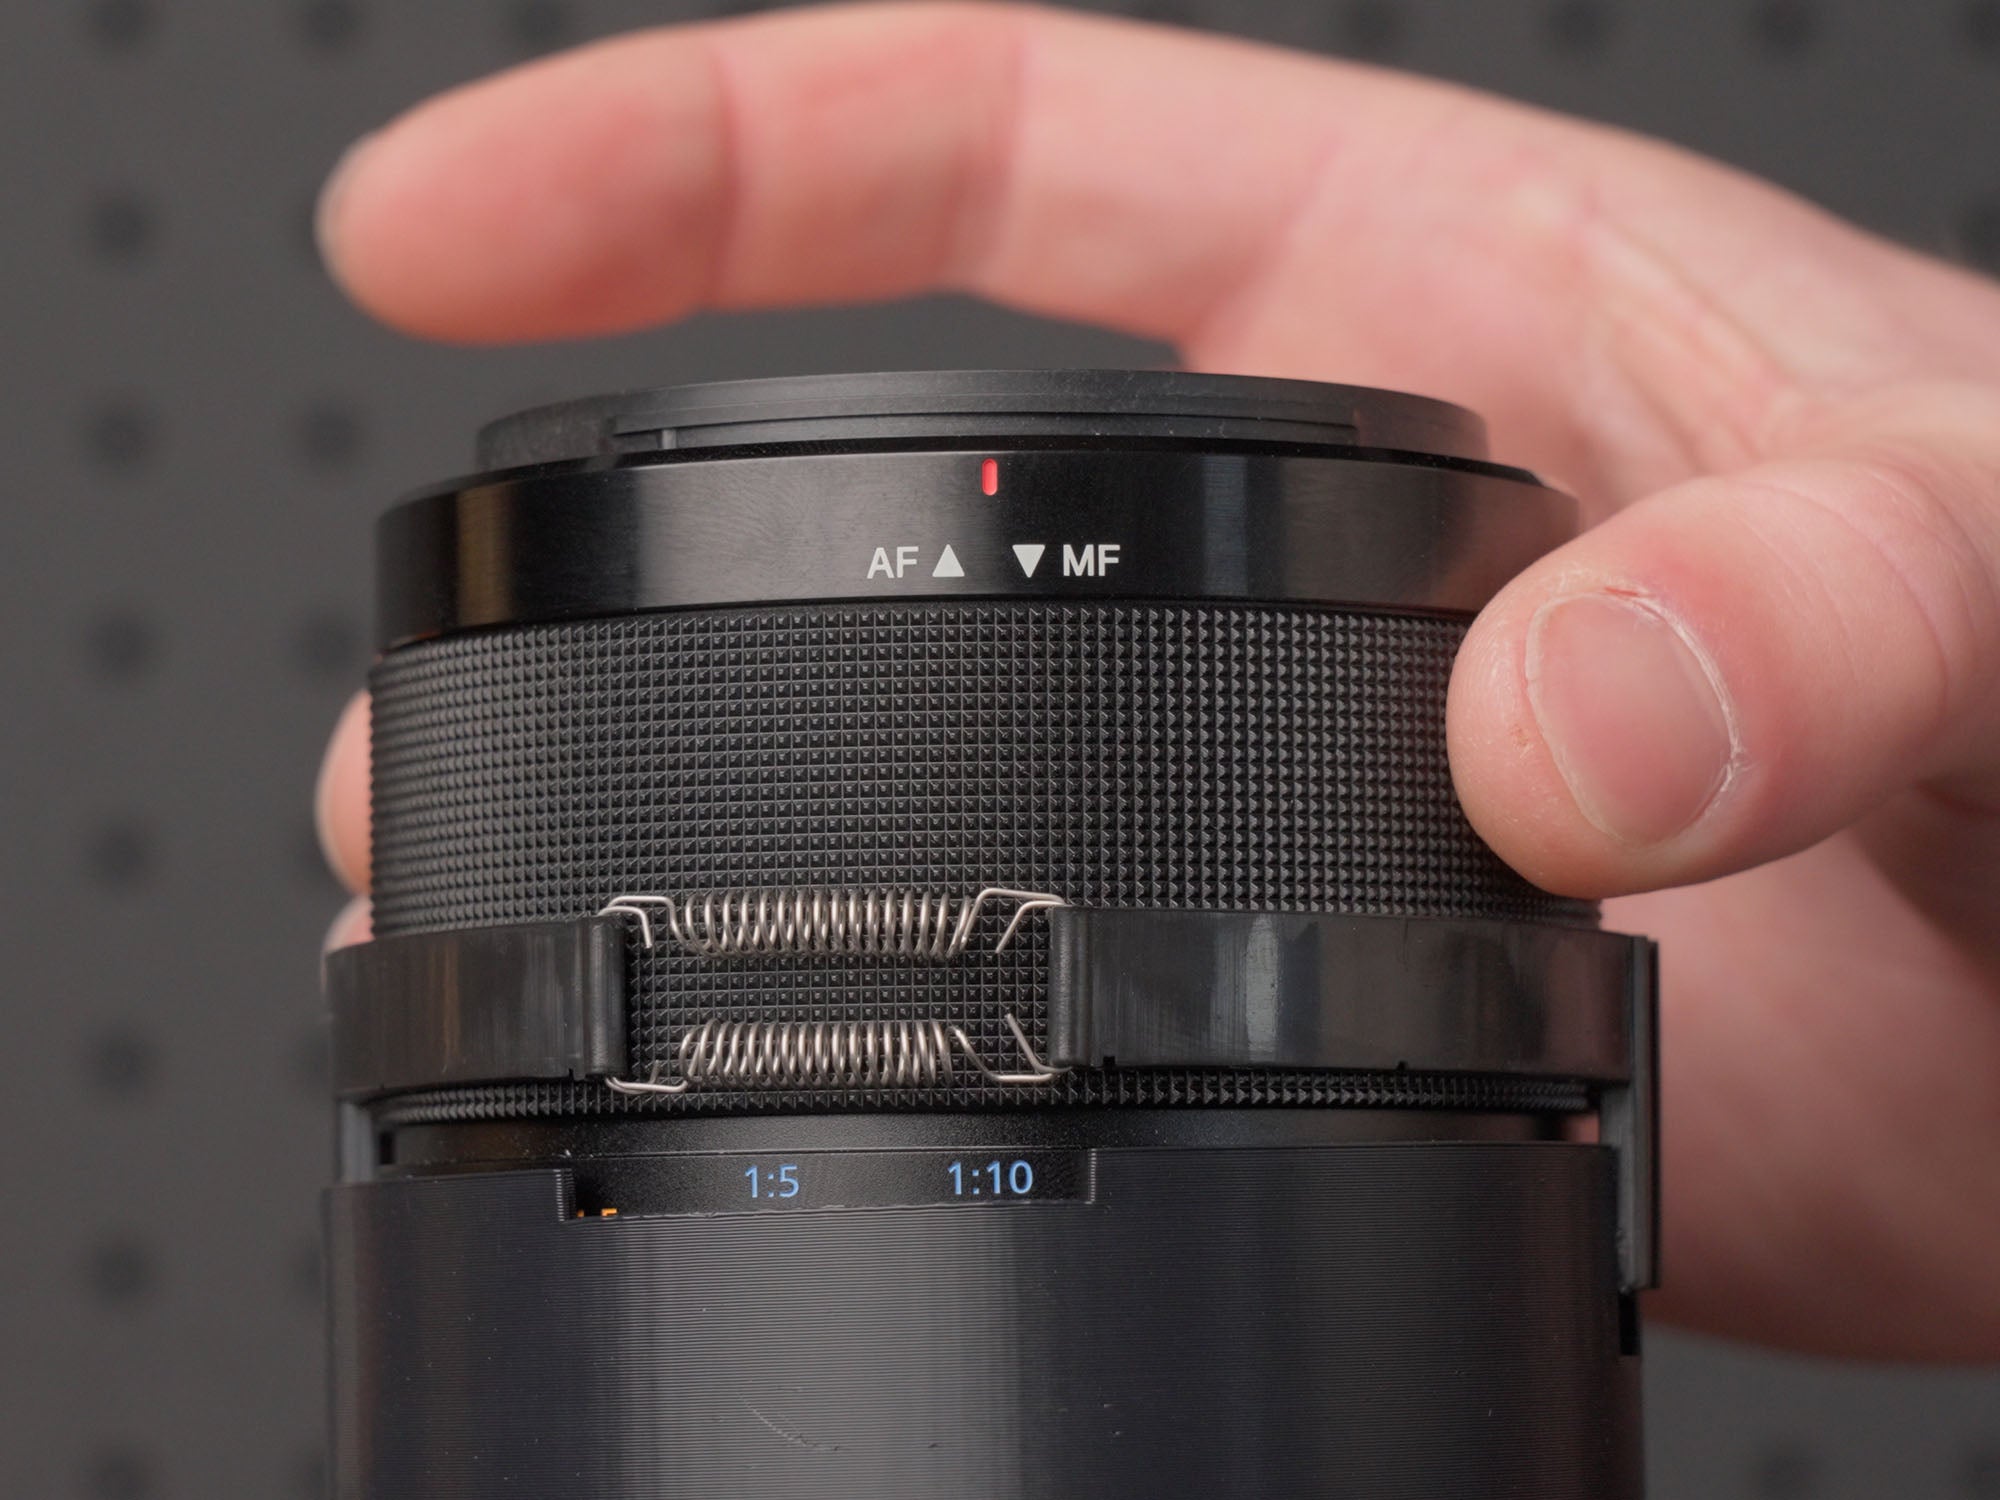
So we're going to go ahead and install the zoom gear # 5509.41. The gear on the bottom of this zoom gear is going to be facing the camera body. We're going to set that into the housing and then we're going to grab our zoom ring retainer that we had removed earlier. We're going to use the included tool to go ahead and tighten this down onto the housing. Just needs to be snug, not super tight, but snug. Now I'm going to reach my hand in and remove the camera's body cap.

Install the zoom gear teeth-side down toward the camera body. After installation turn the zoom knob on the side of your housing to test for functionality.
Installing the Lens
I'm going to take the lens, remove the back cover. I'm going to line up the red dot on the camera lens with the red dot on the camera body. I'm going to also double check and make sure I've got the switch in autofocus and the image stabilization on, it's very important not to forget that.
We recommend extending the lens into shooting mode before installing the lens onto the camera. It also makes it a little easier to hold onto the lens when attaching it to the camera body.
I'm going to take and I'm going to drop the lens down through the zoom gear onto the camera body. Go ahead and turn the zoom knob and check and make sure that the lens is zooming properly.

Ensure your autofocus and image stabilization switches are in the ON position before attaching your lens to the camera.
Installing the Dome Port
So now the lens is installed and we're going to go ahead and install the first port extension. But before we do that, we're going to inspect and lubricate the port o-ring. Place a little bit of lubricant on your index finger and thumb, it doesn't take very much, and just go through and work that around the o-ring surface. In doing this, if there's any debris, sand, dirt, you're going to feel that with your finger as you're applying the lubricant.
We've got that lubricated. So now we're going to go ahead and install the port extension. We're going to back these thumb screws out so that all three of them are flush with the inside of the port extension. One of these thumb screws needs to be at the 12 o'clock position so we're going to line that up and we're going to press the extension into place.

Note that the thumbscrews on the port mount and extension all line up with the hood of the dome shade, these will all be at the 12 o'clock position on your housing.
Then we're just going to screw in these three thumb screws. If any of these thumb screws are really tight to screw in, that would indicate that we don't have the port extension pushed down far enough onto the housing. If that's the case, just remove it and then try it again.
Once the port extension's on we're going to attach the dome port itself. Again, we're going to back out these thumb screws and make sure they're flush with the inside of the dome port. We can also kind of check to make sure there's no debris on the sealing surface. Again, we're going to lube the o-ring on the extension like we did the port base. Just a little bit of lubricant on our index finger and thumb. We're just going to work that around the o-ring. If there was any debris on the o-ring, we would feel that as we lubricated it.
Now we're going to take the port and look for the thumb screw that is centered with this large hood on the dome shade, this is going to be the thumb screw that we want at 12 o'clock. We're going to line up the port, line up the thumb screws so that they are in line (ensure the thumb screw corresponding with the dome shade hood is at 12 o'clock) and we're going to push the port down into place. Then we're going to go and just screw in those thumb screws.
Again, if this is hard to do, you feel a lot of resistance with the thumb screws then that would indicate that the port wasn't pushed down far enough onto the housing or you don't have your thumbscrews and pockets aligned properly. Once we've got that done, then we're all set and the housing is ready to use.
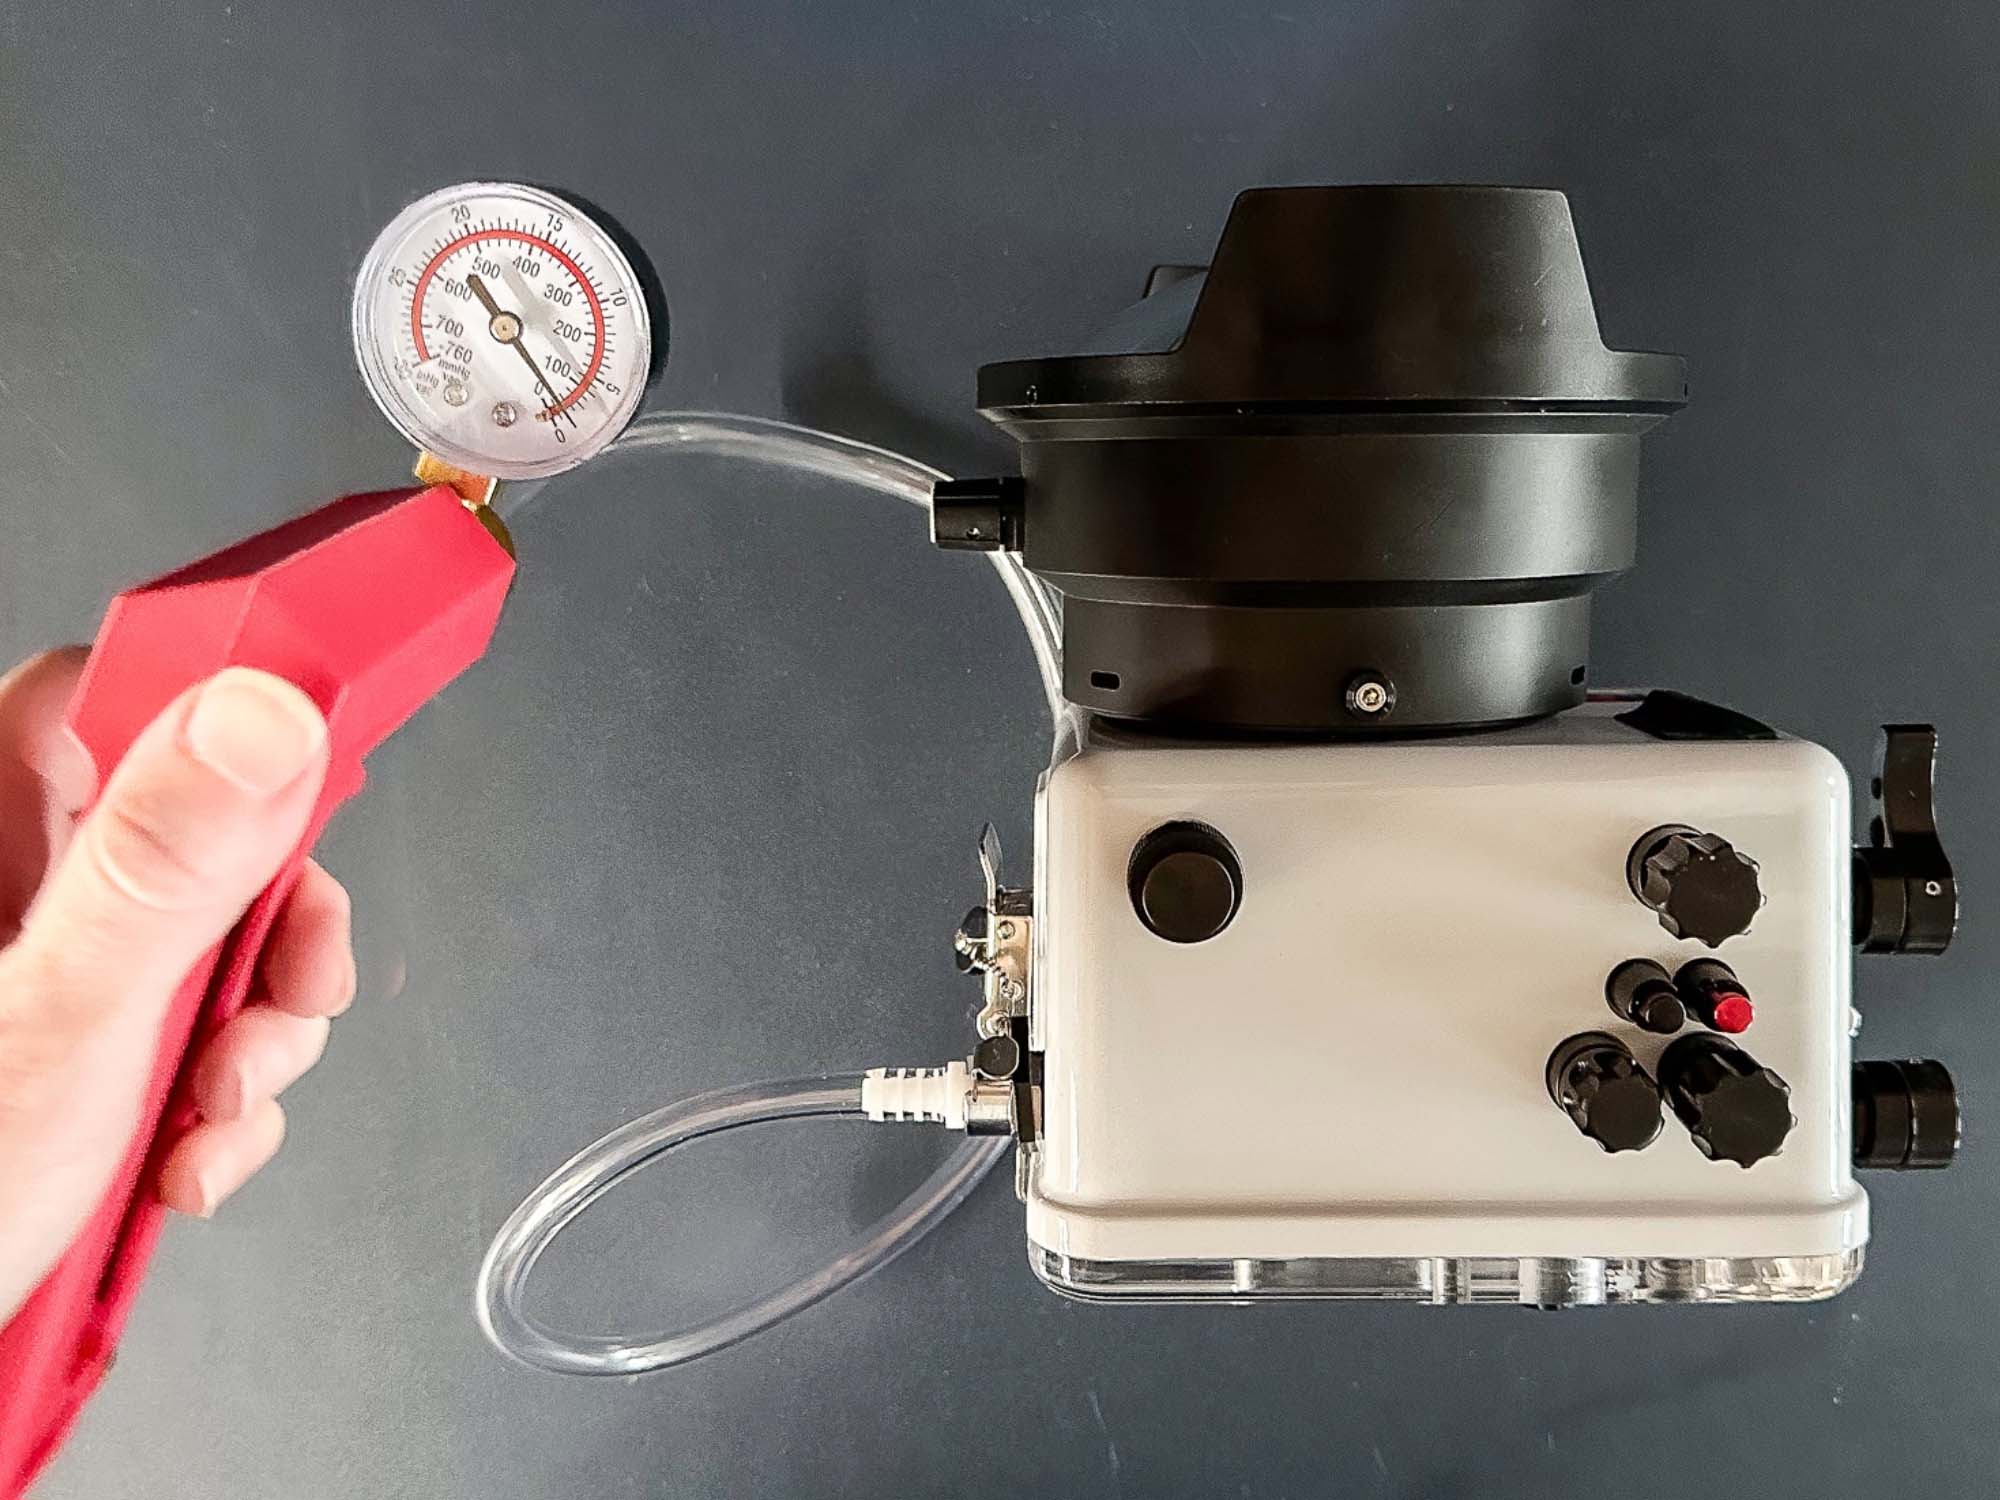
Okay, so now we've got the dome port installed, the zoom gear is installed, and we're ready to go diving. Before that, I do like to apply a vacuum to the housing. We're not going to go over that in this video, but if you need some information about adding a vacuum to the housing check out Checking for Housing Leaks Using a Vacuum Pump and Valve.
If you have any other questions about this housing or the lens, please shoot us an email at ikelite@ikelite.com.
Additional Viewing
Canon R5 II Setting It Up // 200DL Ikelite Underwater Housing Assembly [VIDEO]
How to Use the Canon R5 II in a Canon R5 Underwater Housing [VIDEO]
DO'S and DON'Ts of 200DL and 50DL Underwater Housing Set-up [VIDEO]
The Right Lens for Every Situation Underwater
Assemble Your Housing Like a Pro [VIDEO]
What's in My Gear Bag // Steve Miller 2023 [VIDEO]

Mike Rabideau was certified in 1984 and two years later started working at Ikelite. He went on to become head designer of our camera housing line and leads our technical customer support team. If you call or email with a technical question, there’s a good chance you’ll hear back from Mike R. Mike’s an active diver and underwater photographer. In his free time he enjoys driving his 1962 Nash Metropolitan to car shows. His son also became a certified diver and works underwater every day with the marine mammals at the Indianapolis Zoo.