


Featuring Logan Wood
Perhaps the most famous of all sea creatures... land lubbers may be afraid, but most underwater photographers are going out looking for them. A shark's movement is a pleasure to watch but a challenge to shoot. Logan Wood shares tips on camera settings to capture the beauty of the shark.
Follow along with the video below, or scroll down for quick reference guides.
Shark photos can be some of the more eye-catching shots to take underwater. Some people even go on trips specifically to photograph sharks and since I'm gearing up to do just that, I thought it would be a great time to go through some of our go-to settings for photographing and filming sharks underwater.
DSLR or Mirrorless Camera Settings and Lenses
Mode | If you’re shooting with a DSLR or mirrorless camera, you'll want to be in manual mode. This will give you the most flexibility in changing your settings.
ISO | Whether you’re shooting strobes or not, keep your ISO around 100 to 400. This will keep your images clean and with minimal noise.
Aperture | You can float your aperture around the range that your lens allows you to, but I would start around F/8 to keep everything tack sharp and in focus.
Shutter Speed | For your shutter speed, start around 1/125th to 1/160th of a second. This will help freeze action with minimal motion blur as the shark approaches.
Lens | And for your lens, you can choose anything from an 8mm all the way up to a 50mm. Wider lenses will help you to capture the entire shark, as well as it’s surrounding environment. While tighter focal lengths will allow you to capture details, or subjects that are further away

Tell the full story with a wide angle lens (top) or get into the smaller details with a tighter focal length (bottom). // Images © Steve Miller (top), Logan Wood (bottom).
Point-and-Shoot Camera Settings and Lenses
Mode | If your point-and-shoot camera allows for it, do use manual mode. But if, like on the Olympus TG-6 and OM System TG-7, you don't have manual mode then aperture priority is the second best option.
ISO | Now if you’re shooting with a point-and-shoot camera like the TG-6 or TG-7, you’ll want to keep your ISO around 100-200. Don't go too much higher as these cameras don't perform too well at higher ISOs.
Aperture | For your aperture use the full range that your lens allows you to depending on the sun in your frame. If the sun is a big part of your image, consider stopping down to compensate for the extra light that's in your image.
Lens | And for your lens, go as wide as you can, with or with out a wide angle wet lens.

The OM System TG-series cameras are a great option for point-and-shoot systems underwater. We recommend using the FCON-T02 lens if you're shooting with a TG-series camera as this provides the most versatility underwater. // Shot with OM System TG-series camera and FCON-T02 lens at 25mm • f/2.8 • 1/800 • ISO 100 © Steve Miller
Videography Settings
Frames Per Second | Now for filming sharks, I'll usually start at 60 frames per second (fps), so my shutter speed is 1/125th.
Resolution | I'll shoot at the highest resolution that my camera allows me to, usually 4K.
Aperture | For aperture, I'll start at F/8 and adjust accordingly.
ISO | My ISO will float according to the exposure that I need for that scene.
All these settings will allow for real-time playback as well as slow motion.

If you're shooting into the sun (or looking to capture those beloved light rays) you'll need to stop down your aperture to compensate. // 15mm • 1/125 • f/9 • ISO 100 © Ken Kiefer
Techniques
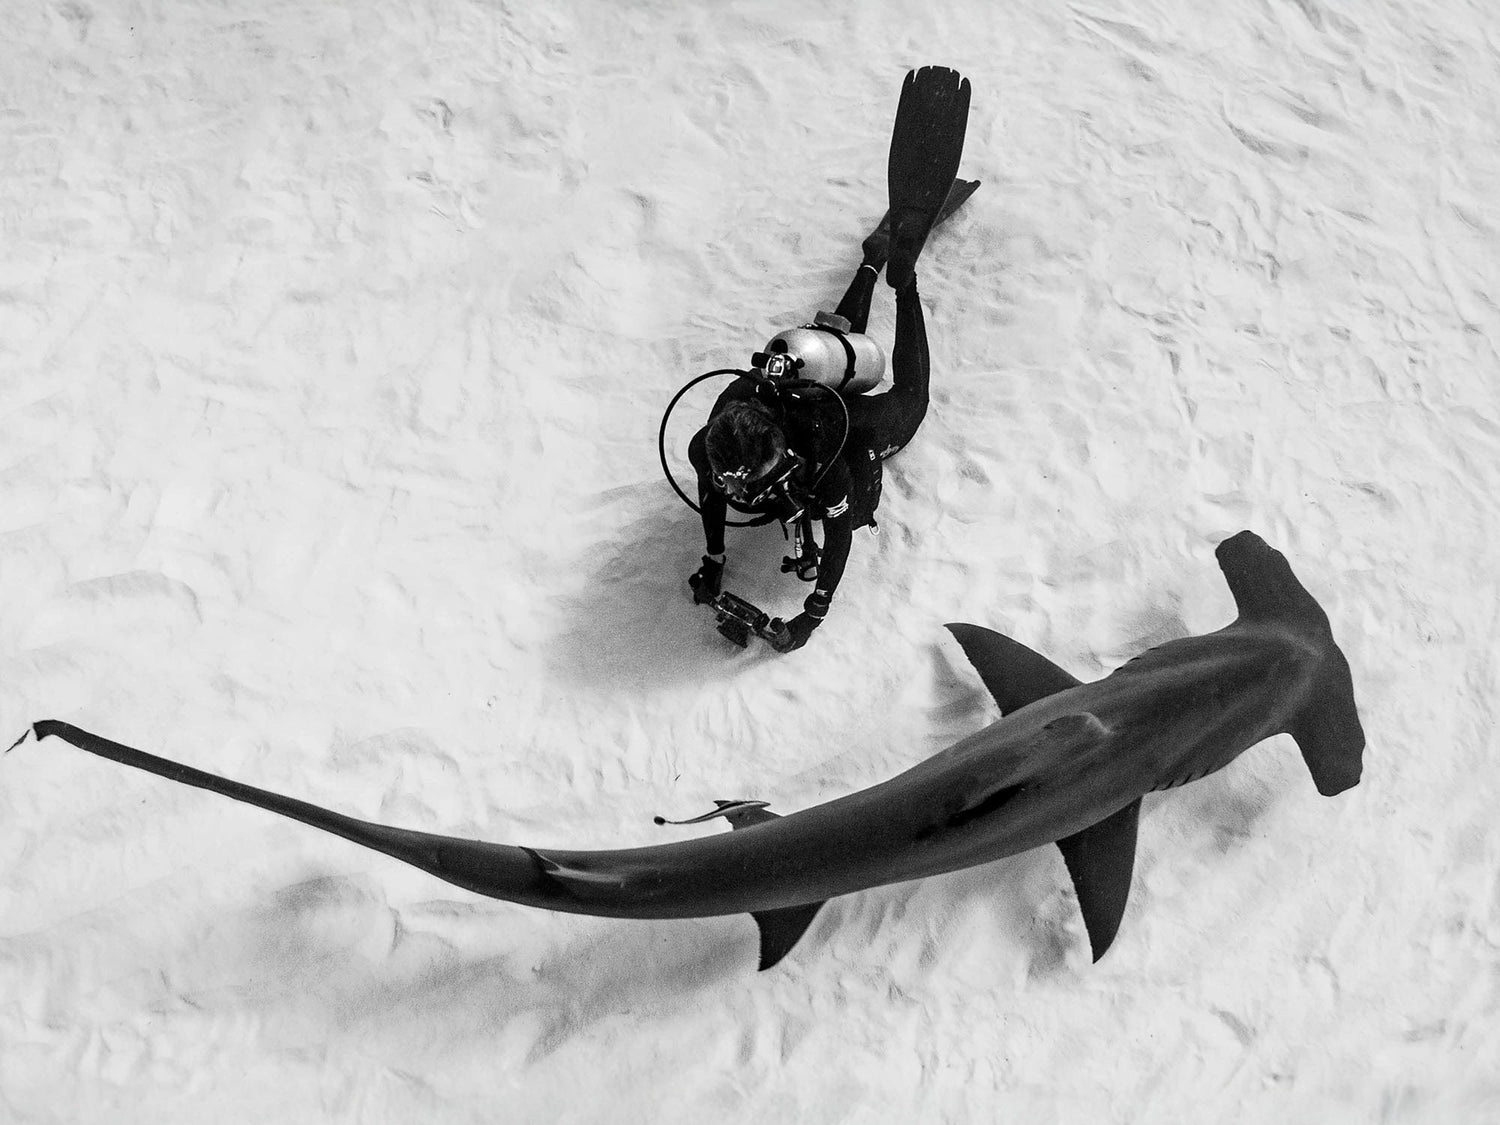
Now for actually photographing sharks, you'll want to get close and shoot up. Sharks are usually gray on the top and white on the bottom, this helps them camouflage from prey and predators that are either looking down at them or up at them. What this means for us as photographers is that if you're looking down at a shark, it'll tend to blend in to the bottom or the sand below us. By getting close and shooting up, we can separate the shark from the rest of the water column as well as capture those beautiful white highlights on the bottom of the shark.
Strobes | If you're shooting with strobes, position them away from the lens and about level with the focal plane. Point them forwards to avoid illuminating any of the backscatter that's in the water.

Technique pro-tip: setting your drive mode to continuous can be a really big advantage when shooting fast moving sharks. Learn how to utilize burst mode so you don't miss the perfect moment. © Ken Kiefer
I hope these tips help you photograph some sharks on your next encounter, and please be sure to tag us on Instagram or Facebook. Or consider submitting your photos to become an Ikelite Featured Customer, we would love to see your shots. If you have any questions, shoot us an email to ikelite@ikelite.com.
Additional Viewing
Whale Shark Photography Underwater Camera Settings
Shark Feed Underwater Camera Settings and Technique
Shark Over Under Photography Camera Settings and Technique
Great White Sharks Underwater Camera Settings and Technique
Behind the Lens // EPIC Shark Splits at Golden Hour [VIDEO]
Secrets to Photographing Mako Sharks Underwater with Josh Blank [VIDEO]

Logan Wood is a published photographer, cinematographer, and Producer at Ikelite. Stemming from a great appreciation for the outdoors and living an active lifestyle, his work focuses on capturing and sharing the natural world through the latest technologies. When not in the studio, Logan can be found cruising on his bike, going to concerts, and researching where to go next. You can see more of his work at loganwood.net and on Instagram @jlowood
![Sony 16-55mm f/2.8 G // Setting It Up 200DLM Underwater Housing [VIDEO]](http://www.ikelite.com/cdn/shop/articles/Sony_16-55mm_f2.8_DLM_Assembly_copy_b6722eca-8bfd-4646-99f7-45721b737b3d.jpg?v=1761913006&width=2000)