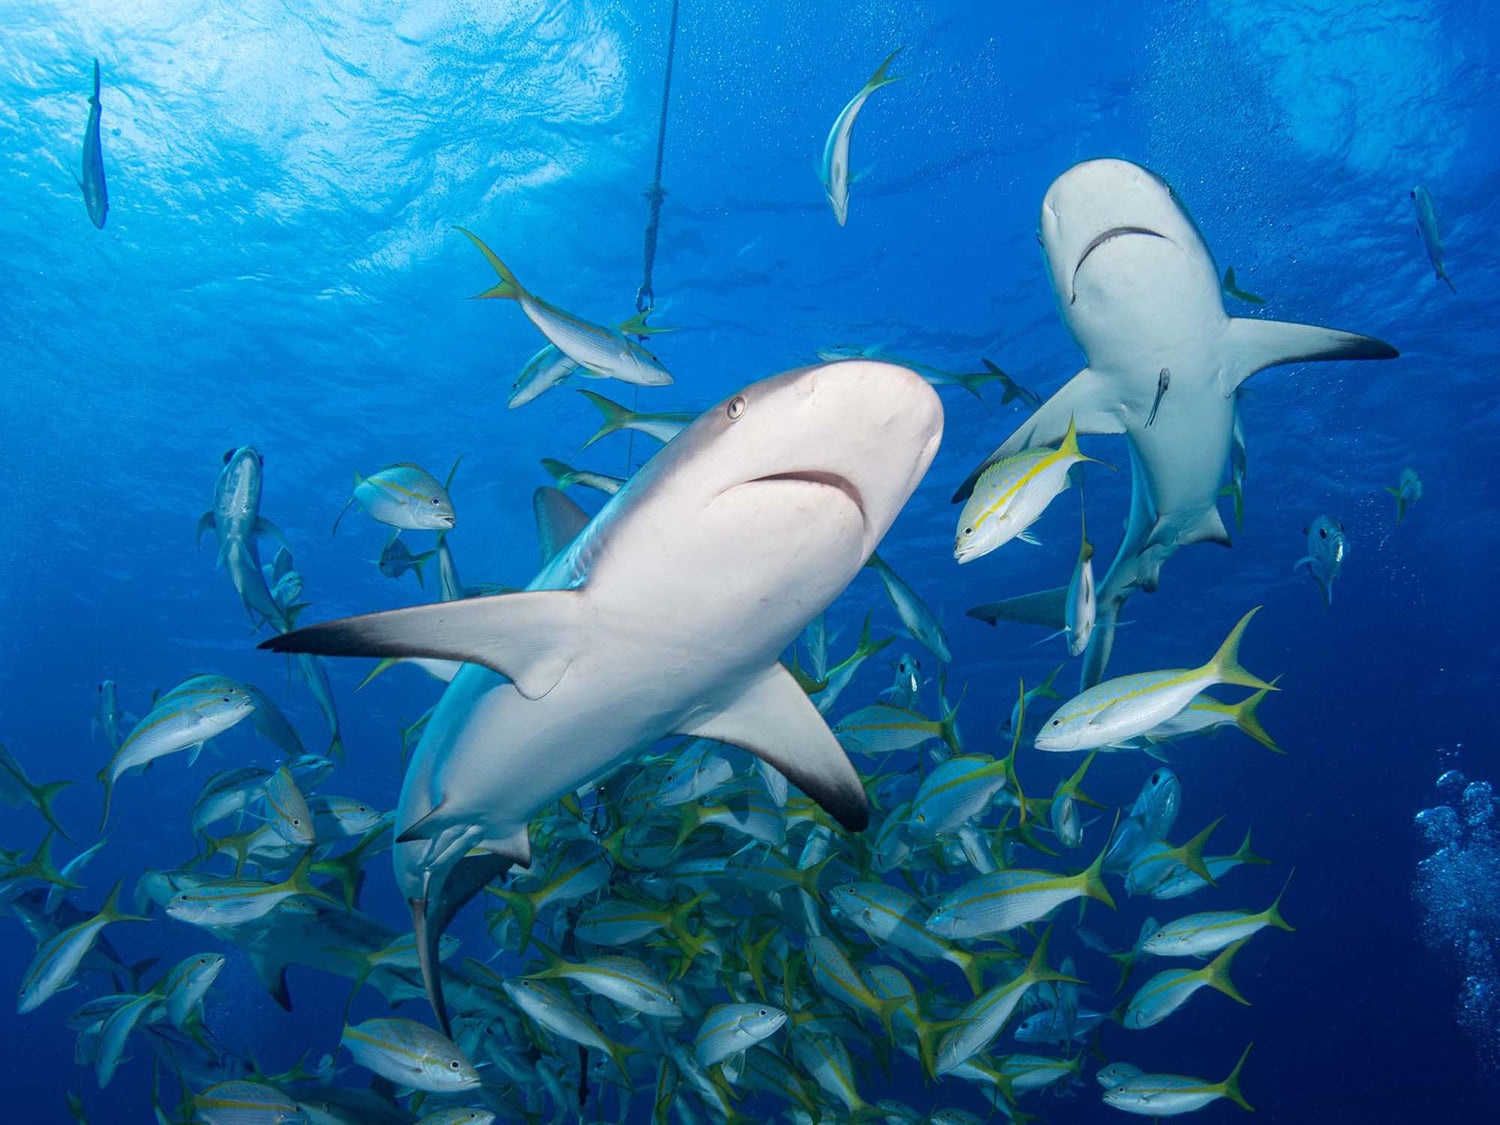
Organized shark feeding for photography has been going on for a long time. A resort or destination can make an area work for this by first picking a site where sharks frequent, then showing up to feed them regularly - word gets out. In the early days of diving cages were used for the divers, but these are rare now except for Great Whites. This is mainly because we understand shark behaviors better, and many of the myths (like the feeding frenzy) have been dispelled. Still, caution is appropriate and you will probably find that the dive plan is presented in a very controlled and consistent manner. In many cases you will be told to kneel for a semi circle on the bottom and wait for the food to be brought in after everyone has settled in.

Before and after the feed, sharks will cruise around with curiosity, pick your frame and wait for them to swim in. © Steve Miller
DSLR + Mirrorless
ISO: 200-400.
Mode: Manual is preferred, unless you are not using a flash. For natural light Program or Auto mode can be fine, but with a flash you may want to make a manual exposure and have the flash "filling" in the details.
Aperture: F-8 is a natural place to start. Since you are probably shooting at things farther away than normal, and using a semi wide or super wide lens, depth of field is not a big concern. If your frame has the sun in it, make sure you aren't overexposing by stopping down the lens.
Shutter Speed: Your flash, and a normal synch speed of 1/125th or so, will stop action for the most part. If you are in close to the actual biting of the bait and aren't using flash you may want a much faster speed, ~1/500th, to stop the action.
Lens: Wide angle zooms are king here, but you can use any focal length. A 50-60mm lens can even work for tight face shots.

You will shoot a lot of frames that look similar during a feed, take some time to experiment with your light. Here we stopped down the lens and waited for sharks to pass in front of the sun, the flash-filling. © Steve Miller
Point + Shoot
If you have exceptional visibility, this type of photography can be accomplished with a point and shoot camera very well.
ISO: 100 to 200.
Mode: Manual or Aperture Priority. If you are shooting natural light, Program will work as well.
Aperture: Full range depending on sun in your frame.
Shutter Speed: 1/125th to 1/200th, faster for natural light photography.
Lens: Full wide angle with or without a wide angle wet lens.
Strobes
Our favorite setup would be two wide angle strobes set out far to the sides. We often talk about how you need to be super close, and that strobes only light up well for a few feet, but sharks are an exception to this. We like to set a manual exposure initially while we are settling in and considering the frame (before the feeding). Take several exposure readings so you know the range in your particular spot. If swinging the housing (panning) brings the sun into your frame don't be afraid of it, but do be prepared to stop down 1 or 2 stops for that frame. You can set your exposure so that your images are essentially natural light images, this way it doesn't matter if the flash hits it or not, you'll still have the proper exposure. Shooting in this manner also means that your strobes can throw light very far; even 15-20 feet away (unheard of distances for flash underwater) you will get light reflecting off of their belly.

In the center of the action is a frozen hunk of fish parts, being devoured as it thaws and is bitten. © Steve Miller
Technique
When you approach your designated spot (and before you settle in) take a look around and consider the rest of your frame other than the feeding sharks. Do you want the silhouette of the boat? Sun rays? Do you want to see other members of the group in your images? Where you settle in is probably where you are supposed to stay for safety.
*Pro Tip
These shoots are often in very clear water. If you are shooting a camera with large image files (so, any modern camera almost) you can crop images in ways that would never have worked with smaller files. Take the time to shoot individuals as they pass by and don't worry if they are farther away than you would like, today's cameras can handle a crop. Also, remember the old spear fisherman's trick: avoid eye contact until the last moment. If you raise your camera and move towards a shark about to pass by close, it will move off. If you watch from the corner of your eye til the last second you may find they come much closer. If you are fortunate enough to have a magnified viewer, you can pan and never worry about eye contact.

The fish that accompany sharks during a feeding are an important aspect of your shot, don't forget to take them into account when you're composing your shot. © Steve Miller
Additional Reading
Techniques for Photographing Sharks
Shark Over Under Photography Camera Settings and Technique
Great White Sharks Underwater Camera Settings and Technique
Schooling Fish Underwater Camera Settings and Technique
Shark Photography Underwater Camera Settings


