Chances are that some of your favorite dive destinations have excellent night sky photography, especially if you move away from any bright lights. Your wide angle zoom lens is an excellent tool for this. Some people even attribute the development of the fisheye lens to the desire to capture the night sky and Milky Way.
Astrophotography is a great way to get more familiar with your camera and experiment with camera settings. Plus, it's a great way to diversify your photo gallery. Use these camera settings and techniques to get started on your astro-journey.

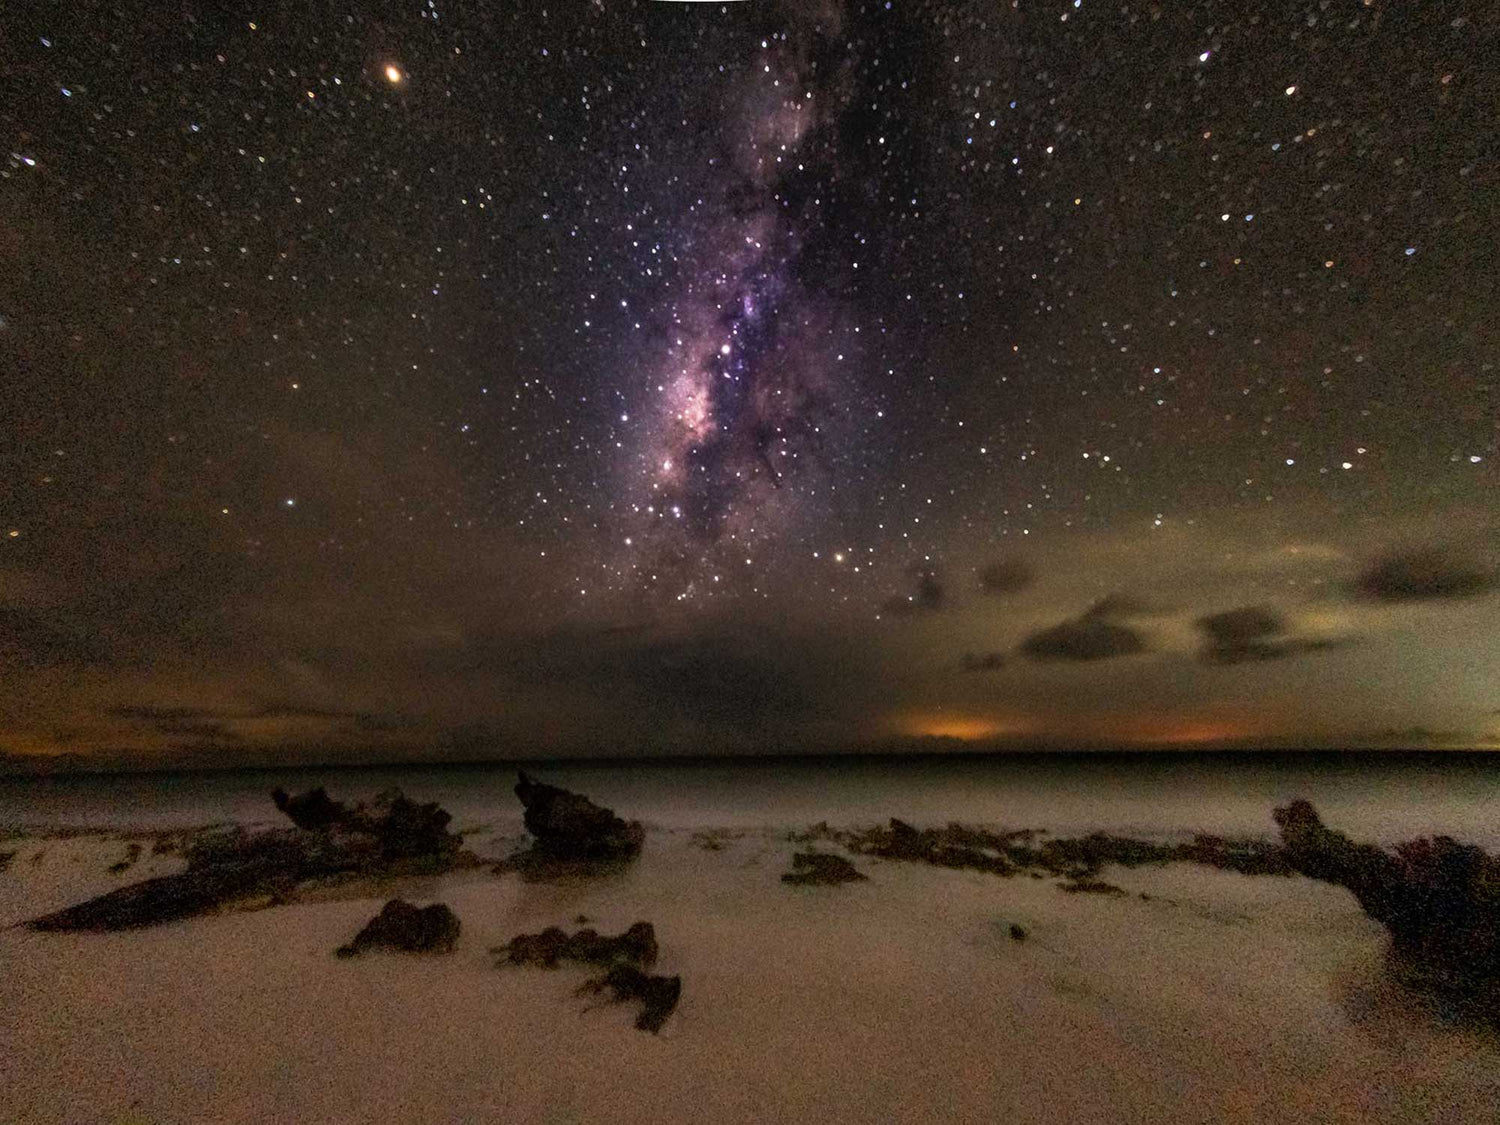
f/3.5 • 30sec • ISO 1600 © Steve Miller
Where
Astrophotography excels in clear night skies, low levels of light pollution, and ideally on moonless (new moon) nights. If you're unsure, you can reference dark sky maps available on the web. If you don't have a new moon, look at what time the Moon rises and sets for when to go out.
A bright moon, albeit beautiful, will obliterate the Milky Way and many stars. But, even if you have a bright moon, clouds, city lights, and air pollution, night images can still be compelling. If you leave the shutter open long enough you can even turn night into day.

Waiting for the Moon to set in Bonaire. You can still make out some stars here, but the Moon is washing them out. f/4.5 • 10sec • ISO 2500 © Steve Miller
DSLR + Mirrorless
ISO: Variable, but typically 1000 ISO or higher. 1600-3200 is a common range to balance the noise and exposure.
Mode: Manual.
Aperture: Since the camera is light starved, open your lens up all the way. Depth of field increases as we move farther away, and stars are pretty far away.
Shutter Speed: 5-30 seconds.
Lens: 8mm to 100mm. Some famous astrophotography will stitch together multiple images to get the whole sky. Wide angle zooms and fisheye lenses work well here.
Technique: Shoot for the edit. All of the saturation and clarity sliders in Lightroom will be needed to get colors. Find a frame that is free of light pollution and check your moon phases.

Framing your photo will add some dimension. f/4 • 13sec • ISO 8000 © Steve Miller
Point + Shoot
ISO: 1000 or higher.
Mode: Manual. Some point-and-shoot cameras have a Night Mode, or even Live Composite.
Aperture: 2.8 or the widest offered.
Shutter Speed: This is your variable, but figure 5-30 seconds average.
Lens: Widest available.

f/4 • 15sec • ISO 3200 © Steve Miller
Strobes
None, although a hand held light can be used to "paint" any terrestrial objects in your foreground.
Technique
The first time you try astrophotography, there are usually two surprises for you. First is that it takes 20-30 minutes for your eyes to really adjust, so when you first look up the sky won't be as bright as it soon will be. The second surprise is that this is one of those rare times (like HDR or Super Macro) when the camera can capture detail far beyond what the eye sees. Twice I have gone out to shoot, thinking I was too early for the Milky Way until a test frame showed it was right there waiting for me.
In theory, astrophotography is pretty straight forward. The scene is dark, so you can open the lens up all the way. Shutter speed can vary, but as a general rule of thumb, 30 seconds will give you good exposure and saturation without any motion blur. If you leave the shutter open for much longer, the stars will turn into dashes, not dots since we are all moving.
A tripod makes life much easier, but a towel and some strategically placed rocks will suffice - particularly if you have a tilting screen. A cable or electronic shutter release is nice, but if you don't have one just put the camera on a 3-second time delay so you don't create any camera shake.

In Hawaii there are often light ordinances that will require city or resort lighting to be below a particular level to allow for night sky viewing. f/4 • 20sec • ISO 10000 © Steve Miller
ISO is the most complicated aspect of your exposure at night. Modern cameras will offer ISO's that are unbelievably high - but they come at a cost. And the cost is noise. The noise in astrophotography is a bit more complicated, as is the editing process. Most of the images used in this article were shot at 1600-3200 ISO, and the noise is quite visible in some. There are several sliders in Lightroom for Noise Reduction that you probably haven't used much; now you will.
As you calculate your exposure, do not trust your eyes and your viewfinder as much as you normally might. Exposing bright, then bringing down the exposure in Lightroom will be more effective than underexposing and trying to boost the brightness in post. If you want to include objects in the foreground like the rocks on the beach, consider doing a separate exposure just for them, then blending the two.
Most importantly, have fun. Astrophotography is a great way to stay outside and enjoy an evening on the beach during your next dive trip and will help you learn new techniques you might not otherwise practice while diving.
 Ambassador Steve Miller has been a passionate teacher of underwater photography since 1980. In addition to creating aspirational photos as an ambassador, he leads the Ikelite Photo School, conducts equipment testing, contributes content and photography, represents us at dive shows and events, provides one-on-one photo advice to customers, and participates in product research and development. Steve also works as a Guest Experience Manager for the Wakatobi Dive Resort in Indonesia. In his "free" time he busies himself tweaking his very own Backyard Underwater Photo Studio which he's built for testing equipment and techniques. Read more...
Additional Reading
Dive Diversions: Lunar Eclipse Photography
Top 5 New Features in Adobe Lightroom with Kristina Sherk
Expand Your Tonal Range with HDR Photography


