


By Douglas Klug
The kelp forests of Southern California offer unique and stunning opportunities for underwater photographers. Diving in kelp forests is rewarding, but these healthy ecosystems can have some of the worst visibility divers can encounter. Whether its blooming plankton turning the water thick, green and dark, surge that stirs up sand and silt throughout the water column, or just large numbers of drifting feeders like pyrosomes or other tunicates, they can all interfere with the classic Southern California reef shot.

Though the photographic opportunities are fantastic, these kelp sunbursts with light rays slicing through the ocean from above don’t come without a few challenges. © Douglas Klug
Many underwater photographers around Southern California refer to those clear sunlit dives as “wide angle water,” which is a nod to those who shoot mirrorless or DSLR cameras with interchangeable lenses and strobes to fill in shadows and bring out color. The basic mantra is this: if you expect poor visibility, shoot macro and if the water’s clean and clear, shoot wide angle.

Despite sunlight from above, a plankton bloom can turn a daytime kelp forest dive as dark as a dusk dive. © Douglas Klug
Anyone who’s taken a camera underwater knows the name of the underwater photographer’s greatest nemesis: backscatter. Sure, good strobe positioning and power control can help mitigate backscatter, but only under the right conditions. If you’re diving in an ocean that’s the equivalent of an underwater sandstorm, no amount of strobe technique is going to hide all those little starbursts from the background of your wide angle shots. In Southern California, persistent surge can stir up sand and silt until it feels like you’re diving in a washing machine. Divers who frequent these kelp forests might feel like there’s no chance for backscatter free wide angle shooting.

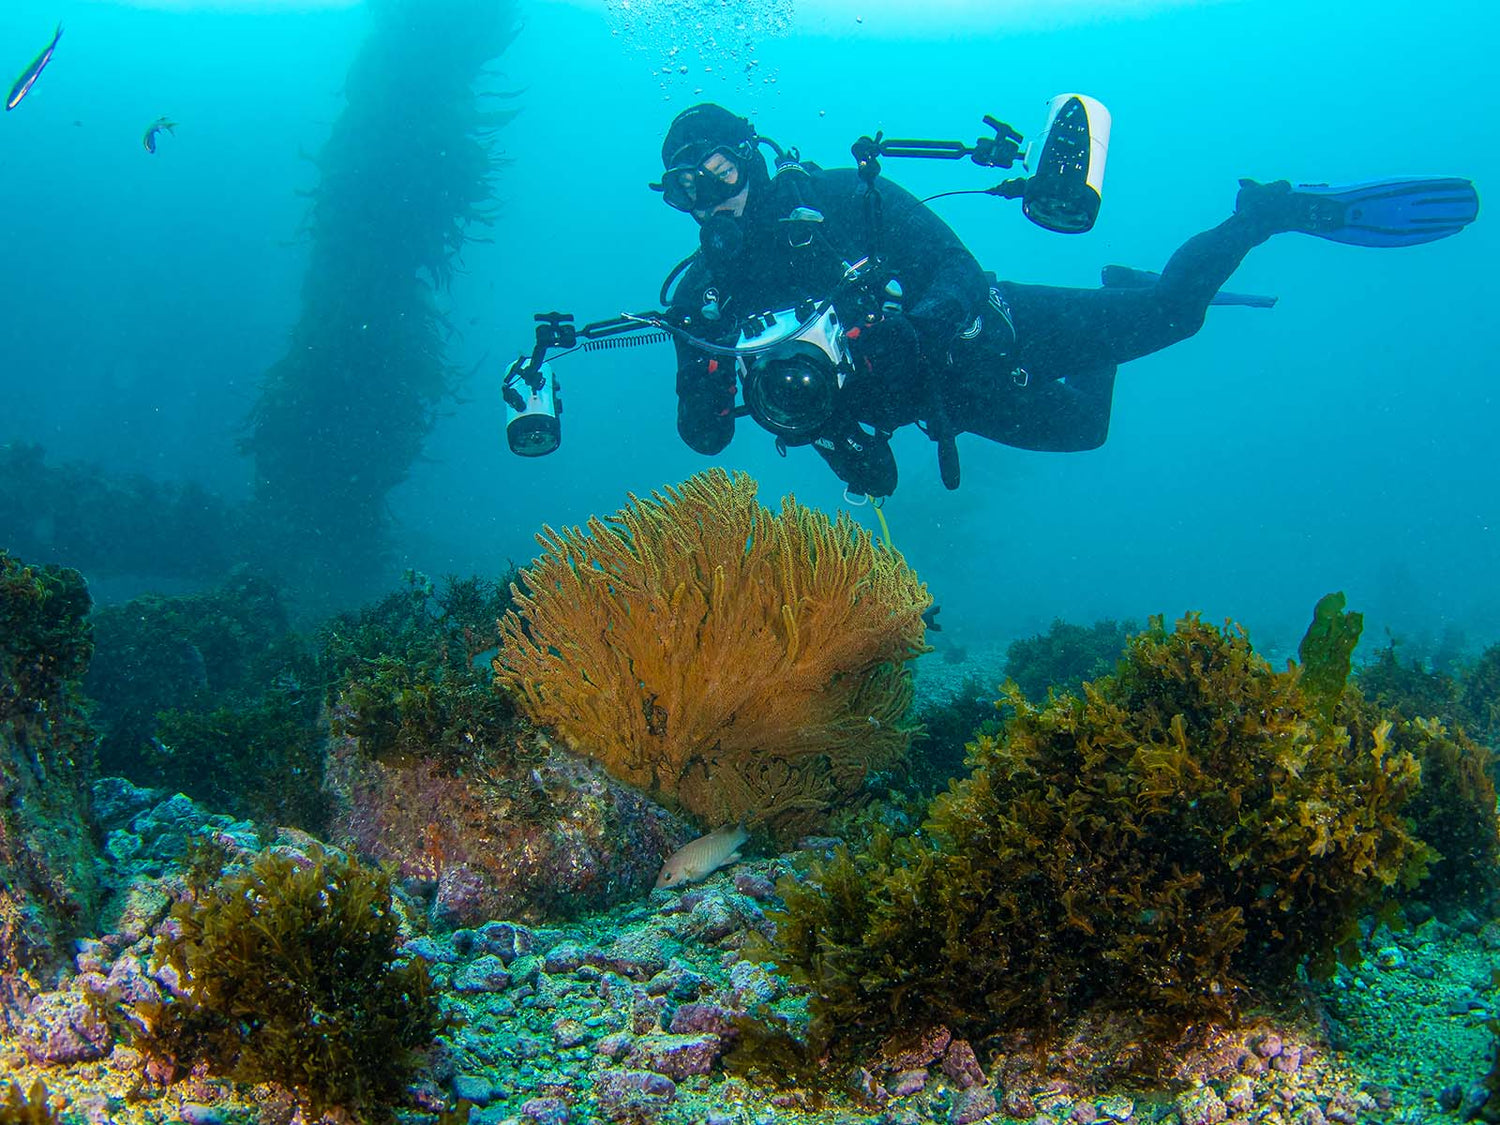
This reef shot showing off colorful gorgonians and bryozoans against the deep kelp forest reef, is a perfect example of “wide angle water” in Southern California. © Douglas Klug
So what happens when you’re looking for wide angle, but the ocean has other plans? Do you swim around with your strobes folded up, pushing a camera rig with all its drag around as you’re just there for a good workout? As a regular Southern California diver, I’ll admit, I had a few of those wide angle “didn’t shoot a thing” dives early in my underwater photography career, but then I started to look at things from a different angle. Or, at least, a different way of setting things up with my wide angle lens to capture shots I was pleased to come home with regardless of the conditions.
First, let’s talk about the basics. Underwater photography 101 taught every shooter who takes strobes and a wide angle lens underwater to get those strobes as far from the lens as possible and angled slightly away from the lens. This reduces backscatter by spreading out the light and changing the angle at which the particles in the water that create backscatter reflect that light. We all learned that the light leaves the strobes in a cone that expands outward, and we generally want those cones to intersect somewhere in front of the lens. The farther apart the strobes are, the farther away that intersection. The basics also taught us that we need that intersection of light, or the center of your image will be dark.

The angel shark above was buried into the bottom where the surge was creating a sandstorm, but by shooting down onto the sand, the backscatter created by the sand blends back into ocean floor. Because I was lighting from above, for this image I brought the strobes in tight, but over the top of my dome port. © Douglas Klug
Underwater photography 101 also taught us to get close to the subject. No matter how good the conditions are where you’re diving, the isn’t as clear as air. Even good “wide angle” water has some particulate matter suspended. The closer you are, the less water between you and your subject and therefore the less particulate matter between you and your subject.
These are two conventions of underwater photography that just about everyone who shoots a system with strobes will agree on. Putting them together with a little thought took me to a place where shooting wide when it’s not wide angle water became unconventional. In fact, by twisting up these basic lessons from underwater photography 101, I found some tricks and tips that showed me what to do when its not wide angle water.
# 1 | Move Those Strobes In
This might seem counterintuitive to what we learned about reducing backscatter by spreading out our strobes, but there’s a method to the madness you’ll see in # 2. By moving the strobes in, the crossing point of those light cones gets even closer to the lens. This works best when shooting a system equipped with TTL so the electronic system will detect the distance to your subject and not over-light it, but if you don’t have TTL, you can just power down the strobe output to whatever the minimum level is.

Strobe wide positioning (top) vs strobe tight positioning (bottom).
# 2 | Get Closer
What you think is close enough isn’t. Most wide angle lenses used by underwater photographers today have very close minimum focus distances, especially at their widest settings (for zoom enabled wide angle lenses). The concept of less water between the subject and the lens will help reduce particulates, and by bringing the strobes in tight the crossing point of the lights gets very close to the lens. A small dome-port like Ikelite’s 6”DLM port lets you get your rig in tight, without sacrificing any of the lenses wide angle view.

Clearly, I was very close to this two-spot octopus for the sequence above. So close, in fact, that it was able to reach out and investigate my dome port. © Douglas Klug
The strobes will only light what’s in front of the dome port, so in the images where the octopus tentacles are actually touching the dome port, the tentacles and suckers aren’t lit. Shooting like this really lets you see how close that crossing point of the light can get when you bring the strobes in tight.
# 3 | Hide That Backscatter
What you can’t see won’t hurt your image. Shoot into the reef or other backgrounds that let the backscatter vanish. Avoid having open water in the background. If you’re diving in a sandstorm, open water beyond your subject will hold all sorts of particulates that will catch light casting from your strobes beyond your subject. By shooting into a reef or crevice, even if it’s a sand bottom in a sandstorm, you eliminate all that open water in the back ground and the reef itself will let the backscatter blend in.

Lobsters shot during a swirling surge. © Douglas Klug

The lobster and anemone shots above were both taken in swirling surge, but by shooting into the reef the backscatter that I couldn’t prevent is well hidden and doesn’t detract from the image. © Douglas Klug
# 4 | Know You Can Edit
While there are some great software programs out there that will even remove backscatter for you, that’s not what I mean. By shooting close and filling the frame and reef with you subject, you eliminate some of the viewers perspective. In a wide angle reef-shot, the presence of background water and sunlight that orient the image for the viewer. If you don’t capture that background, you can orient the shot however you see fit. Rotating and cropping an image are perhaps the simplest forms of editing and by shooting in a manner that lets you control the perspective, you can quickly and easily shift an image from mundane to a crowd pleaser.

In the image above, the kelp itself was up off the ocean floor, so I couldn’t hide the backscatter in any background reef. Instead, I waited while the surge pushed the kelp itself into a swirl that created a solid background similar to a reef. This image did require a small amount of backscatter removal where the blue water came through in the upper left, but it was a quick edit because the area I was working with was such a small portion of the image. © Douglas Klug
These techniques have worked for me, and in similar conditions with similar equipment, I hope they’ll work for you. All images were shot with a Canon R7 in the Ikelite 200DLM Underwater Housing # 69746, Tokina 10-17mm with the DLM 6” Dome Port # 5516.15, and dual DS232 Strobes # 40232 in TTL mode. These tips and tricks should give you some ideas the next time you find yourself swimming around with a wide angle lens setup and in something other than “wide angle water."
Additional Viewing
More Power, Smaller Package: Moving to Mirrorless with the Canon R7
Wide Angle Showdown: Canon RF-S 10-18mm vs Tokina 10-17mm Underwater
Underwater Cathedrals: Shooting Magnificent Kelp Forests
Tokina 10-17mm Fisheye on the Canon R10 Review & Underwater Results
Adapting Your Lighting Strategy Across Multiple Locations on the Trip-of-a-Lifetime

Douglas Klug has been diving California’s Channel Islands for over 30 years as a SCUBA diving instructor and underwater photographer in Santa Barbara, CA. Doug specializes in underwater photography within the kelp forest environment. His photo-essays have been published in print world-wide, including articles in California Diving News, DAN Alert Diver, and Dive Training. Doug’s images have been used in many publications and by the US National Park Service, US National Marine Sanctuary, the Monterey Bay Aquarium, Google, and Microsoft. Doug even does live talks on underwater photography for dive clubs and museums in Southern California. See more...