


Review and photos by Phil Rudin. Reprinted with permission. This review originally appeared in UwP98 Sept/Oct 2017. Underwater Photography Magazine (UwP) is a free bi-monthly electronic publication featuring the latest underwater photography equipment news, reviews, dive site reports, and more. Click here to read more and download the latest issue
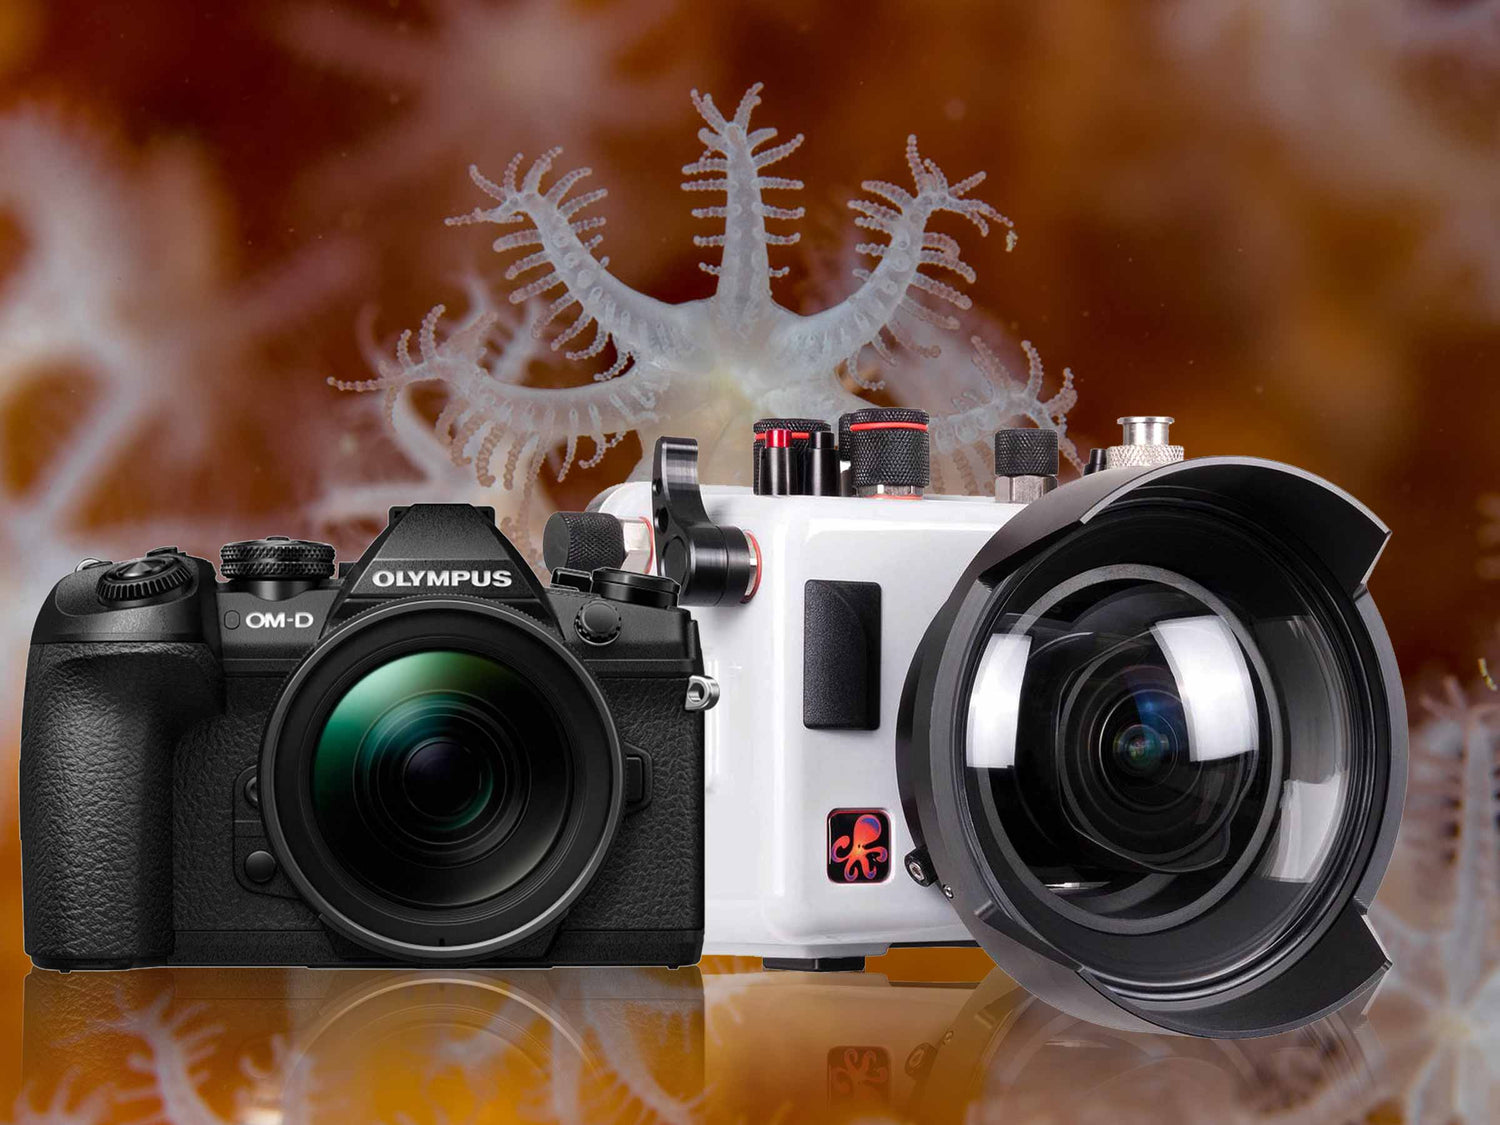
Recently Ikelite released its first housing for the Olympus Pro line of cameras with the Olympus OM-D E-M1 Mark II housing. With new lighter ports being added to the product line and a lighter thinner back plate being developed for shallow water applications like surf photography Ikelite is always expending its product line with new innovations.
Olympus OM-D E-M1 Mark II
The Olympus OM-D E-M1 Mark II was selected 2016 camera of the year by a number well respected reviewing sites and magazines who put far more time into pixel peeping than I do. I believe the E-M1 Mark II is currently the best sub full frame camera for still photography available. Anyone who is interested in underwater photography should take a close look at this camera & housing. For the purpose of full disclosure I have reviewed dozens and dozens of cameras, housings, ports, strobes and U/W photo accessories which I did not own. These reviews have appeared in Underwater Photography magazine and many other publications. For this review I used an Olympus EM1 II and several lenses which I personally own, in fact the Olympus EM1 II is now my go to camera for both underwater and top side photography.

Ana Cecilia Wreck, Palm Beach, Florida • ISO 400 • f/5 • 1/125 • Olympus M.Zuiko 7-14mm f/2.8 lens at 7mm
The E-M1 Mark II expends the hugely successful Olympus OM-D series and is a brilliant successor to the E-M1 platform released in 2013. The E-M1 Mark II is the “Pro” end of the OM-D lineup and the new Olympus flagship camera. The E-M1 II directly targets professionals and high end enthusiasts who don’t mind shelling out $2000US for a highly capable and very compact camera body. The E-M1 II would be a compelling choice for DSLR users who may be considering a move into a mirrorless camera system. Current Olympus users wishing to move up from the Olympus E-M5/II and E-M10/II series cameras will also find the E-M1 II a no-brainer as an upgrade.
Olympus has completely outdone itself with a total redesign of the entire E-M1 camera from top to bottom. This is no incremental upgrade to stimulate new sales, instead the Mark II has exceeded all expectation for both the Olympus faithful and the seasoned reviewing community. Some of the key upgrades include:
- New 20MP live MOS sensor
- Cinema (DCI) and UHD 4K (237Mbps) video
- Micro-HDMI,
- An insanely weather-sealed and temperature resistant body
- New hybrid 121 point auto focus system
- High-res electronic viewfinder
- Fully articulating 3” LCD screen
- 60 FPS burst rate, with mechanical frame rates up to 15 frames per second (18 FPS in continuous AF modes)
- New TruePic VIII processor for blazing speed and excellent buffering
- Dual card slots for SD/SDHC/and SDXC (only one slot (top) for high speed cards)
- The best in-body image stabilization system made with up to 6.5 stops
- USB-3 (type-C)
- 50MP high-res shot mode
- A larger new battery that extends life to new levels for a mirrorless cameras
- A more refined menu interface
All of this plus the ridiculous number of controls and customizable settings that Olympus users now expect with each new release.
Olympus also has an excellent line of lenses that are well suited to underwater photography. Along with the E-M1 II Olympus also introduced the new M.Zuiko Digital ED 12-100mm F/4 Pro zoom lens which is an incredible travel lens. The new lens follows in the footsteps of Olympus first M.Zuiko PRO lens the 12-40mm F/2.8 Digital ED PRO which was introduced with the E-M1 camera.

Invasive Lionfish at Ana Cecilia Wreck, Palm Beach, Florida • ISO 500 • f/8 • 1/125 • Olympus M.Zuiko 7-14mm f/2.8 at 14mm
The E-M1 Mark II body is as expensive as many current mid range DSLRs. While many DSLR users in the underwater photography community are still debating mirrorless cameras they fully grasp the merits of APS-C over full frame sensor cameras for many underwater uses. The APS-C and micro four-thirds cameras allow smaller housing designs and often use smaller lenses with smaller ports and smaller extensions. This will all add up to a more cost effective and travel friendly camera system. Smaller micro four-thirds sensors also increase depth of field and provide better corner sharpness with many wide angle lenses versus full frame. if you intend to replace your underwater photo system the high quality of the E-M1 Mark II and the total system cost makes a very compelling case for the Olympus E-M1 II + Ikelite housing combination. This camera also has excellent video capability which I will not be addressing in this review.
The all magnesium alloy body, overall build quality and finish of the E-M1 II exceeds or is comparable to any current $2000US+ pro DSLR or mirrorless cameras bodies. The E-M1 II is a bit chunkier than the E-M1 at 574g (1.26 lb) v. 497g (1.09 lb) making it easier to hold and operate both in and out of the Ikelite housing. Olympus E-M1 II’s only downside over the E-M1 is a reduced flash sync speed down from the 1/320 sec. to 1/250 sec.

Roman at Ginnie Springs, Florida • ISO 320 • f/6.3 • 1/60 • Olympus M.Zuiko 7-14mm f/2.8 lens at 7mm • Dual DS161 Strobes with Dome Diffusers
Ikelite Housing for the Olympus E-M1 II
The Ikelite housing for the Olympus E-M1 II is the first OM-D housing using a new design featuring an opaque gray ABS-PC polycarbonate material for the front section of the housing with a transparent DSLR/Sony mirrorless style polycarbonate housing back. This attractive gray housing color matches the current Ikelite DS strobe line and always attracts the attention of other divers and photographers when I am in the field. The new housing color shades the camera to provide extra protection from the sun during long boat rides.
A direct electronic connection for Ikelite’s single or dual sync cables allows effortless TTL connectivity with Ikelite DS strobes like the two DS161 strobes used for this review. Each housing has an integrated TTL encoding specific to the camera model being used. For TTL you simply selected Fill-in flash from the camera menu, then set the strobes to TTL and fine tune using exposure compensation through the super menu. The Ikelite strobes can also be fired in manual mode and the DS161 includes a modeling/focus light. Strobes from Inon, Nikonos and Sea & Sea with Ikelite electronic sync connection or Nikonos sync with matching cords can also be used but will only fire manually.
The shutter release and the focus lock can now be accessed with the thumb and forefinger using vertical control triggers rather than the push controls found on some housings. This allows you to hold the housing by the right hand grip and control both shutter and focus locking (rear focus) while having a firm grip on the housing. I used rear focus on this housing for my entire review and found it especially useful for macro photograph.

Snorkelers at Ginnie Springs, Florida • ISO 400 • f/11 • 1/250 • Olympus M.Zuiko 8mm Fisheye • Dual DS161 Strobes with Dome Diffusers
Installation and Set-Up
The Ikelite E-M1 MKII housing has four main components, the front “box” where the camera sits, a flat rear door, the removable front ports and the (optional) tray with handles which attaches with two mounting bolts on the bottom of the housing. The front part of the housing where the camera sits has a track at the bottom where the camera tray slides into place. The camera is held in place on the tray by a single tripod screw. The tray has no locking device so be aware that the camera can shift before the rear door is mounted. Once the camera is aligned in the housing the TTL bulkhead connector is mounted on the camera hot-shoe and the housing is ready to seal.
The rear door of the housing is then secured by facing the housing down and making sure that the rear door O-ring has properly seated in the front half of the housing. The two heavy duty lid snaps are then secured by pushing down. You should hear the lid snaps click into the locked position and you should not be able to lift the snaps without pushing in the snap locking device. I like to use equal pressure on both lid snaps so that they lock simultaneously. Once the camera is secured inside the housing you can see the controls on the camera and align then with the housing controls.

Snorkelers Khloe and Valerie at Ginnie Springs, Florida • ISO 400 • f/11 • 1/250 • Olympus M.Zuiko 8mm Fisheye • Dual DS161 Strobes with Dome Diffusers
The right hand side of the housing has the vertical shutter release and the back focus paddle. The left hand side has a lens release control which allows you to change lenses by removing the port while the camera remains in the housing. The left top of the housing is also where the Vacuum system valve is located. The left top of the housing has the strobe cord sync port and the camera on/off dial. Next to the on/off dial two push buttons allow access the HDR/frame rate button and the AF/focus point button. These buttons can also be reprogrammed for just about any function you desire. On the right top of the housing I programmed two control wheels for Shutter speed and Aperture control since I shoot exclusively in Manual mode. Also on the right top is the mode dial with push button release, the Fn2 push button (which is yet unassigned) and the video start/stop push button which is in a great location where it won’t be accidentally activated.
I removed the standard optical viewfinder and replaced it with an optional 45º Magnified Viewfinder to enlarge the view into the electronic viewfinder (EVF). The EVF is already large for a camera of this size so the optical finders give an excellent corner to corner view into the EVF. An optional Straight Magnified Viewfinder (which I also tried) can be selected if you prefer a 180º viewfinder.
On the top left side of the rear door is the push control to cycle between EVF and LCD. I did not find a way to toggle the AEL/AFL 1 and 2 program level but you have access for use with the rear focus control. At the top right is the Fn1 button. Below that you find four push buttons for menu, info, trash and review. These buttons surround the four-way arrow buttons and OK button. The four-way arrows can be programed to control any number of functions. I have the E-M1 II set to display the super menu screen when I push the OK button and a second push takes me to the AF points array. I frequently use the super menu for changing ISO, AF settings, focus settings, the AF area array and much more.

Coral Polyp Detail at Blue Heron Bridge, Florida • ISO 64 • f/14 • 1/250 • Olympus M.Zuiko 60mm f/2.8 Macro • Dual TTL DS161 Strobes with Dome Diffusers
DLM Lens Port System
Ikelite's new port mounting system is simple and ingenious. Rather than having an o-ring on each of the ports Ikelite placed the o-ring on the port mount at the front of the housing making it quite easy to inspect and service. Just push the port onto the port mount and secure the three small thumb screws supplied with each port into the grove behind the o-ring. This system works easily and the ports have a very secure feel when mounted. Ikelite has macro ports for the Olympus 60mm Macro, Olympus 30mm Macro and Panasonic 45 mm Macro lenses, all with 67 mm threads for mounting closeup lenses.
Ikelite offers 6" and 8" diameter acrylic dome ports for use with lenses like the Olympus 9-18mm, 12-50mm without macro control, 12-40mm, all of the 14-42mm lenses, Panasonic and Olympus 7-14mm, support for the Panasonic and Olympus 8mm Fisheyes. Many other lenses can also be supported. A mirrorless housing port adapter for the 8" DSLR modular dome system is also available and I used this dome configuration for the Olympus 8mm Fisheye. Port extensions and gears are also available with more ports being designed with zoom controls. Ikelite is also working on a design for the new Olympus 7-14 mm F/2.8 Pro and an extension for the 8 mm F/1.8 fisheye Pro lenses.

Searobin at Blue Heron Bridge, Florida • ISO 200 • f/14 • 1/250 • Olympus M.Zuiko 60mm f/2.8 Macro • Dual TTL DS161 Strobes with Dome Diffusers
Field testing the Ikelite E-M1 II Housing
For my review I used the following equipment:
- Housing for Olympus OM-D E-M1 Mark II
- Tray with Dual Quick Release Handles
- Cable Top Handle Grip
- (2) DS161 Strobes (my Ikelite DS161 strobe review is in UwP81)
- (2) Dome Diffusers
- (2) Wide Angle Ball Arms
- Dual TTL Sync Cord
Normally I shot all of my macro and wide angle using manual camera controls and manual flash settings. During this review I used manual settings for wide angle. For macro I relied on the excellent TTL I have come to expect from the DS161 strobes assisted by in camera exposure bias from -0.3 to -1.0 stops selected in the super menu. These settings rendered rich and colorful captures as long as the strobes were properly aimed. I can’t say enough about how well the TTL works, kudos Ikelite. I found the Ikelite dome diffusers to be excellent for models softening skin tones and reducing over exposed highlights. These domes reduce light output by about 1 to 1.5 stops so I try to shoot within about 3' (1m) of the model. I also try to keep the domes well behind the lens and in a flat plain with the housing grips so they won’t over power the edges of the frame.
The small housing is negatively buoyant and I would suggest adding foam blocks or float arms for better overall balance and control. Entering the water with the added buoyancy my system was extremely easy to dive and snorkel being every bit as streamlined as any of the small mirrorless housings I have tested in the past.
My lens selections included the Olympus 60mm F/2.8 macro, the Olympus 8mm F/1.8 Fisheye, Olympus 12mm F/2 and the Olympus 7-14 mm F/2.8 wide angle zoom all used with Ikelite ports. For super macro I also selected the INON UCL-67 M67 and INON UCL-165 M67 closeup lens (see my Inon lens review in UwP98). I had no problem installing and removing the UCL-67 using the Ikelite macro port.

Jawfish at Blue Heron Bridge, Florida • ISO 200 • f/8 • 1/250 • Olympus M.Zuiko 60mm f/2.8 Macro • Dual TTL DS161 Strobes with Dome Diffusers
The Ikelite zoom gear for the Olympus 7-14mm wide angle zoom lenses simply pushes onto the lens from the rear and the lens is then mounted from the front of the housing before the port is installed. The gear is moved by a knob on the dome port extension not the housing which helps to reduce the overall size of the housing. For this review I used the DLM optical-grade 6" diameter acrylic port. While a 6" diameter port is not ideal for this lens it got the job done. I needed to hold the zoom control knob between my thumb and forefinger to easily zoom the lens so it could not be done while holding the left grip at the same time. For video users wishing to use a smooth zooming motion this could present a problem. The E-M1 II AF has proven to be both faster and more accurate than its E-M1 predecessor for all lenses.
I used the 45º Magnified Viewfinder for all of my macro work and the Straight Magnified Viewfinder for some of the wide angle work. This camera has excellent response in live view and I would not hesitate to use it with fast moving subjects like sharks. While I tend to stick to S-AF, the C-AF is now on par with most DSLRs. I have been able shoot the Olympus 12mm at 18 FPS and nailed 18 continue frames of a fast moving subject without loss of critical focus.
Once I had used the housing for a dive or two I had no worries about jumping from the dive platform with the system in hand or any of the other abuse I heap on test gear to evaluate field worthiness. This is an excellent little travel system and I could easily fit all of the components into my Airport express carry-on bag.
Vacuum Test System
I have reviewed several Ikelite housing for both Mirrorless and DSLR cameras but I have not had the opportunity to use three of the Ikelite accessories provided for this review. First is the new and highly recommended optional vacuum system. The valve is small and mounted of the left side of the EM1 II housing. Pushing a button pops the valve plug out of the valve and allows the vacuum pump to snap into place. The snap means the seal has been made. A few squeezes on the pump handle and the vacuum is drawn. Ikelite recommends pumping until the pump gauge reaches 5 to 10 inches of mercury. The vacuum valve can be retro fitted by the user into current and many discontinued housings, check with Ikelite for compatibility with the housing you own. A video tutorial for vacuum system installation and use can be found here
Magnified Viewfinders
The other accessories which I would also recommend are the 45º and Straight (180º) Magnified Viewfinders. I have been a long time user of 45º viewfinders having owned several. They work very well for macro allowing you to stay above the subject and off of the bottom avoiding damage to the surrounding environment. The 45º finder does have a more difficult learning curve because it is often being used with longer lenses and at an odd angles as compared the straight viewfinder or LCD.
The Straight Magnified Viewfinder is excellent for fast moving subjects, vertical subjects like wrecks and walls, panning and more. To get behind the straight viewfinder for macro your body needs to be lower or you will always be shooting downward angles. I enjoyed both viewfinders and as long as the camera diopter is correctly set for your vision they can be a god sent for old eyes and those with poor vision.
Upgrading from the E-M1
Finally for those for those who already own an E-M1 underwater systems the switch to the E-M1 II can be a conundrum. Ikelite did not support the original E-M1 so you would not be replacing an Ikelite housing. For those who have made the switch I have heard little regret or dismay over the decision. The E-M1 II is a very much improved camera not just a MP bump to keep people buying. If you are an above water user the 50 MP high resolution mode is vastly improved operating in a fraction of the time the E-M1 system used. If you shoot landscapes, still-life, architectural and more you will love this feature. Video is improved in every way as well. Lastly if you decide to make the switch the E-M1 seems to do very well in the used market selling much faster than other brands I have followed.

About the Reviewer
Phil Rudin is a regular contributor to Underwater Photography Magazine and a freelance writer/travel photographer. Phil retired from the West Palm Beach Florida Police Department where he served as Dive Team Commander for the city. With thirty years experience as a public safety diver and dive team manager Phil did over five hundred recovery dives during his career. Phil has traveled extensively throughout the world to pursue his passion for underwater photography. His images have appeared in magazines such as Popular Science, Underwater Photography Magazine, Reflections, Rodale's Scuba Diving, Underwater Journal, Skin Diver, Florida Underwater, South Florida Adventures, The Sun, Dive Chronicles, Waterways and more. Phil teaches underwater photography classes and lectures on travel destinations and photography around the country.