


The saying goes, "all toads are frogs, but not all frogs are toads." Our personal motto is frogs, toads, or tadpoles - they're all fun to photograph. Whether you want to document the lifecycle of a frog or just happen upon a frog while you're out filming something else, you can take the guess work out of underwater frog photography by using these techniques.

The Olympus TG-6 with FCON T02 Fisheye lens can create some stunning images, this was taken from a distance using a pole. Read on to find out how. © 2022 Steve Miller
Where
Frogs, toads, and tadpoles can be found in all kinds of strange places. Truly aquatic frogs like the green frogs and bullfrogs in these images need a high quality of water to live in. Some toads will spend most of their lives living on the floor of the woods, but will find bodies of water to lay their eggs in. If you hear frogs "calling" in the Spring, you can probably follow the sound to a body of water containing many of them mating all through the night. Frogs will lay their eggs in masses, while toads will typically have long strings of eggs attached to plant life.
The challenge with photographing them is primarily that you may not be able to get in the water with them, and therefore get close to them. The mating and egg laying can be in just a few inches of water. There are some places where you can swim with frogs, but for the most part the best solution is to "shoot remotely." Which could mean mounting your camera on a stick and using the timelapse function to shoot a frame every few seconds while you maneuver the camera close. Or it could mean setting your camera up in the scene and then controlling it remotely with a mobile device.
In our experience, as long as part of the Ikelite housing is above the water line you can control your camera with your phone, if your camera is equipped with that functionality. If the housing becomes totally submerged you can expect to lose your signal, but it should re-establish the connection once you lift it. If you want to shoot remotely underwater, a simple string going from your shutter release up the pole you use to move the camera around with can work well enough.

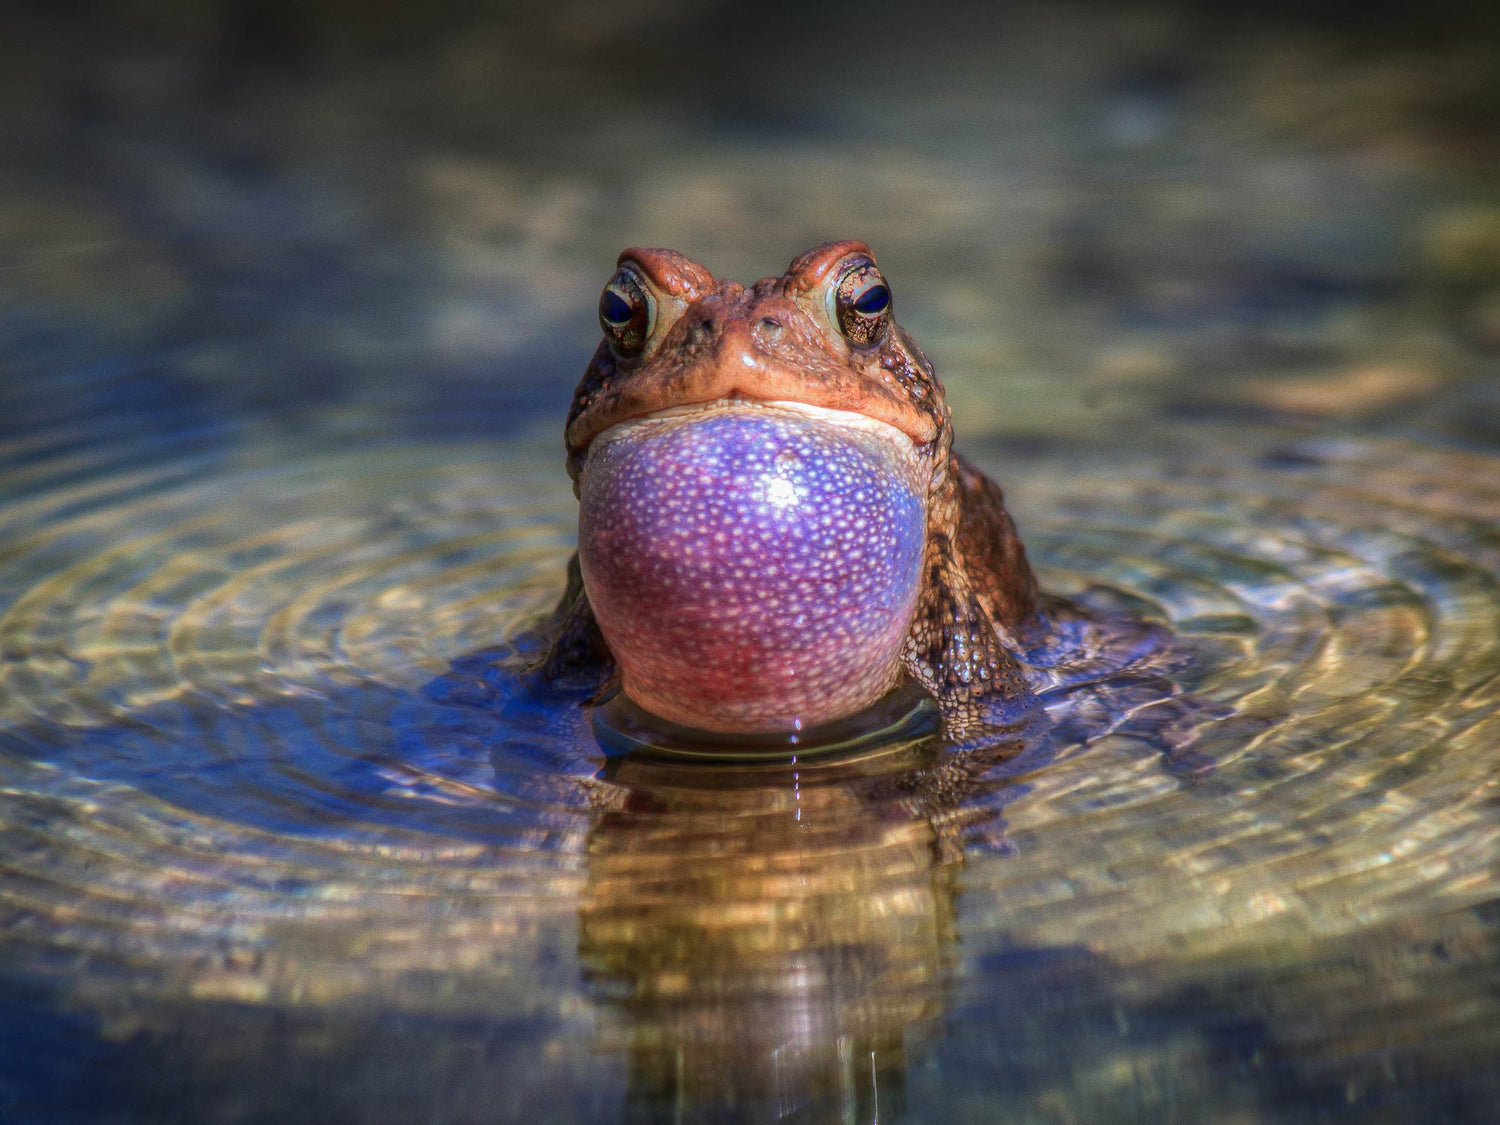
On my Shot List is to try this image at night with lots of flash in the background. If you look close, you can see the reflection with clouds in the eye of the frog. © Steve Miller
DSLR + Mirrorless
ISO: 200-400. Mostly we are using flash, so a low ISO will work. Even shooting natural light you will be very shallow so there should be good light during the day. If you shoot mating frogs at night consider illuminating the area with constant-on light. This will help your camera focus, and the frogs won't mind.
Mode: Manual for camera, set strobes to TTL.
Aperture: F-16 or even smaller apertures will give you more depth of field than a wide open lens. Since we are shooting without (generally) being able to look through the viewfinder, this depth of field can really help. If the auto focus locks on the frogs shoulder and the eye is out of focus you won't know until you review the images.
Shutter Speed: 1/125 - 1/160 flash synch. These animals like to hang out, and can be very still even when mating, so there is no need for a fast shutter for the most part.
Lens: 8mm to 100mm. As long as you can get close, and focal length is worth using here.

This particular tadpole variety stays very small (about .5 inch - or 1.27 cm - long). When they enter the grass as tiny black frogs they are barely an inch long, unlike bullfrog tadpoles which are huge and stay in the water for years. Tadpoles are easy find, but so small there isn't much you can do with them except go Super Macro. © Steve Miller
Point + Shoot
ISO: 100 to 200. If you have no light or strobe, expect to raise the ISO.
Mode: Manual or Aperture Priority. If you are shooting natural light, Program will work as well, a focus light or dive light will help here.
Aperture: F-8 will give you depth of field, and probably be the preferred aperture for most point and shoot cameras.
Shutter Speed: 1/60 - 1/200 is plenty fast to stop the action.
Lens: Zooming out to your widest setting is the best place to start. It is hard to guess what your camera is seeing if it is at the end of a pole, so zooming wide will give you the best chance of capturing them in the frame, and also having sharp focus.
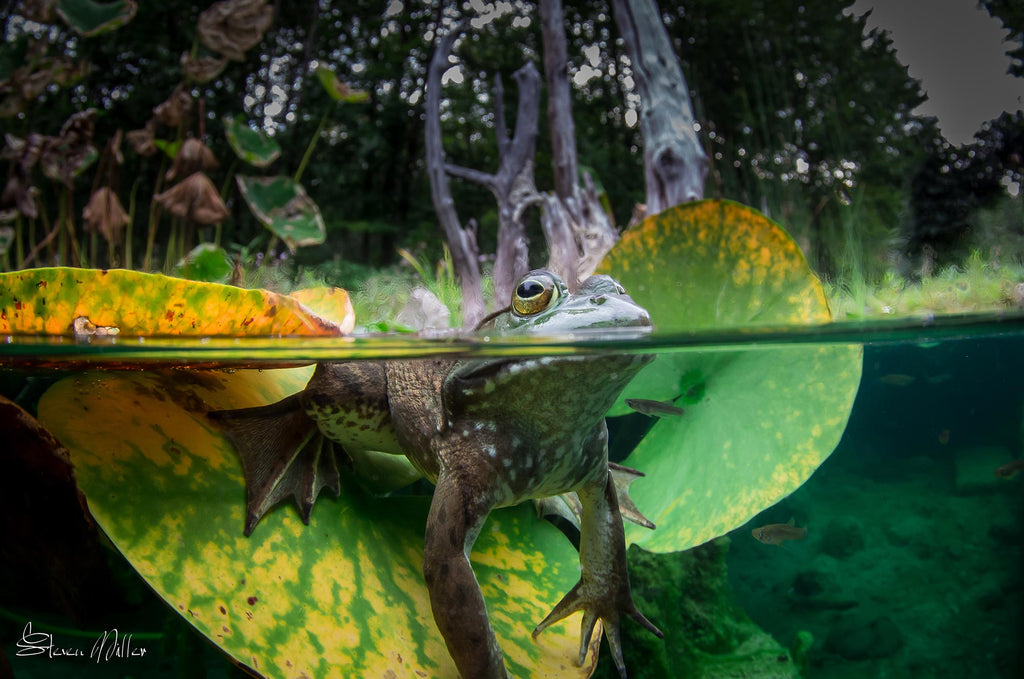
My favorite image, I used styrofoam blocks to make my housing into a boat floating level for an over/under. Using strobe arms and a 10 foot pole I could push the "boat" around and trigger the shutter with a long string, then later CamRanger. The frogs aren't afraid, here the dome port was almost touching him. © Steve Miller
Strobes
Ideally you will have multiple strobes. One to light the subject itself, and another to light the background. These can be mounted out of the water, or submerged, or halfway between the two. If the light originates out of the water you will get some cool light rays. Your strobes modeling light can come in handy for achieving a fast focus lock.
Technique
Although frogs are shy, and will move away if you try and get close, this doesn't seem to be the case with your camera. They appear to know it is not alive, and not a threat. Often we have had frogs hold on to our dome port, or even climb up on the housing, despite its being moved around with a long pole.
Remember you always want an upward camera angle, so set the camera up in this orientation. Many housing/lens/port configurations will float, and this can be ideal. Test the buoyancy of your system out in a tub, and if it doesn't like to float in the right orientation for you, try attaching small blocks of anything that floats (cutting up swimming pool "floaties" are our favorite).

Yes, he is actually holding on to the dome port here. This is why I love fisheye lenses, they do not struggle at these distances to focus quickly. You are basically shooting through air this close, so it is very sharp even if the water is cloudy. © Steve Miller
 Ambassador Steve Miller has been a passionate teacher of underwater photography since 1980. In addition to creating aspirational photos as an ambassador, he leads the Ikelite Photo School, conducts equipment testing, contributes content and photography, represents us at dive shows and events, provides one-on-one photo advice to customers, and participates in product research and development. Steve also works as a Guest Experience Manager for the Wakatobi Dive Resort in Indonesia. In his "free" time he busies himself tweaking his very own Backyard Underwater Photo Studio which he's built for testing equipment and techniques. Read more...
Want the easy way to improve your underwater photography? Sign up for our weekly newsletter for articles and videos directly in your inbox every Friday:
Additional Reading
Freshwater Underwater Camera Settings and Technique
Wide Angle Fisheye to Macro on the Same Dive with the Olympus Tough TG-6
Streaming Light Rays Underwater Camera Settings
Over-Under (Split Shots) Underwater Camera Settings
Up Close and Personal: A Guide to Underwater Animal Portraits
