


Anemones are basically begging to have their picture taken – they won't swim away from you, they're home to photogenic fish, and they're just plain pretty to look at! Whether an anemone is open or closed or has a cast of critters living among its tentacles, you'll have a variety of options and opportunities to experiment with lighting and camera settings. Use these tips to create photos that are sure to impress your audience.
Where
Tropical and temperate oceans, all depths, even tidal pools.
DSLR + Mirrorless
Mode: Manual. There are few subjects more cooperative than a Sea Anemone (maybe a sponge). It is easy enough to make a simple capture up close, but since they are generally affixed, using and experimenting with different combinations of Aperture and Shutter in manual mode offers you the most creative influence on the final result.
ISO: Most tropical reefs 200-400 is plenty. If you find yourself deep and/or dark, be prepared to raise the ISO to the 600-800 range.
Aperture: Often Anemones have a lot of white in them, so you can stop down the lens to get maximum depth of field if you like, especially with a flash. But this is one of the few subjects where any Aperture can work. Opening the lens all the way will give a nice bokeh background, closing it down all the way will either give you a stark dark background (making the Anemone stand out) or possibly a nice sun ball or clouds if your camera angle is upwards enough.
Shutter speed: Tentacles tend to flow around with the current, so a shutter speed of 1/125th or faster will stop this motion. A strobe will do a much better job, so use the synch speed of your camera (generally 160th-1/250th second).
Lens: Enjoy any lens that you wish here (from around 100mm or wider) because Anemones are beautiful with a macro lens, a super wide Fisheye, and everything in between, as long as it focuses very close.

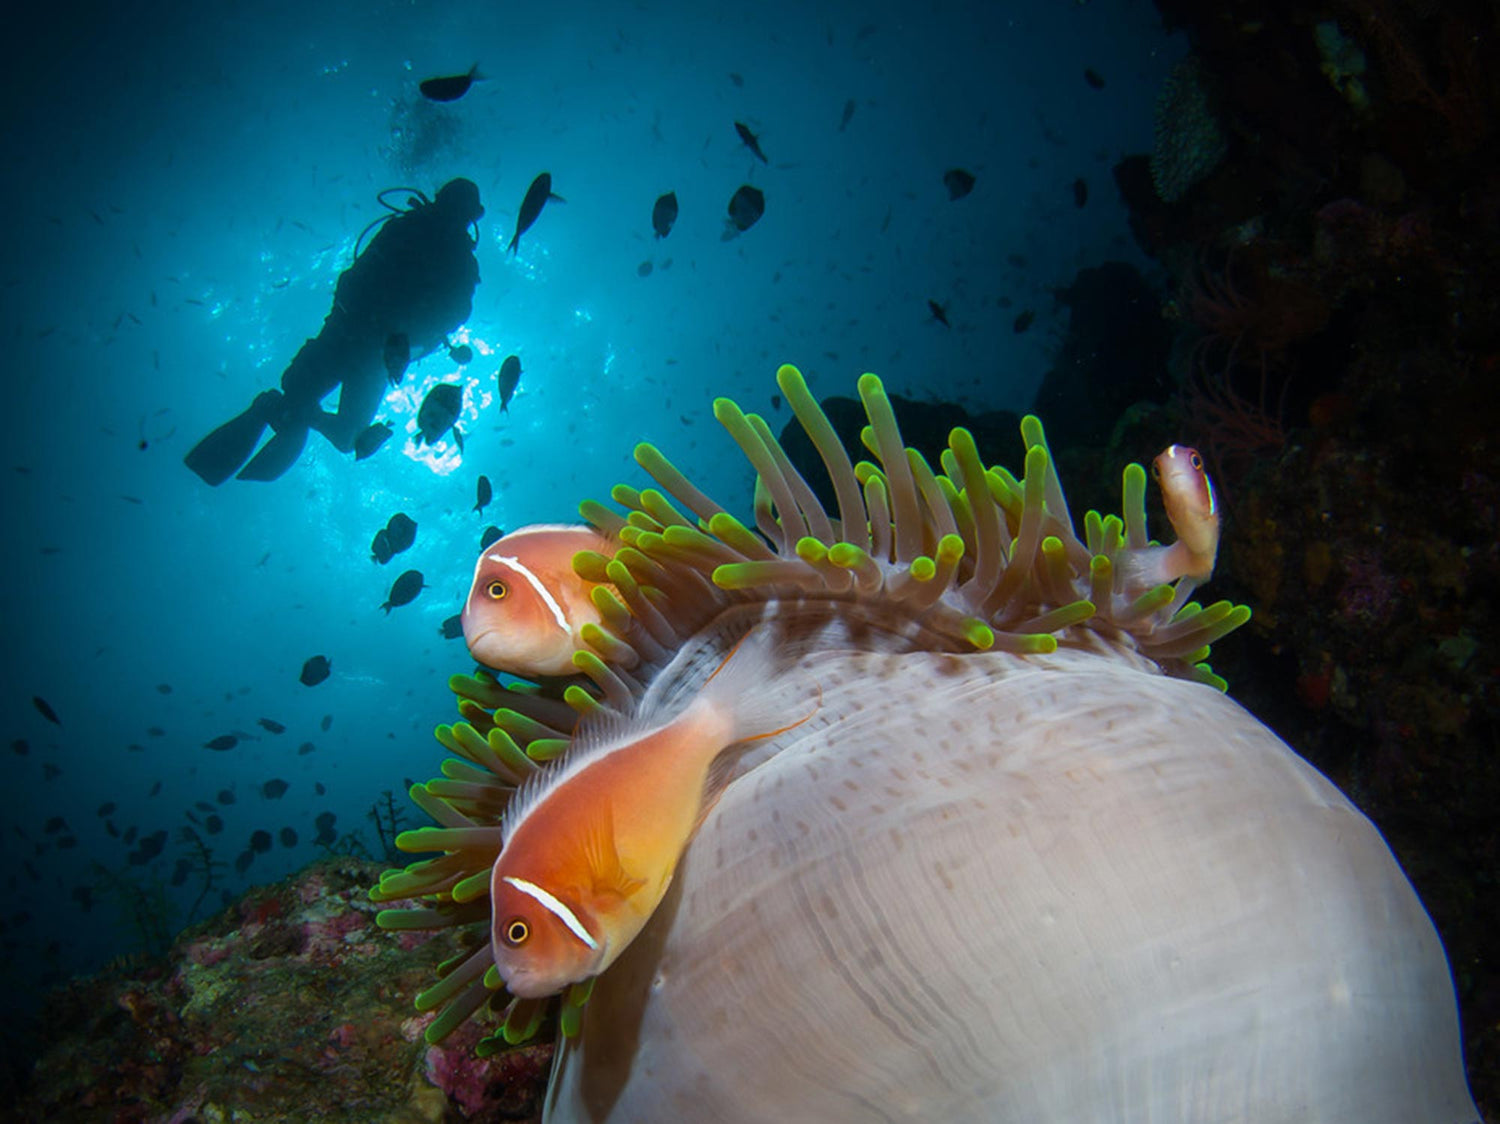
Close Focus Wide Angle images are a lot easier if you can find an anemone on a vertical wall like this one in Wakatobi. Balance your manual settings to the sky, TTL will automatically deliver the right amount of flash to the exposure you have selected for the background. © 2021 Steve Miller
Point and Shoot
ISO: 200-400 for shallow, 600-800 deeper and/or darker.
Aperture: F-8 to start, but virtually any Aperture will work if the ISO and Shutter speed are balanced against this.
Shutter speed: From 1/60th second to 1/250th second, higher numbers if you are shooting the resident shrimp or fish living in the tentacles. A strobe will dramatically improve your ability to stop the motion of these little critters running around the tentacles.
Lens: Super wide, macro, and everything in between (as long as they focus close).

When Anemones "ball up" they are just as interesting as when they are spread out. We prefer flash to video lights for these types of images- powerful lights can cause them to open prematurely. © 2021 Steve Miller
Technique
Some photographers (this one!) wait decades to be able to spend time with a big Anemone full of resident clownfish, shrimp, crabs, etc. This subject will not swim away from you, even the residents will swim around in circles but always return. Anemones are a wonderful subject to experiment with lighting and settings. If you plan on shooting the residents (shrimp, clownfish, etc.), use a macro lens in the 60mm-100mm range, and a flash (or two) to freeze their action.

Clownfish and shrimp aren't the only animals residing with Anemones. Porcelain Crabs are a photographers favorite. Side lighting will emphasize your shadows. © 2021 Steve Miller
Strobes
Most Anemones are translucent and some are almost transparent. This means they will "glow" when lit certain ways. Move your strobes around to create harsh shadows for rich blacks, side light, light from above, backlight, etc. these are great subjects for creative techniques of lighting and exposure.

Moving your strobes around to control light and shadow can change the impact of your images. © 2021 Steve Miller

Selective lighting to isolate your subject can be achieved with longer strobe arms and an upward camera angle. Pro-Tip: Using a brush in Lightroom to make your dark areas a truer black can add impact and separation. © 2021 Steve Miller
 Ambassador Steve Miller has been a passionate teacher of underwater photography since 1980. In addition to creating aspirational photos as an ambassador, he leads the Ikelite Photo School, conducts equipment testing, contributes content and photography, represents us at dive shows and events, provides one-on-one photo advice to customers, and participates in product research and development. Steve also works as a Guest Experience Manager for the Wakatobi Dive Resort in Indonesia. In his "free" time he busies himself tweaking his very own Backyard Underwater Photo Studio which he's built for testing equipment and techniques. Read more...
Additional Reading
Clownfish Underwater Camera Settings
Underwater Photo Editing: Trash to Treasure Using Lightroom
Tropical Reef Underwater Camera Settings