By Logan Wood
Something we talk about all the time is knowing your camera. So let's go through the settings and custom buttons that we've changed for the ZV-E1 to get the most out of the camera and efficiently navigate settings while inside an underwater housing.
Every environment is different, so these aren't the end all solution to getting the perfect shot. But it's a good place to start if you've just got the camera.
Watch the video below or scroll down to read through.
To speed things up, we have these exact settings available to download. That way you can load these settings on your camera and have it the exact same way that I'm going to set it up in this video. Once downloaded, put the file into this folder on your SD card, then go to Setup > Reset/Save Settings > Load > and then choose “E1-IKE”.
Alright, so the first thing that we're going to do is reset my camera so that it looks exactly like I just took it out of the box. And the first thing that I'm going to do is switch out of intelligent mode and go into manual exposure mode. This way we'll have a few more settings that we can change.
Shooting Menu (Resolution, Frame Rate, Stabilization)
Start out by going to the main menu page. In the shooting menu, the first page, you'll find your file format. This is going to be your different codecs, different resolutions, and they each have their own compression rates and resolution sizes.
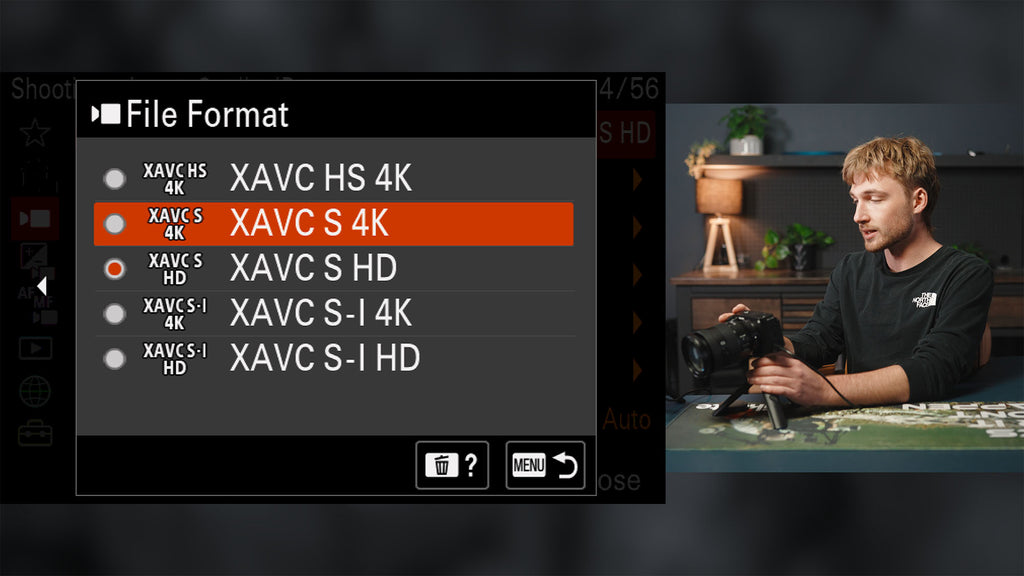
For 4K, I like to use XAVC S 4K.
Movie Settings is going to be where you will pick your frame rate. So for underwater, we'll stick with 60. And then record setting we want the most information, so we'll stick to 4:2:2 10 bit. If you want to shoot log, this will be where you'll turn that on. If you don't know what log is, then don't worry about it. But if you do want it on, I would change your color gamut to S-Gamut3.Cine. Then also make sure to turn “Embed LUT File” off so that you're not baking in your LUT to your image.
Format, this will be where you can format your card.
File, if you wanted to have your files come out with a certain naming convention right out of the camera, this would be where you will set that.
Shoot Mode - you can change your shoot mode here, but you can also do that in the function menu on the shooting screen as well. So we'll leave it to manual exposure.
Image Stabilization, you can change your stabilization mode here. You can also do that in the function menu, so we'll just leave that on active and leave the rest off.
Shooting Display is where you can put an overlay onto your screen for a few different options. Rule of Thirds, Square Grid. So I'm going to leave that as off, but I really like to turn on “Emphasize Record Display.” That way, when you record, that red box shows up around it versus just the small record button. I really like while I'm in a housing, sometimes it's harder to see just that small record symbol. So the whole screen turns red around the border. It's a lot easier to know when you're recording.
Marker Display, kind of the same deal as shooting display, but you can choose different aspect ratios to add the overlay to the screen. So say you're shooting for social media, you can add like a 9:16 overlay so you know exactly where your frame will be when you crop in.
Exposure/Color Menu (ISO, Metering, White Balance)
Next menu will be Exposure and Color. Here you can set your ISO range limit. I'm going to set it to the entire range. But if you only wanted a certain amount, you can do that here. We're also going to kick it out of ISO auto and just go straight to 640.
Metering, I shoot in SLOG-3 multi metering mode has been fine, but there's a few other options that you can pick from. For now I'm going to leave it on multi.
White Balance, that's super important for underwater photography and videography. So let's just take that right out of auto and go straight down to Custom 1.
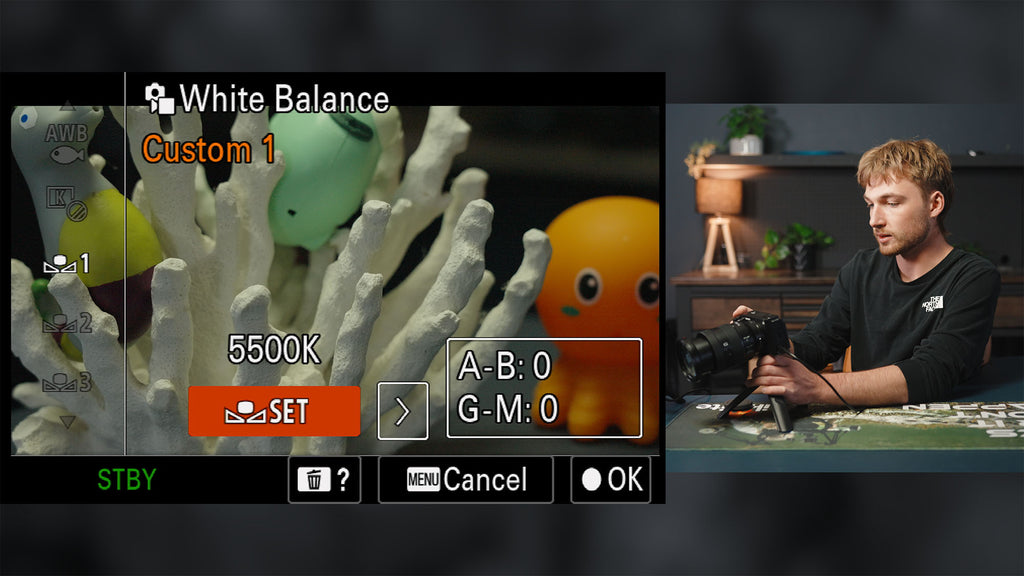
One of the most fundamental settings for underwater footage is proper White Balance. This might be your most important custom setting, so don't skip this step!
Color and Tone, this will be where you can select some of the built in LUTs or upload your own. I'm going to change mine, keep mine on “s709”, that’s been a popular one. And then this is where you'd be able to import LUTs from your SD card. I'm going to turn off “Soft Skin Effect," it maybe be useful topside, but underwater it's just extra processing and I don't see any benefit having it on so we'll turn that off.
Zebra Display I like to have my zebras on so that I know when I'm clipping my highlights.
Focus Menu (Focus Mode, Focus Area, AI Autofocus)
The next menu is your Focus Menu. Here we'll want to have autofocus on.
AF Transition Speed will be how fast the camera changes focus from one subject to the other. I don't like it to be super fast, so I'll put mine at 4.
AF Subj. Shift Sensitivity is how sensitive the camera is to new objects coming in. Personally I don't really like it when it's jumping from subject to subject in the middle of a shot, I like it to be locked on so I’ll put that all the way down at 1.
And we'll leave AF Assist off.
Focus Area, these are your different focus areas. You can change them in the function menu as well, but you can change them here too if you want. I'm going to change my to Spot, because that's what I like to use.
Focus Area Limit, here you just have a few different size options, especially for the spot mode. I'm going to turn them all on just to give me the option to have them.
Subject Recognition - this is really cool in this camera and on the new Sonys they have their AI autofocus so want to keep that on and here is your different options for subjects (animal/bird, insect, airplane, etc.). You can also change this in the function menu so don't worry about changing in here. You won't really be locked in. So we'll just keep it on human for now.
Target Select will allow you to select the subjects that you want. So for underwater, you might see an airplane, you might see a car and train, but, probably not. So we're going to keep it on human, animal/bird, animal, bird and insect.
Peaking Display, sometimes I like to have peaking on, it’s essentially an overlay on your video to show you what's in focus. It'll give you some little red dots, but I'm going to keep that off for now. You can also change, you know, the sensitivity of the dots and the color as well.
Playback and/or Network - this would be just if you wanted to connect to your phone topside or something like that.
Custom Buttons for an Ikelite Underwater Housing
Setup is where you can change your area, date, time settings If you didn't do it correctly at the beginning.
Reset/Save Settings is where you could load up the settings that we have available for download and also reset your camera if you needed to.
Operation Customize is where you'll set the custom keys for working inside of an underwater housing.
I'm going to jump straight to video custom keys. You'll see it's kind of already set up for a bunch of different ones but we're going to change all of these so that it's a little easier to find some of the settings that you might need to use a lot.
The first one we’re going to change to “AF On” (Focus > AF/MF > AF On). This way, when you're shooting, you can just point at your subject and then hit the C2 button and now it's in focus.
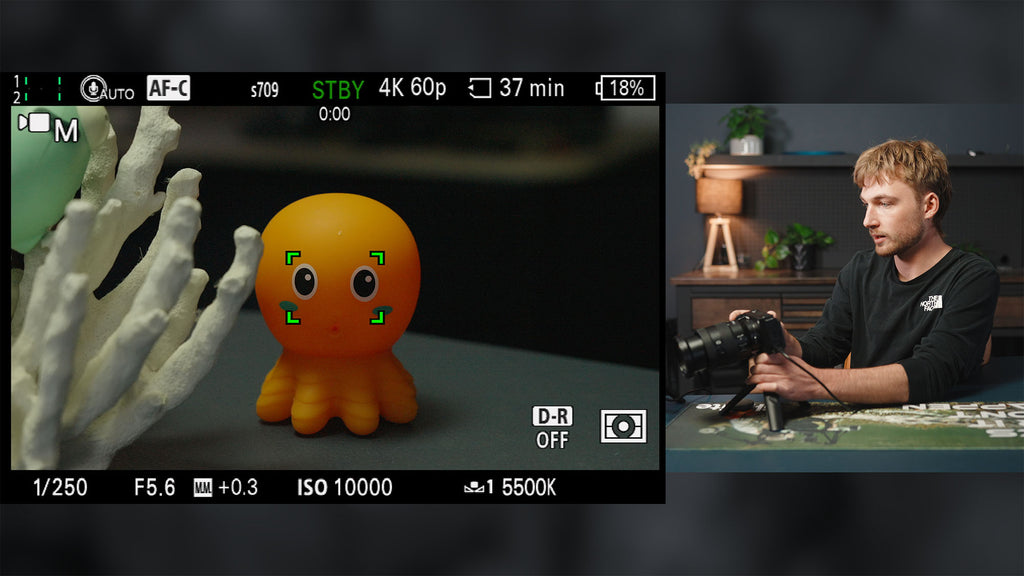
You'll see small green bars pop up and that means your subject is in focus.
The next custom key we're going to set is Record Frame Rate. It's right on the first page, second option, record frame rate (Shooting > Image Quality/Rec > Rec Frame Rate). That's going to allow us to, once we hit the little trashcan button, to change our frame rate super quickly and all you have to do is just change your shutter speed to match your frame rate, which we'll keep on 60.
The third option we're going to change to Tracking on Toggle I really like this in conjunction with the center focus area. So if I hit my focus, hit the center button, it's going to start tracking and then I can compose my shot and that hit the center button again to cancel. It really works seamlessly with that center focus area.
The fourth button we're going to change this in the auto focus menu, Subject Recognition and Recognition Target Select (Focus > Subject Recognition > Recog. Target Select). When you're shooting, you just hit left on the pad and you'll go through all the different options target subject options. So if your dive buddy is coming to the shot and you want to get a shot of him, you can switch it to human and then pan over to an animal and you're all set to go.
The fifth button we're going to choose is the Right on the on the control wheel - we're going to change that to White Balance (Exposure/Color > White Balance > White Balance). This is where it was important to make sure that you're on the custom white balance already so that right when you hit Right on the d-pad, all you have to do is hit Right again, set, find your white object and grab your white balance. So it's all about minimizing the amount of time to get to the setting that you want. Selecting white balance now just becomes two clicks on the on on the control pad and you're there.
The last button on the rear is going to be, ISO which we will make Down on the d-pad (Exposure/Color > Exposure > ISO). It's the same principle as our previous white balance option - you can change your ISO simply pressing Down on the d-pad. And that does it for the rear buttons.
The next thing we'll focus on is customizing the Dial/Wheel. The top dial I'm going to change that to my Aperture (Exposure/Color > Exposure > Aperture).
Next I'll customize the scroll wheel of the control wheel to change my Shutter Speed (Exposure/Color > Exposure > Shutter Speed) this way I can use the top dial to control my aperture and control wheel to to change my exposure.
I've just kept all of the custom keys for photo mode to follow video mode so it doesn't change when you go between the two modes.
Setup Menu (Diff. Still/Mv Settings, REC w/ Shutter, Power Save Options)
Functions (Fn) Menu Settings, this would be where you can add some quick settings to access from the shooting menu. A lot of these things we just set for the custom buttons, so they're not really super applicable. But Steady Shot are good ones, you can also change your stabilization mode, focus area, stuff like that.
Different Set for Still/Mv is another great feature. Here I can select settings that I want to stay dependent of each photo or video mode. So if I'm in photo mode, I have a shutter speed and aperture set and then when I'm in video mode, I can have completely different aperture and shutter speed set. So I just check all of these options so that they're different when I switch between the modes.
Display Screen Set just keep all this on.
REC w/ Shutter definitely turn that on so you don't have to reach to the top of the housing to start recording. You can just use the trigger just like you would taking a photo.
Dial customization > Av/Tv Rotate I would keep this on Normal. When I got the camera, for whatever reason, it was on Reverse and it was really annoying. So Normal would just be like any other camera that you've used. Or if you haven't used a camera, you don't want to learn it in reverse.
Touch Operation will be on by default and you can't use the touch screen to the housing so I would just turn that off to eliminate any option of that happening and we'll skip the rest of that the same.
Monitor I like to have mine on Sunny Weather so that while it's in the housing is just a little bit brighter and I can see it a bit better.
Display Option this be where you can turn on gamma display assist but I'm in LOG, so i can’t do that.
Display LUT you'll want that to be on so that you can see your LUT and the rest of this can stay the same.
Auto Monitor Off I like to turn this to about 10 seconds so that if I'm not shooting or not fumbling around with settings after 10 seconds, the monitor will just kind of go into a sleep mode.
Power Save Start Time after a minute the camera will just kind of power down.
Auto Power OFF Temp I always set this to 'High.' Cameras that record 4K 120p or really any 4K for an extended period of time are prone to heat and eventually they will turn off. But this setting will allow the camera to just tolerate a little bit more of that heat before turning off, so just set that to 'High.'
Download the Settings
Unless you only want to use some of these customization options, the easiest way to adjust all the settings we just talked about is by downloading these settings and put the file into this folder on your SD card, then go to Setup > Reset/Save Settings > Load > and then choose “E1-IKE”.
If you have any questions about these Sony ZV-E1 settings, or anything else underwater photography related - contact us today.
Logan Wood is a published photographer, cinematographer, and Producer at Ikelite. Stemming from a great appreciation for the outdoors and living an active lifestyle, his work focuses on capturing and sharing the natural world through the latest technologies. When not in the studio, Logan can be found cruising on his bike, going to concerts, and researching where to go next. You can see more of his work at loganwood.net and on Instagram @jlowood
Additional Reading
Sony ZV-E1 // Ikelite Underwater Housing Assembly & Camera Settings [VIDEO]
Sony ZV-E1 Underwater Review (Sea of Cortez and Channel Islands) [VIDEO]
Sony PZ 16-35mm F4 Lens // Zoom Gear Installation DLM/A Underwater Housing [VIDEO]
Setting the Right Frame Rate and Shutter Speed for Your Underwater Footage [VIDEO]


![Sony ZV-E1 Camera Settings for Underwater Videography [VIDEO]](http://www.ikelite.com/cdn/shop/articles/ikelite-sony-zv-e1-underwater-camera-settings.jpg?v=1697217398&width=1500)
![Color Grading S-Log 3 Sea Lion Footage in Adobe Premiere [VIDEO]](http://www.ikelite.com/cdn/shop/articles/Color_Grading_S-Log_3_Sea_Lions_Cover.jpg?v=1697762398&width=2000)