


![Replacing Control Gland O-Rings on an Ikelite Underwater Housing [VIDEO]](http://www.ikelite.com/cdn/shop/articles/Replacing_Control_Gland_O-Rings_copy.jpg?v=1698367689&width=1500)
By Steve Johnson
Today we’re going to talk about maintaining o-rings on your housing's rotating controls. This would be any control that is operated by a knob or lever. Let’s dive in!
When to Change Control Gland O-Rings
The control knob or lever attaches to a control shaft. The shaft is sealed using something we call a gland. In normal use we don’t recommend replacing the o-rings of these controls. If you rinse your housing properly after each use, your controls will provide many years of trouble-free performance. All I recommend is to apply a little lubricant to the control shafts occasionally.
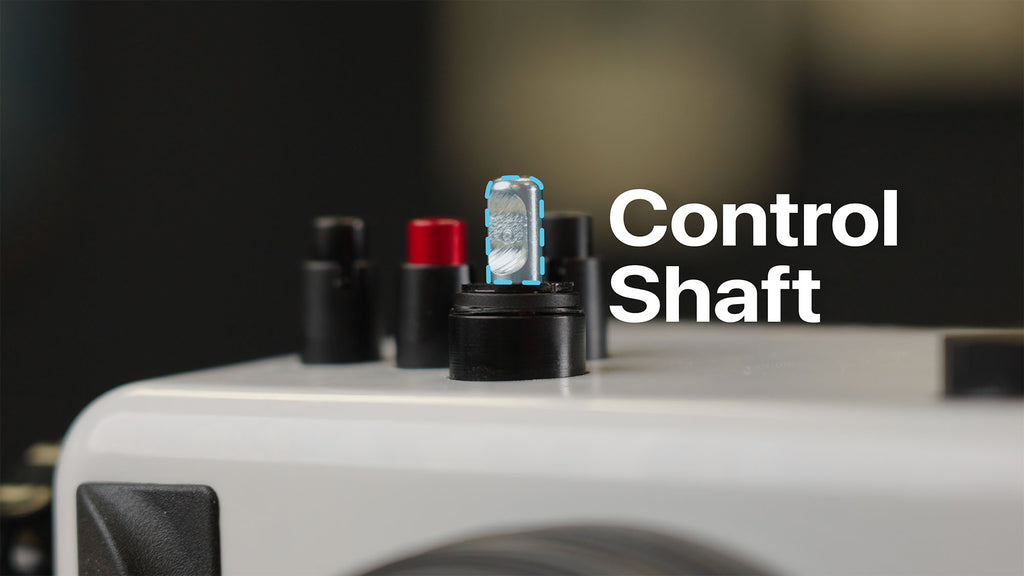
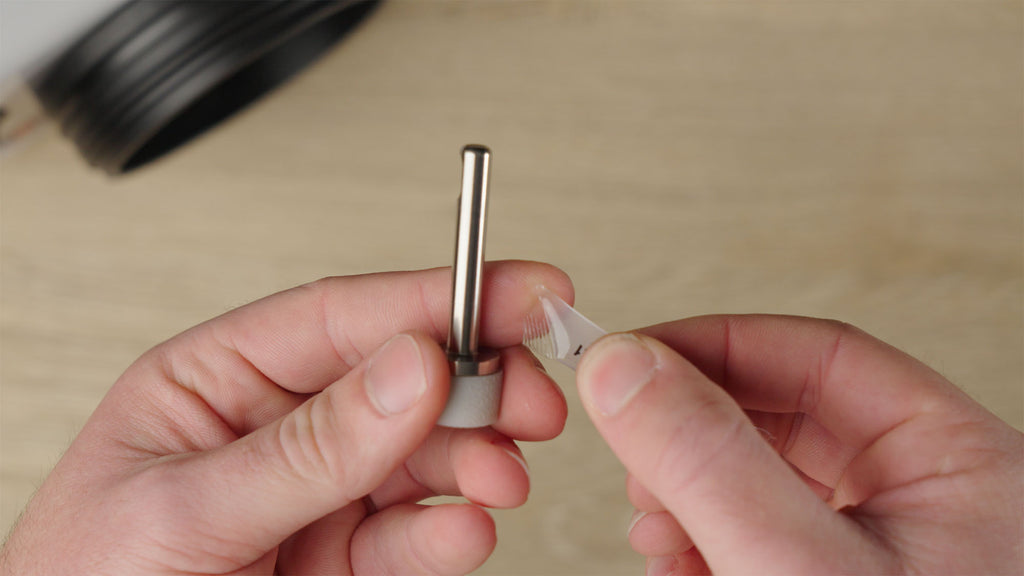
The control knob or lever attaches to a control shaft.
If your control is leaking then the best choice is to return the housing to us for service. If that’s not an option for you, you may need to disassemble the control and replace the o-rings. Let’s talk about how to do that.
Types of Control Glands
We have two piece glands and one piece glands. We’re only going to be talking about two-piece glands. There are a variety of lengths of glands in each housing. It’s a good practice to do one control at a time so that you don’t accidentally mix up the control parts.
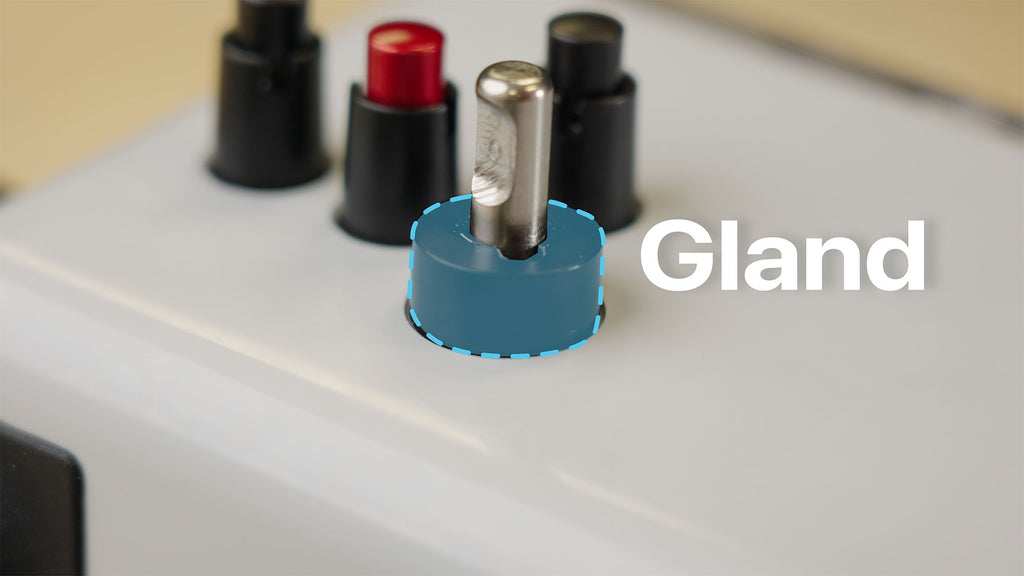
The control shaft is sealed using something we call a gland.
Removing the Knob, Control, and Gland
Loosen the set screw in the knob and remove it from the shaft. If the knob does not remove easily, then we recommend sending your housing in. At that point it will be difficult to remove the knob without damaging multiple components.
If you’re removing a lever, there will also be a shaft end cap. Remove that too. If there are washers or spacers, keep them together with your control components. They will need to be replaced when you re-install the control for proper operation.
Gently pull the control out from the inside of the housing and set it aside.
You can use pliers or channel locks to remove the gland from the housing. You may want to put tape on the ends of your pliers to avoid damaging the control gland in the next steps.
Use your pair of pliers to gently turn the gland counter-clockwise. The gland may come out in one piece. If the cap separates, set it aside and use the pliers to gently remove the body of the gland. You really want to be careful not to damage the gland in this step. Never grab the threaded portions of the gland with pliers.
With the gland cap and body separated, remove the x-ring from its seated position. Remove the o-ring from the body of the gland. Don’t use anything sharp to remove the x-ring as that could scratch the sealing surface. Discard the used x-ring and o-ring.
Cleaning the Gland and Replacing O-Rings

The metal parts of the gland can be cleaned with warm water and vinegar. Dry them thoroughly in air. Don’t use a cloth to dry them. Fibers from a cloth could remain on the parts and cause a leak.
Next replace the x-ring which sits inside of the gland body. Make sure the x-ring is clean and well lubricated. Install it flush inside of the recess in the gland body.
Thread the gland cap onto the gland body. Make sure it threads all the way down. You should be able to see the x-ring touching the inside top of the gland cap. If there’s a gap, that would create leaks down the road.
Make sure your replacement o-ring is clean. Put a light coat of lubricant on the o-ring prior to installation. Install the o-ring over the threads and into the groove on the underside of the cap.
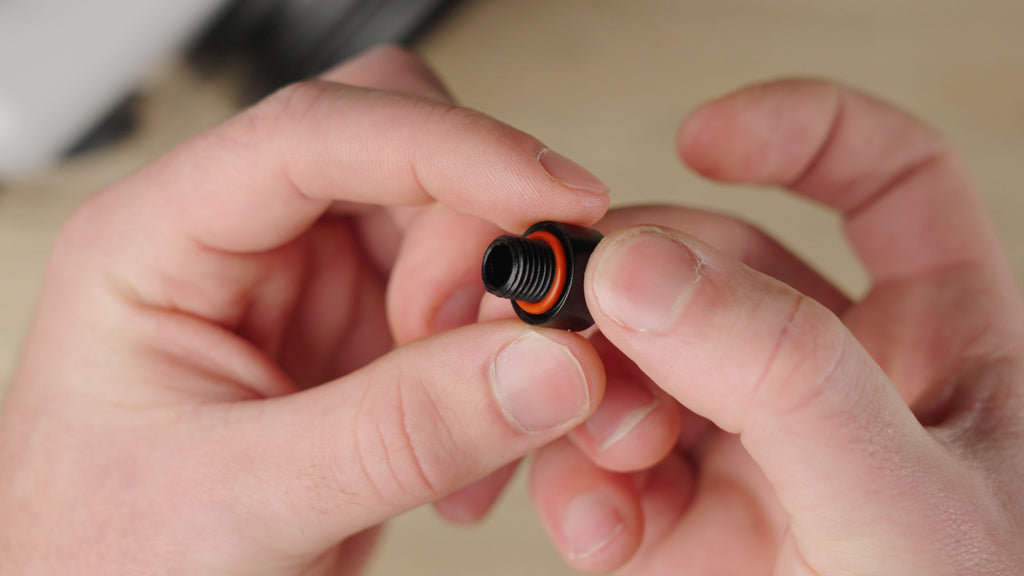
Replacement o-ring properly installed over the threads and into the groove on the underside of the cap.
Re-Installing the Gland and Control
Inspect the sealing surface of the housing. The sealing surface should be solid and clean. Send photos to us via ikelite@ikelite.com if there are any questionable abnormalities in this surface. You want to make sure there is no lint, hair, or dirt on the sealing surface of the housing or the underside of the gland cap.
Install the gland into the housing and tighten snug. Be careful not to cross-thread the gland or over tighten it. You will know it might be cross-threaded if it is difficult to turn when threading into the housing. It should thread in smoothly.
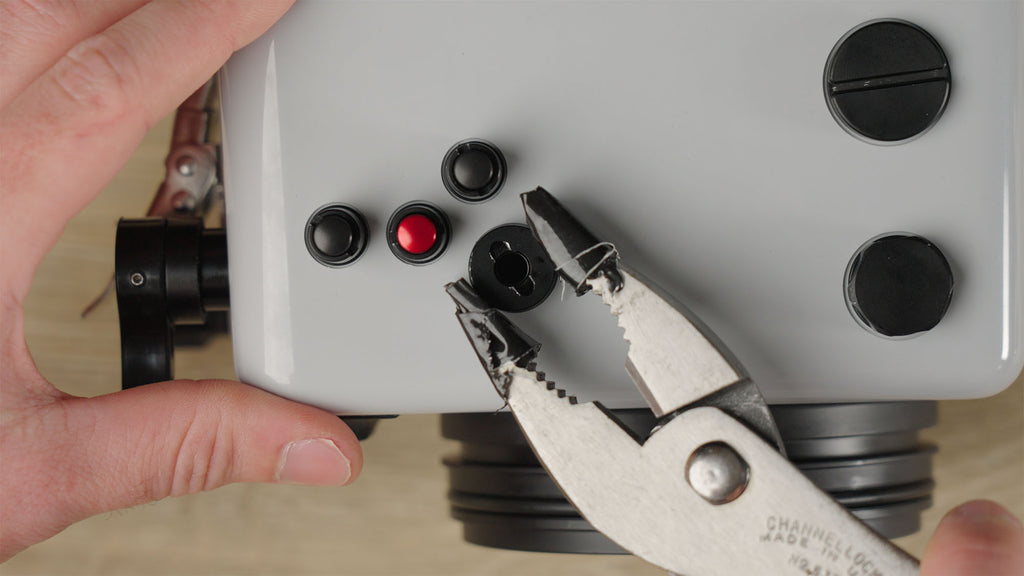
Be careful not to damage the gland during this process, we suggest using pliers with tape on the ends for this process.
Tighten it as far as it will go with your fingers. The gland cap should be barely touching the surface of the housing. Then use your pair of pliers to tighten only about 1/4 to 1/2 turn more. Don’t over-tighten. Over-tightening the gland may crack or damage the housing body and it would need to be returned for replacement.
Clean the control shaft with a lint-free cloth. Very lightly lubricate the shaft including the end of the shaft.
Re-install the control shaft gently from the inside of the housing, rotating it slightly as you push it through. Re-install the knob or end cap and lever.

The set screw of the piece attaching to the control shaft must align with the flat on the shaft. Tighten snug.
Testing the Housing
When you’re done, I recommend putting a camera inside of the housing and checking the controls. Some rotating controls may require a little adjustment of the position of the knob in relation to the control shaft flat.
Any time you’ve replaced o-rings on your housing you need to take it diving without a camera installed the first time to test for leaks. Operate all of the controls at depth to confirm waterproof operation.
If you have any questions about repairing or servicing your housing please reach to us. We’re always here to help you. Thanks for joining me!

Steve Johnson has been a team member with Ikelite for 28 years. In that time he's worked within almost every aspect of the company but has mainly focused on the service department. Outside of work you can catch Steve scuba diving, snorkeling, spending time with family and his chocolate lab rescue Maplesugar.
Additional Reading
Replacing Push Button O-Rings on an Ikelite Underwater Housing [VIDEO]
Bent Reflector Replacement for DS160, DS161, DS125 Strobes [VIDEO]
How to Care For Your Sync Cord Plug [VIDEO]
How to Install a Trigger Extension on Your Ikelite Underwater Housing [VIDEO]
DO'S and DON'Ts of 200DL and 50DL Underwater Housing Set-up [VIDEO]
![Sony ZV-E10 // Ikelite 200DLM/A Underwater Housing Assembly [VIDEO]](http://www.ikelite.com/cdn/shop/articles/Sony_ZV-E10_Housing_Assembly_copy.jpg?v=1698332190&width=2000)
![OM System TG-7 Underwater Housing // Setting it Up with TTL Strobe [VIDEO]](http://www.ikelite.com/cdn/shop/articles/OM_System_TG-7_Set-Up_Cover.jpg?v=1699020039&width=1990)