


![OM System TG-7 Underwater Housing // Setting it Up with TTL Strobe [VIDEO]](http://www.ikelite.com/cdn/shop/articles/OM_System_TG-7_Set-Up_Cover.jpg?v=1699020039&width=1500)
By Jean Rydberg
If you're looking for an underwater camera and housing that's super compact yet capable of incredible imaging, the OM System TG-7 is an amazing choice.
The Ikelite housing is the only housing to support the incredible FCON-T02 Wide Angle Fisheye Lens which allows you to shoot everything from super wide angle to close-up macro on the same dive without adding bulk to your system.
If you want to see more content like this, make sure you're following us on YouTube.
Introduction to the OM System TG-7 and FCON-T02 Fisheye Lens
The OM System TG-7 camera is the follow up to the previous model Olympus Tough TG Series and it's a great camera to take underwater if you're looking for something that's really small and lightweight and easy to travel with. So let's look at what it takes to put it in a housing.

The FCON-T02 is our go-to lens for the OM System TG-7 camera. It is overall very compact and easy to use and can take you from macro photography to wide angle all on the same dive.
I've chosen to show you our housing that has a dome port to fit the Olympus FCON-T02 wide angle fisheye lens. That's my lens of choice when I'm going to shoot underwater because it allows me to get much closer to my subject. It can also give you a zoom through so you can shoot macro and wide angle on the same dive just using the zoom of your camera. It's super small and lightweight compared to a lens that you would attach to the front of a housing, those tend to be bulky and you can only really use them if your camera's in the housing. This lens you could use on its own with the camera, even on the surface.
Ikelite Housing Features
Inside the box you'll find your housing with the dome port already attached, instruction manual with QR code to take you directly to helpful videos, Ikelite stickers that you can add to your gear, and an accessory kit with lubricant and our lanyard.

Our safety breakaway lanyard for the TG-7 is made to snap apart if you were to get caught on something underwater, thus preventing a dangerous situation. It is not intended to carry your system above water, doing so could damange your gear.
This lanyard is a safety breakaway lanyard. You can attach it to either the lanyard hole on the housing or you can attach it to your handle assembly. But do not want to carry your housing on the surface using the lanyard. It's only for safety while you're underwater to attach it to your wrist. It's breakaway so that if it was to get caught on something, it will snap apart and you won't be attached to something underwater, which could be a very dangerous situation. So please keep in mind that it's not going to hold the weight of your system on the surface and it would break if you were trying to carry it by the lanyard topside.
So I'll take off the neoprene protective port cover from the dome board and put that aside. On my housing, I like that I have an ergonomic shutter lever that's on the side that brings my shutter trigger all the way to the side which is really comfortable to use underwater. I can also extend this trigger lever if I was to use a right handle so that it would be right there where my finger is. It's much more comfortable than trying to reach over to the top of the housing to press a shutter button.
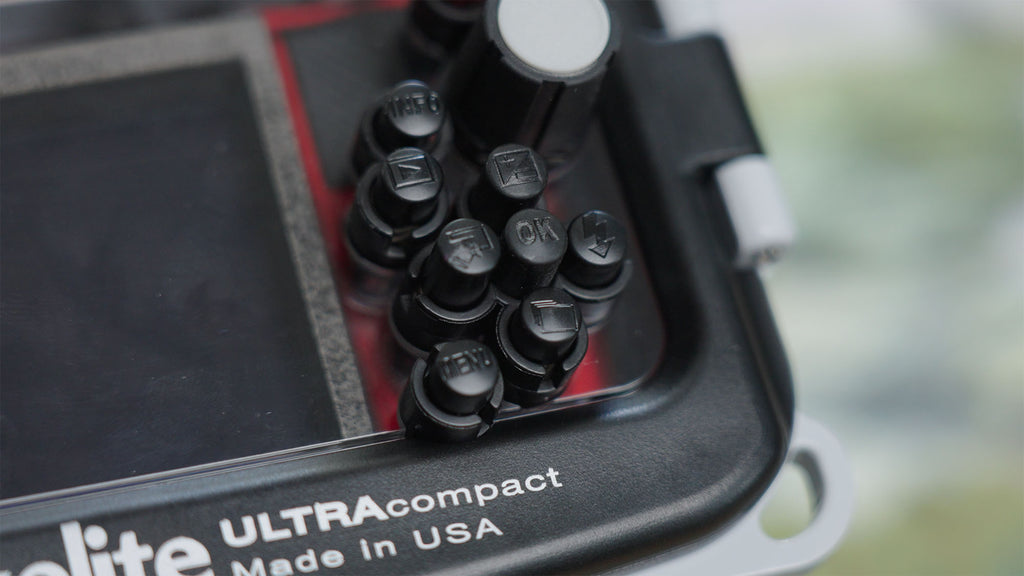
These push buttons are marked by laser engraved indicia, meaning the markings are never going to fall off or fade.
On this housing I have a zoom control, the on/off control, dials for the camera on the front and the back, and I have all of the indexed push buttons on the back of the housing. I also like that the record start stop button is bright red, so that stands out to me and makes it really easy for me to start and stop my video while I'm underwater.
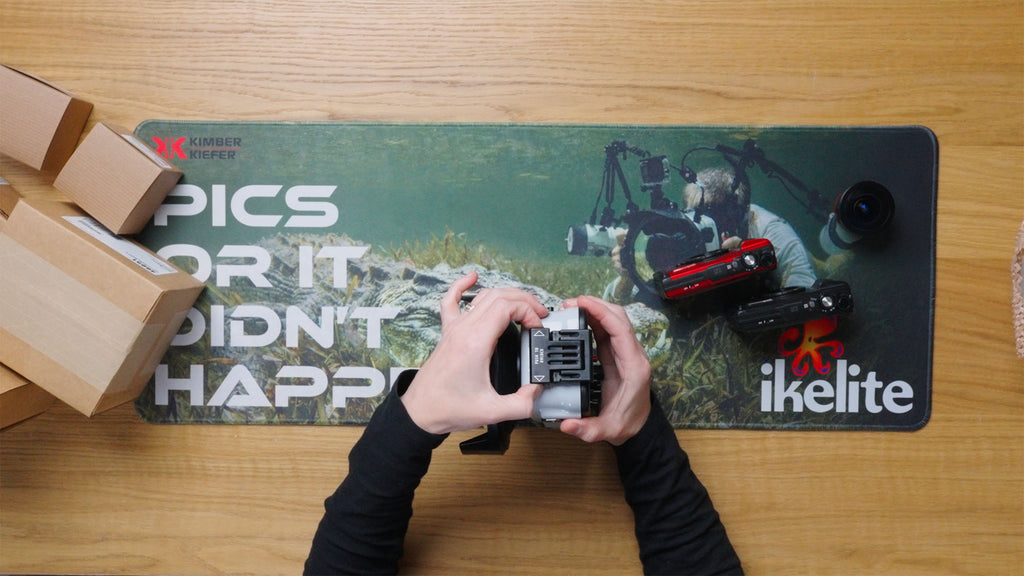
Installing the TG-7 inside the Underwater Housing
When I go to put my camera in, I'm going to set the housing down on the front of the dome port flat on the table. There's two push buttons on the locking latch on the side of the housing. Push those and pull the latch out and open to unlock the housing.
Before I put the camera inside the housing I first need to install the FCON-T02 lens. To do that I'll take off the beauty ring on the front of the camera revealing and bayonet mount. Line up the white dot on the lens with the white dot on the front of the camera and bayonet the lens onto the camera.
When I put my camera in the housing I push it all the way down to make sure that the camera is flat and touching the support ribs on the inside front of the housing.
Now I'm going to grab my included tube of lubricant. This tube looks small, but it actually will last a very long time if you just keep it inside of a little plastic baggie in your kit. I'm only going to squeeze a very tiny amount onto my index finger and then I'm going to run this around the visible surface of the o-ring. Unless there's a lot of sand or dirt on your o-ring, you can leave the o-ring on the housing when you lubricate it.
Whatever excess lubricant I have on my finger I'm going to put along the housing sealing surface. That's just going to make a really smooth movement when the housing closes and the o-ring is pushing into the sealing groove.
When locking the housing, both of the buttons on the latch should have come back out and should no longer be recessed.
Now, I close the back of the housing by reattaching the latching mechanism. I want to make sure that it's clicked and I can even pull on it a little bit to make sure that it's locked.
Now my housing is set up and ready to use. I would typically want to turn it on, make sure all of my buttons and levers are working and that I understand what they're doing. And I would also try putting this in a rinse tank or a clean bucket of water and watch that I'm not getting water inside that I'm not seeing a stream of bubbles coming out, then I know that it's waterproof when I get ready to dive.
The good news is, if you were to have a problem with your housing, the TG-7 camera is also waterproof to 50ft (15m). So generally it's probably not going to damage your camera if you were to make a mistake and something bad happens and that's a really nice feeling when you're getting ready to go diving.
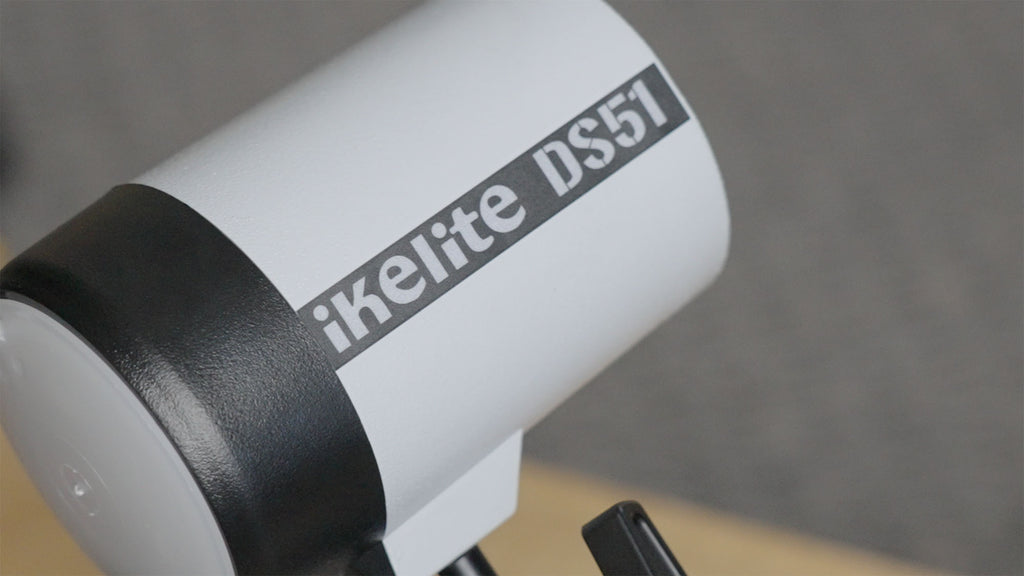
Choosing a Strobe
Now that I have my housing set up, I want to add a strobe. A strobe is going to bring out a lot of color and detail in my images that I'm not going to get if I shoot with the camera alone. So I've chosen to add the DS51 Strobe. That's the most popular choice for this camera because it's also the smallest and lightest option that you can put on to the system. I can also use my DS51 Strobe with all kinds of other systems and get TTL that's specific to that system in the future. I could attach a Canon TTL transmitter, or a Nikon, or anything I want to transition to later down the road.
The DS51 is a great option that can grow with me as I grow in underwater photography. It is also travel-friendly and easy to use.
Inside the DS51 box there are more stickers for my gear, the DS51 instruction manual, and my DS51 strobe. But first I'm going to need a strobe arm to position this in relation to my system and also a tray and handle to attach the strobe to the housing. So let's get those things set up.
Attaching a Tray with Handle
There's three sets of hardware included with the Action Tray II with Left Handle for Compact Housings for this I will need the 1/4-20 mount hardware that has two screws and two washers. The other hardware is for different types of housings.
To install the tray and handle I'm going to turn the housing over and mount my handle so that it's in my left hand when I'm holding the housing. I'm going to align this with the two 1/4-20 holes in the bottom of the housing, add a washer to each screw and get it started into the mount, then I'm going to take my screwdriver and get those really tight.
The handle has a quick release button on the back so that will allow me to attach my strobe arm. I could also add a second section to this tray so that I have a right handle, in that case then I would want to put a trigger extension on my shutter trigger.
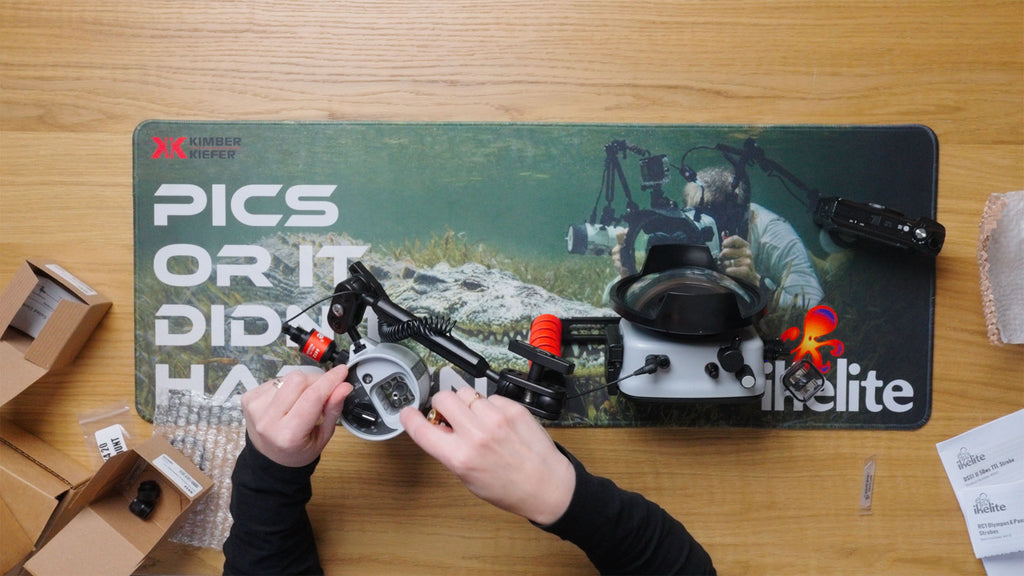
Attaching the Compact Ball Arm
I have my Compact Ball Arm and it has two clamps and a section that goes into the top of the quick release handle. I'm going to loosen it enough that I will be able to fit the ball mount of the strobe in the clamp. What I do is I turn one of the clamp plates 90 degrees and that will allow me to just put the ball on and then rotate it again so that they're parallel and tighten the wing nut. Now I'm going to press my quick release button on the housing and slide the ball arm in and now it is attached.
Attaching the RC1 TTL Receiver and Fiber Optic Cord

The RC1 allows you to focus on framing your shot and make sure your settings are looking right in the camera without having to worry about strobe exposure.
Now I need to add my RC1 TTL Receiver, which is what's going to allow the strobe to communicate with the camera and give you automatic strobe exposure.
The RC1 has a protective cap on the end of it. I can just unthread this and put the cap back in the box. Now I can also remove the bulkhead cap from the DS51 Strobe and put that aside as well.
I'm going to put a small amount of lubricant on my fingertip - and again, I'm not going to take this o-ring off of the RC1 - we'll leave the o-ring on there and apply this small amount of lubricant around the visible surface of the o-ring.
I don't want to get any lubricant on these gold pins and receptacles or anywhere else on this. Just a little bit on that o-ring. I'm going to line up the pins and receptacles of the strobe with the pins and receptacles of the RC1, push it in, and make sure the retaining ring is threaded all of the way down and that the retaining ring is meeting the bottom of the bulkhead on the strobe.
Then I need a Fiber Optic Cord to attach this to my housing, and that's going to transmit the flash signal from my camera. The fiber optic cord has two ends that each have their little o-rings on them. This is not a waterproofed piece, so you don't have to worry about lubricating these o-rings or anything. It just simply pushes in to the RC1. I'm going to give the cord a little wrap around the ball arm and then push it into the fiber optic port on the top of the housing.
You can see on the top of the housing that I have two fiber optic ports so that I could add two strobes to my system, which can be a really great idea if I'm shooting wide angle with this circular fisheye lens.
Be care that your batteries line up with the sticker indicator that's on the inside of the battery compartment of the strobe. You don't want to put batteries in the wrong direction, or that could have adverse implications.
Now I have everything set up and I'm going to put batteries into my strobe. I've taken off the battery door of the DS51. The DS51 battery door is unique in that the o-ring stays in place, you don't need to lubricate it, you don't really need to do anything with it other than make make sure it's clean. When I make sure that's clean and the top of my battery compartment is clean then I'm going to orient it with the notch on the strobe, and tighten it all the way snug with my fingers. Once I tighten it all the way, I'm going to be able to see that that o-ring has now formed a solid black line around the perimeter of the battery compartment, that's how I know that that is sealed and ready to go.
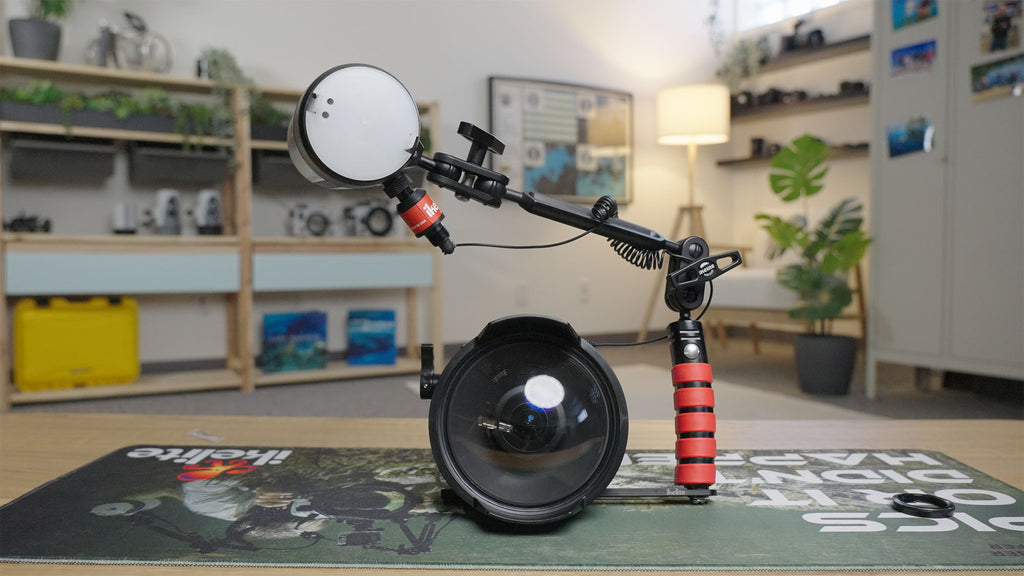
Now I'm going to turn my camera on, turn my strobe on to TTL, and make sure that I'm in the RC flash mode on the camera and now I'm ready to take a photo.
zthat's everything you need to know about setting up the TG-7 in the housing and getting ready to go shooting underwater. If you have any questions about this system, setting it up, or taking photos underwater - please send us an email to ikelite@ikelite.com because we're always here to help you!
The OM System TG-7 camera is compact, lightweight, and travel-friendly. It's a great camera if you're just starting out, want a backup system, or want to keep your gear as compact and lightweight as possible.
 Jean Rydberg, daughter of Ike Brigham, became President & CEO of Ikelite in 2006. Prior to that, she wisely pursued a degree in Astronomy & Astrophysics to prepare herself for the challenges of running a technology-driven manufacturing business with global distribution. Jean fully embraces the need to travel outside of her hometown of Indianapolis to experience good diving. She believes that any camera is capable of amazing results in the right hands, and anyone can become a great photographer given the right advice. When she's not working she's spending time with her husband, cats, and two daughters (though not necessarily in that order).
Additional Reading
OM System TG-7 in Ikelite Underwater Housing for Olympus Tough TG-6, TG-5 [VIDEO]
Using an OM System TG-7 in an Olympus TG-5, Olympus TG-6 Housing
The Secret to Underwater Photography with Olympus and Panasonic Cameras [VIDEO]
Olympus FCON-T02 Circular Fisheye and Tough TG-6 Underwater Photos
Wide Angle Fisheye to Macro on the Same Dive with the Olympus Tough TG-6
![Replacing Control Gland O-Rings on an Ikelite Underwater Housing [VIDEO]](http://www.ikelite.com/cdn/shop/articles/Replacing_Control_Gland_O-Rings_copy.jpg?v=1698367689&width=2000)
![Canon R7 // Underwater Housing Assembly Ikelite 200DLM [VIDEO]](http://www.ikelite.com/cdn/shop/articles/Canon_R7_Assembly.jpg?v=1700084577&width=2000)