


![Canon R7 // Underwater Housing Assembly Ikelite 200DLM [VIDEO]](http://www.ikelite.com/cdn/shop/articles/Canon_R7_Assembly.jpg?v=1700084577&width=1500)
By John Brigham
The Canon R7 is an amazing system to shoot underwater right now thanks to its 33 megapixel resolution, in-body image stabilization, and 4K video using the full width of its sensor. John Brigham walks you through the simple rear-loading installation with the RF 18-150mm kit lens.
Ikelite 200DLM/D Underwater Housing for Canon EOS R7 # 69746
Canon's RF series has been an impressive line of cameras, but one of my personal favorites is the R7, it has in-body image stabilization and a much bigger battery so I can shoot for a lot longer with this camera. It's a little bit pricier than the R100, for example, but if you can spring for it, I would highly recommend it.
In this video I have the 18-150mm lens, which is the kit lens for this camera. But check out our list of The Best Canon RF-Mount Lenses for DLM Underwater Housings to find out which one would work the best for you.
Adding a Vacuum Valve
Now, for my kit, I like to add the Vacuum Kit # 47012. This adds a mechanical reinforcement to all the closing mechanisms on the housing, and it also helps me prevent a forgotten o-ring or some potential leak. If it's airtight, that means water won't get in.
First take the housing, set it down on its front port mount, we’re going to lift and unlock each of the lid hooks take off the back and set it aside.
You'll notice on the outside of the side of the housing you have a 1/2-20 plugged porthole. What we need to do is remove that port with an 11/16 wrench and it will unthread from the side of your housing.
Generally speaking, you won't need to use this plug again, but I'd keep it with your spare parts. Check the sealing surface of that opening to make sure that there's no debris there.
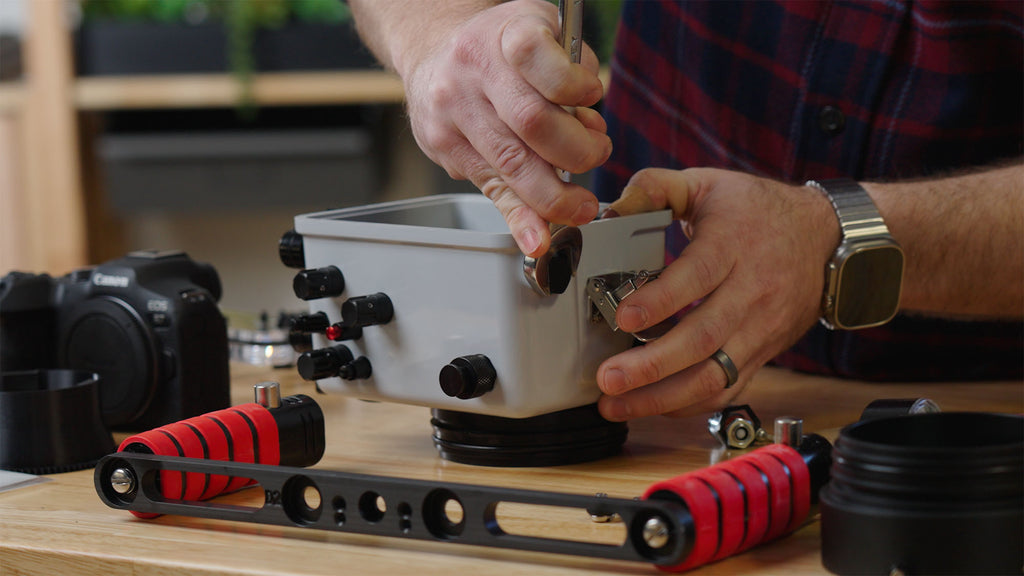
Now we're going to take the vacuum valve and you'll notice that there's a sealing gasket, that'll go on to the inside of the housing. Remove the nut and take the retainer for the chain that holds the cap. What I like to do is take the button and then I like to position that so that the chain is just one position away on the hex. Then I will insert the valve through. It doesn't thread in, it just goes through to the hold and then take the nut and thread it on from the inside, starting with your fingers.
Ensure you get the button positioned in a place that's convenient for you to access. I tighten it down as much as I can with my fingers, and then take a 9/16 wrench from the inside while holding the valve on the outside and snug that up.
It's important that you do not over tighten this. You want to make sure that your gasket on the outside has a good compression. Check the outside. Make sure you didn't extrude the gasket.
Attaching the Camera Mount
Inside, you're going to notice the camera mount. We'll remove that by sliding it out of the housing. There’s a 1/4-20 screw that corresponds to the 1/4-20 hole on the camera. Line that up with your camera, take a flathead screwdriver, and make sure that that gets snug down to the camera. You don't want to get crazy, but you do want to make sure it's snug. Any movement between the camera mount and the camera will translate to misalignment in the controls. So now you have your camera body ready to go into the housing.
Attaching the Canon RF-S 18-150mm Anti-Reflection Ring
In this particular case, we're shooting the 18-150mm kit lens, which is a rear loading lens. So let's go ahead and prep that and get it ready to go before we install it.
In this case, you'll notice that there's writing on that front of the lens that indicates the designation of the lens itself. Now, when you're shooting through a port, light will come in, bounce off those numbers, hit the port, and then come back in, which you can see ghost images of the numbers. So we're going to use an Anti-Reflection Ring for Canon RF-S 18-150mm f/3.5-6.3 IS STM Lens # 0923.17 to prevent this.

Take your time with this process, you only have to apply this ring once.
What I like to do is get it started on the far end, away from the cut and then work it from that direction so that goes all the way around the circumference of the lens.
Now we can take our camera body, take the body cap off, and replace it with the lens. Next we can attach our Dome Port and Zoom Gear.
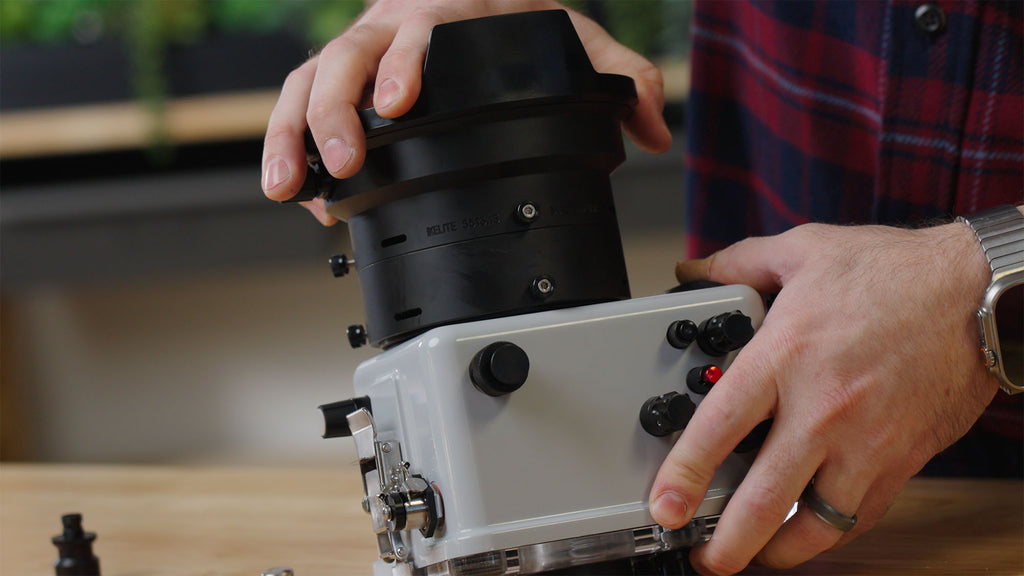
Installing the Dome Port & Zoom Gear
Let’s turn our attention to the housing itself. Go ahead and reattached the back by lifting the two lid snaps over the hooks of the back, push down, and then check to make sure that it's locked in place.
Turn the housing so you can see the inside front of the port mount. I'm going to take a little bit of Ikelite lubricant right on my fingers and then run that around the o-ring. The lubricant doesn't create the seal it just helps overcome the friction when you put the extension on or the port on. This process lets you feel for debris or any hair or anything, give it a good visual inspection as well.
The 6-inch dome is far more compact and lightweight for travel as compared to larger, glass domes.
For this kit lens we're going to start with the DLM 1.2 Inch Port Extension # 5516.65. Make sure that all three thumbscrews are backed out and cleared of the inside diameter. Then I like to take my finger and just make sure that the sealing surface of the extension is also clean and free of debris while applying a little bit of that lubricant.
Take one of the thumb screws, align it with the top of the housing, press the extension into place. We're going to take the Zoom / Focus Gear # 5515.16 with the friction pads facing in towards the camera body, and drop that into the extension.
Then you're going to attach your DLM 6 Inch Dome Port with Zoom # 5516.15 just like you did with your extension. Make sure that the three thumbscrews are not protruding to the inside diameter and checking your sealing surface before you put it onto the extension. Take the drive gear and make sure that's backed out all the way. Now I like to align the shade and the top thumb screw with the thumb screw at the top of the housing. Align the two pieces press into place, check that your drive gear is going to drive your zoom gear.
Then hand tighten each of the thumb screws. If you don't have the pieces all the way pushed together, you'll notice that they're bottoming out, meaning that you don't have a piece pushed down all the way.
Installing the Camera
Now we can flip the housing back over, take the back off, and move the controls out of the way so they don't interfere with the camera as it slides in. Slide your hotshoe on, making sure it's pressed fully forward. Take your camera (with the mount attached), align the mount with the base inside the housing, and insert. You will feel the friction pads engaging the lens as you slide the camera in, realign your back button focus, AF-ON control, and make sure your other controls are aligning with your camera body.
Check this sealing surface to make sure you don't have any hair or debris and check your o-ring for the same. This is a compression o-ring, so no lubricant is required for this particular o-ring seal. Now you can reattach the back, using the lid snap hooks, and double checking that these are secure.
Adding a Trigger Extension
Before we add the tray and handle we're going to add a Trigger Extension v2 for Shutter or Back Button Focus # 4077.95. You can also add one to the back button focus if you want. For now we will just do the shutter, but it's the same procedure for both.
Now, in order to do that, you're going to want to loosen both set screws on the shutter lever itself. That will come off and you'll take the extension and replace the shutter lever and then snug it down. Then, take the shutter lever and you're going to place it back on top of the extension.
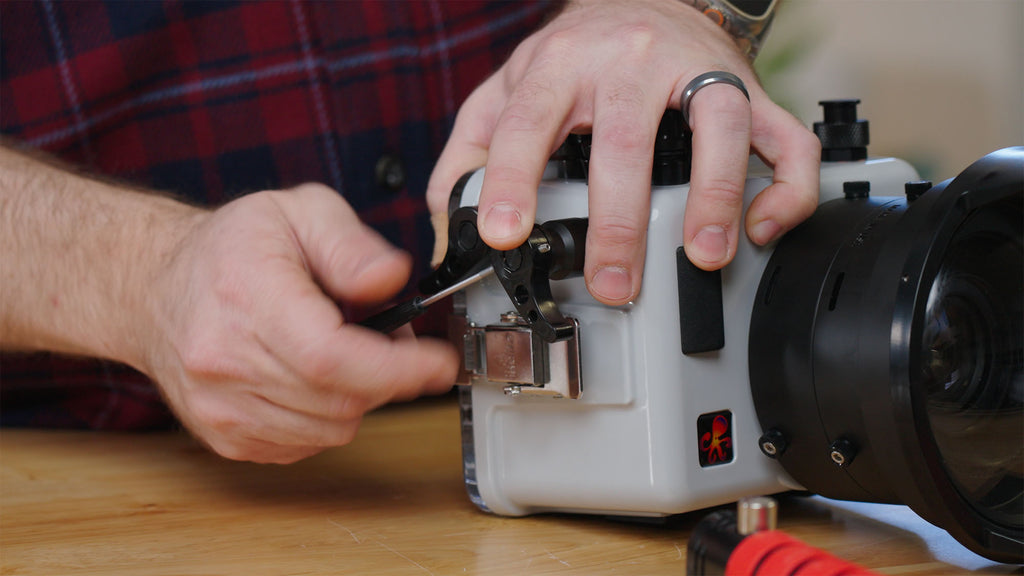
The extension has an octagonal shape - that means that you have several positioning choices of where you can have this lever. Either to pull it like a trigger or to push it, whichever is more comfortable for you.
After you have your lever positioned according to your preference, tighten each of the two set screws opposite each other, no need to over-tighten, just make sure it's snug.
Adding a Dual Tray and Handle
Now we can add our Tray with Dual Quick Release Handles for Compact and Mirrorless Housings # 9523.64. Take your tray and handle, and align it so that the quick release buttons will be facing you when using the housing. Position the tray and handle so it corresponds with the holes on the bottom of the housing, take the two screws with the two washers and drop them into place, and using a flathead screwdriver get them both started so the tray is evenly attached. Once everything is aligned properly you can tighten each screw down all the way.

Adding the dual tray and handles will give you more stability in the water and provides you with two mounting point options for strobes.
Using a Vacuum Pump to Check for Leaks
Technically speaking at this point we have a fully assembled waterproof case, but we are going to use the vacuum pump to evacuate the air on the inside and create a pressure differential.
In order to do that we're going to push the button on the side of the valve, which will release the cap. The cap has a double o-ring seal and I like to add just a little bit of lubricant to those two o-rings because it is a piston seal. If I keep that lubricated it makes the cap easier to come in and out. You'll notice the cap is tethered, so I can't really lose it and it will help remind you to replace the cap when the vacuum pump is not attached.
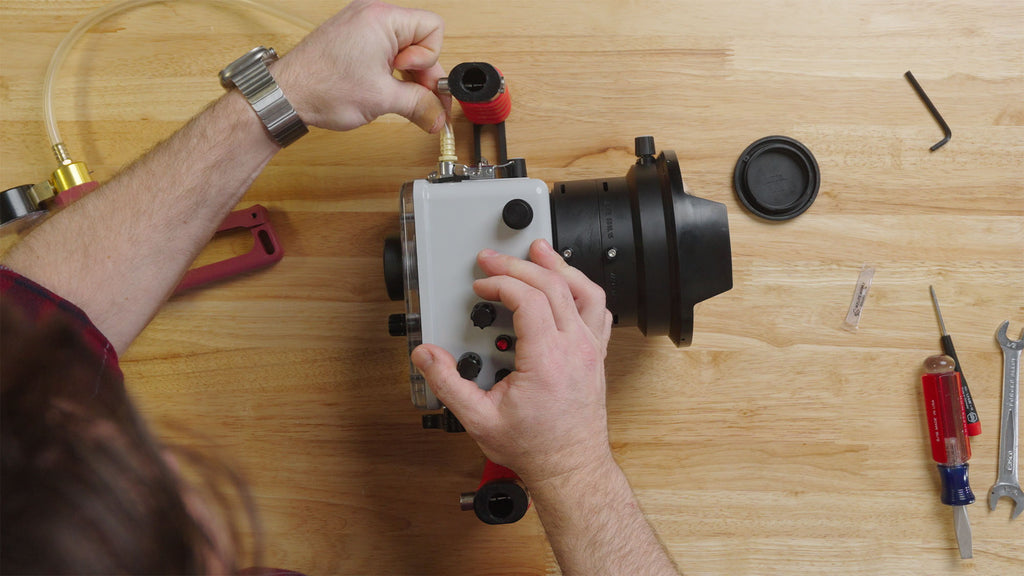
Always ensure your vacuum valve cap is reattached when the vacuum pump is not in use.
With the cap removed, attach the barb of the pump and then pump the housing. You're not looking for a specific number. You're just looking for a reference number to ensure the vacuum is being maintained. In this case, I will go to 10mmHg on the pump. Initially I will look to see that this is staying at 10mmHg. If you see there's an immediate drop, it means that something was not assembled correctly or you have a leak somewhere.
Now, the longer you can let this set, the longer you can see if there's any issues. What I recommend is to make sure that there's not an issue in the pump itself - since I'm not diving with it - and take the pump out and replace it with the cap. If you can get away with at least 15-20 minutes, that's good and even better if you can let it sit overnight. Then, reinsert the pump and check that the number jumps right back to 10mmHg, this lets you know that it held that pressure differential all night long. You're going to want to go diving with the housing under a vacuum. Always being sure to replace the cap of the vacuum valve when the vacuum is not attached.
Questions?
The R7 assembly is as simple as that! If you have any questions about this assembly, the R7 camera, or any of our products whatsoever, reach out to us today!

John Brigham is the Vice President & head of product development at Ikelite. He was born with a flair for design and an entrepreneurial spirit as son of Ikelite founder Ike Brigham. He worked his way up in the business and is a natural fit in the R&D side of things. John dives the equipment as much as possible to test product and put himself in the "fins" of the user. You may also find him on the other end of an email or phone call when you reach out for product advice and support. When he's not underwater he's flying drones, setting off rockets, training his German Shepherd "T2", and spending time with his family.
Additional Reading
Canon EOS R7 Underwater Photos & Review
Featured Customers | Matt Dowse From the Canon 7D to the Canon R7
Burst Shooting DS230 Strobes & Canon R7 // Swimming Photography with Kids
The Best Canon RF-Mount Lenses for DLM Underwater Housings
Canon R10 vs R7 // Best Crop Sensor for Underwater Photography [VIDEO]
Canon Mirrorless Lineup Explained for Underwater [VIDEO]
TTL Underwater Strobes for Canon R10 (and R7) // Setting It Up [VIDEO]
![OM System TG-7 Underwater Housing // Setting it Up with TTL Strobe [VIDEO]](http://www.ikelite.com/cdn/shop/articles/OM_System_TG-7_Set-Up_Cover.jpg?v=1699020039&width=1990)
![Canon R8 // Underwater Housing Assembly Ikelite 200DLM/D [VIDEO]](http://www.ikelite.com/cdn/shop/articles/canon-r8-assembly-cover.jpg?v=1701287002&width=2000)