


![OM-1 OM System Underwater Housing Assembly // Ikelite 200DLM/B [VIDEO]](http://www.ikelite.com/cdn/shop/articles/om-1-cover.jpg?v=1681433021&width=1500)
With Mike Rabideau
The OM-1 is a top choice of wildlife photographers due to the incredible telephoto lens options available in lightweight form factors. While we aren't using telephoto lenses underwater, it's still a great choice for shooting below the surface. It provides fast autofocus, good image quality, and sharp 4K video with in-body image stabilization. A wide range of lenses are available from both Olympus and Panasonic for the micro four-thirds lens mount.
In this video, Engineer and Product Specialist Mike Rabideau shows you exactly how to set up the OM System OM-1 mirrorless camera from camera installation to lens port attachment and setting up TTL DS230 strobes. Watch now, or read the article.
Installing the Camera
The OM System OM-1 200DLM/B Underwater Housing is compact and ergonomic, making it convenient for travel and easy to handle.
Begin by open up the housing. There are two lid snaps on each side of the housing, and each one of these lid snaps has a lock. Depress the lock and then lift up on the lid snap and remove them from the hooks and the back will come off.
Next, attach the camera mount to the camera body. There's a screw in the center of the mount and it will screw into the tripod hole of the camera. It is highly recommend that you use a screwdriver to securely fasten the mount to the camera - not a coin or your fingers - we want this to be very secure on the camera. Any kind of movement of the camera against this mount can throw some of the controls off center a little bit.
Then, attach the TTL hotshoe (needed for triggering external strobes using TTL). Start by removing the manual hotshoe from the housing. There's a small button on the bottom of the hotshoe attachment, press it and it will pull out from the bulkhead. The TTL hotshoe will have a yellow indicator band at the end so that you know it's designed for TTL use.
Once the mount is attached to the camera, and you've got the appropriate hotshoe installed, clear the control shafts out of the way so that the camera can be easily installed into the housing. The camera mount slides into the camera base and the camera will drop into the housing front. Reposition the AF-ON control and then install the back. Align the clear acrylic back onto the housing, lift up on both of the lid snaps, and push the down on them both at the same time. Double check to ensure the lid snaps are in the locked position.

"[OM-1] Auto-focus and subject tracking performed well even in the lower light levels under the kelp canopy off the coast of California’s Channel Islands. The ability to half-depress the shutter – or use back button focus – and accurately track a subject’s eye is a great advantage underwater." - Jean Rydberg
Lens and Zoom Gear Installation
Position the housing so the front (port side) is facing you. First, remove the lens body cap from the camera then set the zoom gear into the housing, then drop the lens in through the zoom gear. Align the red dot on the lens with the camera body and install as you typically would.
To remove the camera from the housing, use the lens release control located on the side of the port and rotate that clockwise. This will depress the lens release button on the camera body and allow us to rotate and detach the lens from the camera body.
Attaching the Port
- Ports are determined by the lens(es) being used, to determine which port(s) you need for your housing, visit our Port Chart. Need help picking a lens? Email us for advice!
With the lens and zoom gear installed, it's time to attach the port. Ensure that the small thumbscrews are unscrewed so that they are flush and clear the inside lip of the port. Next, orient the zoom control so that it is on the left side of the housing. From here, push down firmly until you feel the port seat into position. Now, tighten the three thumbscrews. They don't require any tools or to be overly tightened. Tighten them just so they're snug and finger-tight.
Ensure that you've attached everything correctly and the zoom gear is functioning properly by looking down in through the housing, rotating the zoom knob and ensuring that the lens is zooming accordingly.

The 6-inch dome port with zoom is far more compact and lightweight for travel as compared to larger, glass domes.
Dual Handles: Benefits and Installation
The Tray with Dual Quick Release Handles provides extra stability when shooting underwater. Additionally, the dual handle system is beneficial when handing your gear up to a dive boat. The bright red handle provides a clear place to grip and avoids someone accidentally grabbing your gear by a sync cord or the port.
To attach the tray and handles, turn the housing over so the bottom is facing you. Line the dual train handle up with the corresponding holes on the bottom of the housing and insert the washers and screws into the holes and tighten using a screwdriver.
Attaching the Customizable Trigger Extension
For optimal ergonomics, we recommend installing the Trigger Extension v2. This will bring the shutter lever closer to the handle and provide maximum comfort.
To install the trigger extension, remove the shutter lever via unscrewing the set screw. Now you can attach the trigger extension to the hex shaped cap underneath. It doesn't matter which direction you put this on, as long as it's convenient for you. Most orient it for use with the index finger, like a trigger, though some invert the lever and push with their thumb to activate the shutter. Try different configurations to find the best fit for you. Then, tighten the set screw and reattach the shutter lever.

The Tray with Dual Release Handles coupled with our Trigger Extension v2 make this system stable, comfortable, and fun to shoot underwater.
DL3 DS Link TTL Converter
Life moves fast, especially underwater. If you're shooting with strobes, a TTL converter is the ultimate time and energy saver. Let the TTL converter worry about accurate strobe exposure so you can stay focused on composition and what's happening around you.
First, unscrew the bulkhead cap from the housing and pull it off. Save this and store with your spare parts because when you're not using external strobes, you need the bulkhead caps installed on the housing. Now, with the bulkhead cap removed, line up the three pins and two receptacles on the end of the DL3 with those corresponding on the housing bulkhead, simply push it in and then rotate the collar down until it stops and is snug.
Once the DL3 TTL converter is attached to the housing, then attach a sync cord by lining up the receptacles of the TTL converter with the sync cord and turning the collar until it's snug. When using dual strobes, utilize the dual sync cord. When using a single strobe, utilize a single sync cord.
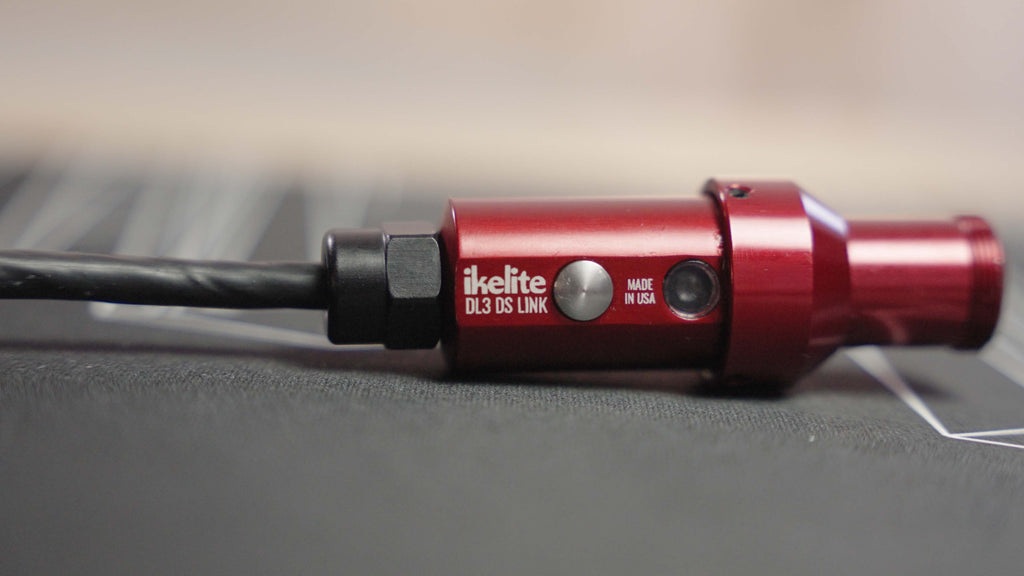
Take the guess work out of strobe exposure. The DL3 DS Link TTL Converter will adjust the power of your strobe automatically to give you correct exposure with every shot.
Attaching Strobes and Ball Arms
The Wide Angle Ball Arm is the most popular choice for any mirrorless or DSLR camera system. The two segment arm is easily adjustable on-the-fly and perfectly suited to any shooting scenario from macro close-up to super wide angle.
Now, attach the ball arms to the housing. Located on the bottom of the arm there's a quick disconnect pin that indexes into the housing handle. On the back of the housing handle there's a silver button, depress this and then the arm will slide in and lock into place.
The DS230 Strobe is our newest, most powerful strobe, and it's making waves among the professional underwater photography community.
The strobe comes with a one inch ball mount on the bottom, attach this ball mount to the end of the strobe arm by inserting the ball mount into the ball clamp and finger tightening the wing nut grip. Ensure the wing nut grips will be facing you underwater for ease of access should you need to adjust your ball arm.
Once the strobes are attached to the arms the next step is attaching the sync cords to the strobes. Remove the dust cap from the dual sync cord. The long ends of the sync cord always plug into the strobes, the short end of the sync cord either plugs directly into the housing or into your TTL converter. Ensure your cords are in the proper configuration and plug the cord into the strobe and turn the collars so they're snug.

"With predator encounters, you might miss a part of a bite sequence or animals interacting that may never happen again, so having the extra lighting firepower is even more crucial. Bottom line - I love my DS230s." - Ken Kiefer
System Testing
Before you get in the water, turn the system on and verify that everything is working properly. First turn on the camera and then each strobe. Next, turn the strobe dial to TTL. When you see the indicator light up in red, the strobes are ready to use.
Next, check the TTL converter. The LED indicator light will shine blue to signal that it is in TTL mode. If you want to switch to manual exposure press the silver button on the TTL converter one time and the LED will change to red, that indicates that you're in manual mode.
Lastly, fire the strobes. Check for the double flash and a green indicator light on the strobe, this indicates that it was a metered, quenched flash. This is another way the system is telling you that everything's working properly.
An added benefit of the DS230 strobes is the modeling light. When on a night dive you can use the modeling light as your primary light. Or, if you need additional light for focusing when shooting, you can utilize the modeling light of the strobe. To use this feature, adjust the strobe dial to On with Light.
Add the Red Cable Grip for Easy Transport
One of our staff-favorite accessories is the Red Cable Grip. It's easy to install and makes transporting your housing to and from the dive boat a breeze. As you lift up on the cable grip, it will pull the arms in and make your system compact, convenient, and comfortable to carry.
Just attach the stainless steel carabiners to the segment of the ball arm that's closest to the housing and you're ready to go.

Get the Gear
200DLM/B Underwater Housing # 69540
DL3 DS Link TTL Converter Kit with Hotshoe # 46032
Need more advice?
We're always happy to help with any questions you might have about your system or how to get better images. We're divers who really enjoy helping other divers create they images they're looking for. Contact us today!

Mike Rabideau is an avid scuba diver and underwater photographer with over 35 years experience designing, building, and shooting underwater camera housings. His level of technical familiarity with every camera and housing model from film SLR to DSLR and mirrorless is unparalleled. In his off time he enjoys fishing and driving to local car shows in his classic 1962 Nash Metropolitan.
Additional Reading
OM System OM-1 Underwater Photos and Review
First Reactions to OM System (Olympus) OM-1 Underwater [VIDEO]
OM SYstem OM-1 Underwater in Croatia [VIDEO]
My Must Have Underwater Housing Accessory // Cable Top Handle Grip [VIDEO]
![Using a Trim Weight System for Balance and Stability Underwater [VIDEO]](http://www.ikelite.com/cdn/shop/articles/ikelite-trim-weight-system-underwater.jpg?v=1678996396&width=2000)
![Manual Fiber Optic Transmitter for Ikelite DL and DLM Underwater Housings // Installation and Use [VIDEO]](http://www.ikelite.com/cdn/shop/articles/fiber-optic-blog-cover_620ebd9c-b1c3-4a57-85f5-94fb73c304fc.jpg?v=1682040125&width=2000)