


![Canon R100 // Deluxe Underwater Housing Assembly [VIDEO]](http://www.ikelite.com/cdn/shop/articles/Canon_R100_Housing_Assembly_copy.jpg?v=1692918353&width=1500)
By John Brigham
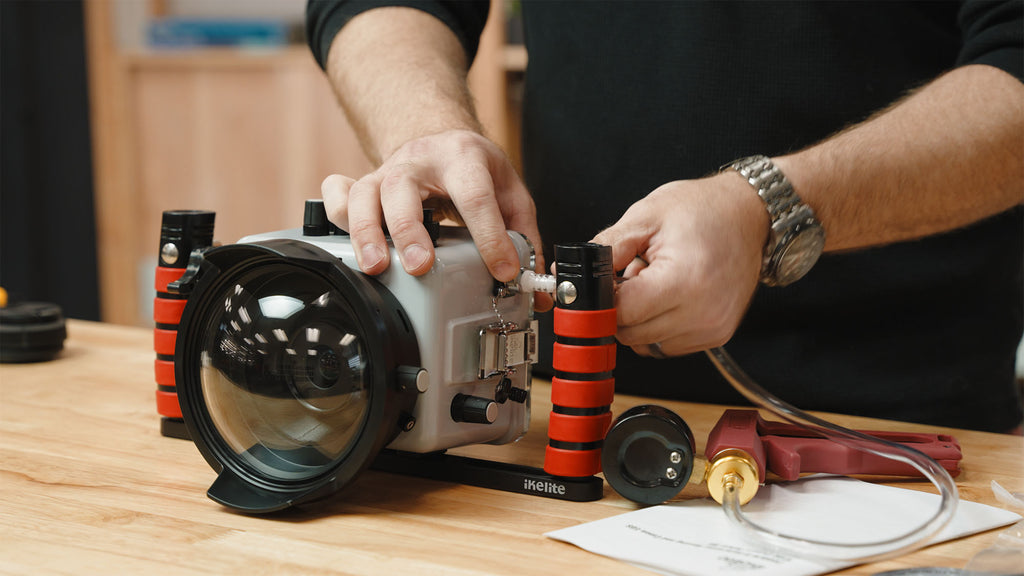
The Canon EOS R100 is one of our favorite cameras for the fantastic combination of image quality, small size, ease of use, and affordability. The Deluxe Kit sets you up with all of the most popular underwater housing accessories pre-assembled and ready to take diving.
In this video we'll walk you through exactly what you need to do to get your camera set up in the housing. The real beauty of the EOS R100 system is the interchangeable port system, which allows you the flexibility to change lenses quickly and easily. After setting up the camera with the 18-45mm kit lens, you'll learn you how to remove the dome port to install the 85mm Macro and optional Flat Port.
What's Included
- Ikelite 200 DLM/D Underwater Housing # 69750
- Canon EOS R100 Camera Body
- Canon RF-S 18-45mm f/4.5-6.3 IS STM Lens
- Dome Port # 5516.15 (installed)
- Zoom Gear for 18-45mm # 5515.14 (installed)
- Anti-Reflection Ring for 18-45mm # 0923.16
- Tray with Dual Handles # 9523.64 (installed)
- Trigger Extension # 4077.95 (installed)
- Vacuum Valve and Pump # 47012 (valve installed)
- Spare Rear O-Ring # 0110
- Spare Front O-Ring # 0132.36
- Instruction Manual
- Ikelite Stickers
Anti-Reflection Ring for Canon RF-S 18-45mm Lens
To start, go through and make sure that your camera has a fully charged battery and that you have your camera set up the way you want it for your shooting preferences.
Next, attach the lens to the camera. Before we install the camera in the housing we'll install the anti-reflection ring on the lens itself. Peel the anti-reflection ring off the backing and apply it to the inside diameter of the lens itself, working it around the edge on each side until the cut opening meets the other cut opening. Simple as that!

The anti-reflection ring is a simple, self-adhesive ring that attaches to the front of your lens to cover the writing and details that can cause reflections inside of a dome port.
Installing the Canon EOS R100 Camera
Now we're going to turn our attention to the housing itself. You can rest the housing face down on to the shade, release the locking lever and open the lid snap on each side, lift over the hooks. Take the back and set it aside.
Take the camera mount out from inside of the housing. This mount features a 1/4-20 screw that will go into the 1/4-20 thread on the bottom of your camera. Align the screw with the hole, and then using a flathead screwdriver, tighten that down and make sure it's snug because you don't want any movement between the mount and the camera.
At this point, the gear sleeve is preinstalled in the housing. So you don't have to install that right now. It'll all be set to go as soon as you get it out the box. But before you drop your camera in, make sure that the lens is in the shooting position by zooming it to 18mm. Make sure that the controls, the on-off front dial, and the lens release are out of the way.
Take the camera and the hotshoe (this is included with the housing and installed) slide it onto the top of the camera fully forward so that the pins make contact. Align the camera mount with the camera base in the bottom of the housing, and then press firmly. You'll feel resistance as the friction pad goes around the lens. Adjust your hotshoe wire, align your on-off control, and take the time to make sure that it turns your camera on and off via this control.
Once you've ensured that all of your controls are aligned properly, you can replace the housing back. Always check your sealing surface any time you take your back on and off and check your o-ring to make sure that there's no debris. This o-ring does not require any lubricant, as it is a compression seal, meaning there is no friction overcome. Place it on, take both lid snaps over the hooks and you can simultaneously press them down and then check that they're locked. Check to make sure that your zoom functions and that you're able to zoom your lens in and out.

What's really nice is that you can see the o-ring compressed all the way around because of that clear back.
Vacuum Test for Leaks
The deluxe kit comes with the vacuum valve pre-installed. Take the vacuum pump and the included tube and simply press the tube onto the barb of the vacuum pump. Press the release button on the vacuum valve on the housing and remove the cap and insert the barbed end of the vacuum pump tube. Now you can create a vacuum inside of the housing.
I recommend creating a vacuum to 10mmHg. Now, initially, when you create the vacuum, check the gauge, make sure that the needle isn't dropping. If the needle is dropping initially, that means that you have a compromised seal. After a few moments without the needle moving you can remove the vacuum pump and reinsert the plug on the vacuum valve.
I generally do this at the beginning of the dive trip, the very first part of the day. Oftentimes what I'll do is let this sit overnight and then the next morning you can reinsert the vacuum pump and you'll notice that that needle will jump right back to ten. If you don't have the luxury of waiting overnight, waiting even 15-20 minutes should suffice.
You want to dive with this system under a vacuum. The vacuum not only ensures that you don't have any broken seals, it will reinforce all of the closing mechanisms.
Changing Lens Port for Canon RF 85mm Macro
Now, what's really cool about this system is that you're not stuck with the 18-45mm kit lens. Let's say, for example, you want to shoot macro and you have the 85mm macro lens. Well, that's as simple as removing the port and replacing it with flat port.
In order to do that we'll need to release the vacuum, take the port off, replace the kit lens with the macro lens, and then replace the port with the flat port.
To start - take your vacuum hand pump, release the cap for the vacuum valve on the housing, reinsert the barb, and gently to press the button on the bottom of the hand pump. You'll hear the release of the vacuum, you will also notice the needle drop. You can take your vacuum pump back out at this point and make sure to always recap the valve. You don't want to dive without this valve cap installed.
Next, swap the lenses and ports. The ports are held on with three thumbscrews. These thumbscrews don't create the seal, they just keep it retained. The seal occurs when you press the two pieces together and the piston o-ring makes the seal. Once you've loosened the three thumbscrews, you can simply slide the port off of the housing.
Set your zoom dome port aside, make sure you use the neoprene cover so it stays protected. Now you can remove the gear sleeve for the 18-45mm kit lens. This is a friction fit around the lens, simply work it off the lens and then keep that with your dome port. Use the lens release lever, remove the kit lens, replace it with the 85mm macro lens. Check to make sure that your lens is set on full, autofocus, with stabilization on. Align the red dots and then bayonet the 85mm lens into place.
In order to accommodate the 85mm you need two pieces: the DLM Extension # 5516.65 and the DLM Extended Flat Port # 5516.50. Using the included Ikelite lubricant, apply just a little bit on your fingertips and check your o-rings while you’re lubricating them. At this point, also check the sealing surfaces to make sure that there's no debris there.

It's important to check for debris as you lubricate your o-ring. You can often feel anything on an o-ring before you'll see it.
You're going to want to take to make sure that the three thumbscrews are not protruding into the inside diameter of the port. Then, align the thumbscrews so that they're in place and press the flat port onto the extension and tighten each of the thumbscrews. Again, these thumbscrews don't create the seal, they just keep it retained.
You're going to repeat that process with this combination onto the housing itself. Again, checking to make sure the thumbscrews are not in the inside diameter, pressing the port onto place, and then retightening the three thumbscrews. Repeat the vacuum process, and now you're able to shoot macro.
Questions?
If you have any questions about this system whatsoever, feel free to email us at ikelite@ikelite.com.
 John Brigham is the Vice President & head of product development at Ikelite. He was born with a flair for design and an entrepreneurial spirit as son of Ikelite founder Ike Brigham. He worked his way up in the business and is a natural fit in the R&D side of things. John dives the equipment as much as possible to test product and put himself in the "fins" of the user. You may also find him on the other end of an email or phone call when you reach out for product advice and support. When he's not underwater he's flying drones, setting off rockets, training his German Shepherd "T2", and spending time with his family.
Additional Reading
The Most AFFORDABLE Pro Quality Underwater System // Canon EOS R100 Housing [VIDEO]
Canon Mirrorless Lineup Explained for Underwater [VIDEO]
Canon RF 85mm f/2 Macro Underwater Review and Tips [VIDEO]
![How to Lubricate Your ULTRAcompact Housing O-Ring [VIDEO]](http://www.ikelite.com/cdn/shop/articles/lubricating-ultracompact-oring-cover.jpg?v=1692137851&width=2000)
![How to Install a Trigger Extension on Your Ikelite Underwater Housing [VIDEO]](http://www.ikelite.com/cdn/shop/articles/Shutter_Trigger_Extension_Installation_Cover.jpg?v=1692821361&width=1800)