


Excerpt from Blue Magazine Sept-Dec 2014
Natural Light Underwater Photography is a great example of doing more with less. The photographer can happily leave all the gadgetry behind and carry only the camera inside a waterproof housing. Despite this simplicity, many accomplished topside photographers taking their cameras down for the first time, will enter the water bubbling with excitement at the play of light over the scene: the dark moodiness of being submerged, the ability to move in three dimensions, and the bizarre creatures residing there. They are only to be frustrated by the lack of contrast, general flatness or even blur, when they review their work afterwards.
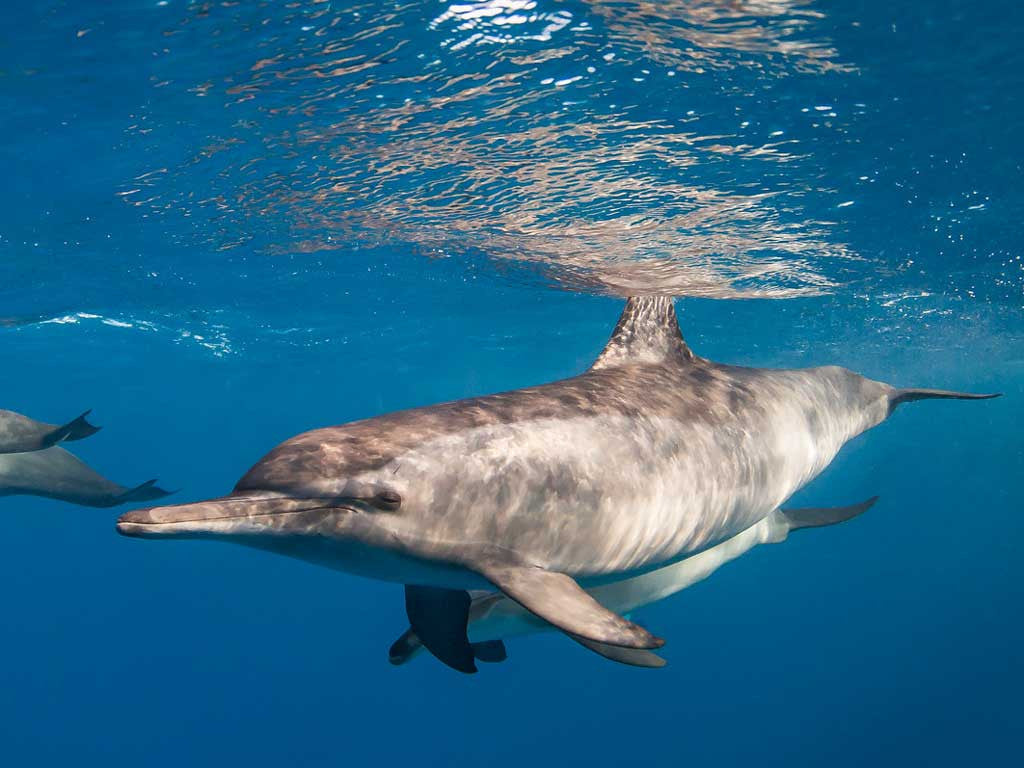
Rule #1
Get close to your subject—and use a very wide lens to facilitate this. For serious underwater work using a point and shoot camera, external wet lenses that widen the angle of view are almost standard issue. Even the widest native lens on a point-and-shoot camera will be too narrow to capture the head of a whale shark underwater at close proximity.
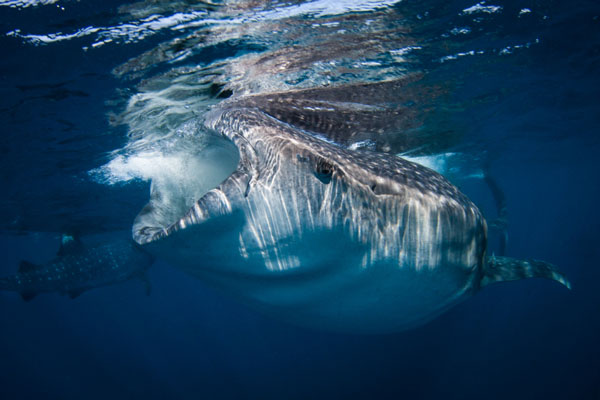
1/160 sec | f/20 | ISO 640 | Image © 2014 Steve Miller
Rule #2
Make sure the sun is behind you. This ensures that the light of the sun is hitting your subject on the side that's visible to your camera. If the sun is in front of you, the subject will appear as a silhouette (all-dark or black figure).
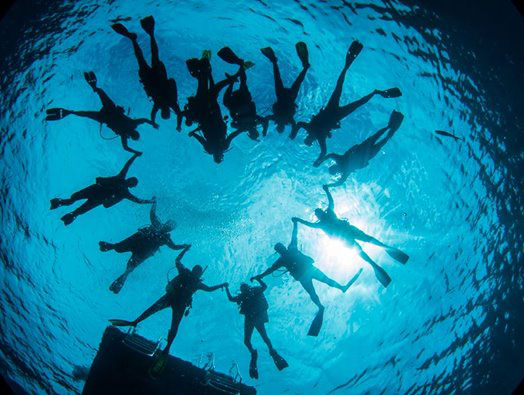
Divers silhouetted by the sun1/125 sec | f/16 | ISO 100 | Image © 2014 Steve Miller
Choosing your settings
I prefer to use one of the camera's Program modes (Program, Aperture Priority, or Shutter Priority) for available light photography. In these modes the camera makes exposure adjustments quickly, resulting in properly exposed images while you concentrate on composing the frame. I prefer Shutter Priority by a slim margin. Shutter Priority will pick the proper Aperture based on the scene, after taking into account the ISO and Shutter Speed you have selected.
If you're shooting big animals, a good starting point is to set an ISO fitting the light levels (for example around 320 on a sunny day) then select a shutter speed that is fast enough to stop the motion of the animal like 125th to 160th of a second.
Caves, Caverns, and Wrecks
In the case of low-light photography while inside underground springs, cenotes, or shipwrecks, different techniques need to be applied. Try concentrating on the light rays coming through the openings in the ceiling, or at the entrances. Then the challenge is to capture something besides just the light rays. Start out by opening your lens all the way (f/3.4 to f/4), slowing your shutter to allow the light in (1/60th of a second), and bumping up your ISO (to around 1600). Then speed up your shutter as necessary to get the bright light rays to look just right.
You can expect to spend time editing these images, bringing up the darks and shadows that will appear lost at first. Shooting RAW is key to retaining these details.
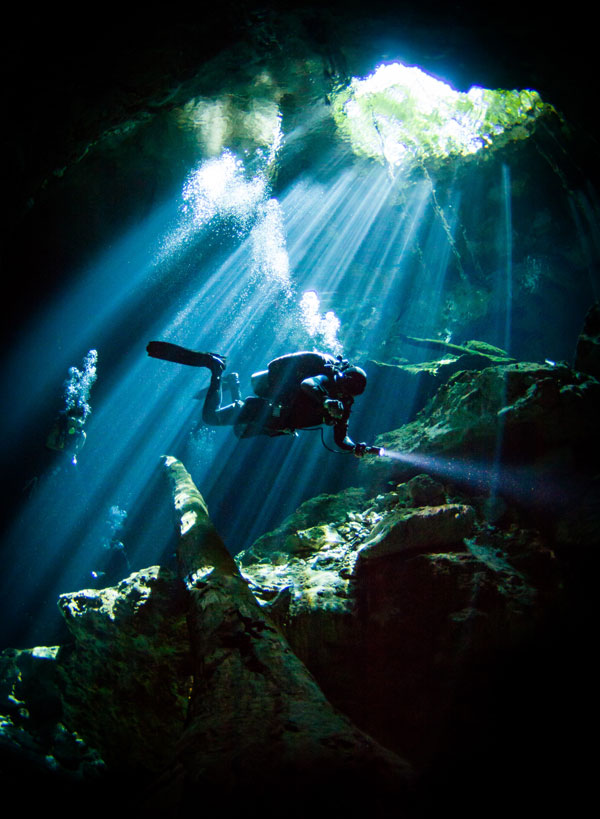
1/60 sec | f/3.5 | ISO 1600 | Image © 2014 Steve Miller
Summary
There are many reasons for choosing to shoot Natural Light. Even the most powerful strobes will only reach 5 feet (1.5 m) or so into the water column. If you're farther away than that from your subject, your strobes will only light the water column and scatter in the water. Turning your strobes off is sometimes necessary to get "the shot." Natural Light images have an organic appeal that is dramatically different from flash photography but equally beautiful!
Read the Full Article...
This except is re-printed from the September-December 2014 issue of Blue Magazine. Visit bluetravelmag.com to read more about Natural Light Photography, as well as other interesting articles about scuba diving, ecotourism, and indigenous culture of the Caribbean and beyond. Go off the beaten path and into some of the most marvelous and mesmerizing sights in this special area of our Blue Planet!
